


No products in the cart.
Learning how to use a map and compass really boils down to a few fundamental skills. It’s all about orienting your map to match the world around you, adjusting for the quirky difference between magnetic north and true north, and then taking accurate bearings to figure out your path. Once you get the hang of it, these simple tools become your most trusted guides in the backcountry, ensuring you can navigate with confidence, even when your gadgets give up.
Why Bother With a Map and Compass Anymore?
In a world of GPS watches and smartphone apps, pulling out a physical map and compass can feel a bit old-fashioned. I get it. But here’s the thing: those classic tools provide a rock-solid reliability that technology just can't match. A dead battery, a cracked screen, or a lost satellite signal can turn your high-tech navigator into a useless brick in an instant. Your map and compass? They just work.
But it’s more than just a backup plan. Learning to navigate this way is an incredibly empowering skill that fundamentally changes how you experience the outdoors. You stop being a passive follower of a blue dot on a screen and become an active, engaged observer. You start really seeing the landscape—identifying peaks, understanding the terrain from the contour lines, and building a genuine awareness of your surroundings.
Before you can navigate, you have to know what you’re working with. A topographic map and a good baseplate compass are your primary instruments. Getting familiar with their individual parts is the first real step toward mastering them.
Essential Map and Compass Components
This table breaks down the key features of your map and compass. Don't just glance at it—these are the components you'll be using constantly out on the trail.
| Component | Function | Why It's Important |
|---|---|---|
| Contour Lines | Brown squiggly lines on a map showing changes in elevation. | They tell you if the terrain ahead is flat or a grueling uphill climb. Close lines mean steep; far apart means gentle. |
| Map Legend | The key that deciphers all the symbols on your map. | It explains what that dotted line or little blue square actually represents (e.g., trail, stream, building). |
| Map Scale | The ratio that translates map distance to real-world distance (e.g., 1:24,000). | This is critical for estimating how long it will take to get from point A to point B. |
| Magnetic Needle | The floating red needle inside the compass housing. | It always points toward the Earth's magnetic north pole, which is your primary reference point. |
| Rotating Bezel | The circular dial marked with 360 degrees. | You use this to "dial in" a specific bearing or direction you want to travel. |
| Direction-of-Travel Arrow | The fixed arrow on the compass baseplate. | You point this arrow at your destination to take a bearing or follow one you've already set. |
Knowing these parts inside and out makes the whole process feel much less intimidating. It's the difference between fumbling with your gear and using it with purpose.
These tools have an incredible history, too. The compass has been around for over 2,000 years, first appearing in China’s Han dynasty. By the 12th century, it was guiding sailors across vast, unknown oceans. It's a testament to how powerful a simple, reliable tool can be.
My Two Cents: Your map and compass are non-negotiable, but they're only part of a complete kit. Being prepared means having all your essentials dialed in. Before your next adventure, it’s worth checking out my thoughts on a few of my hiking must-haves.
Once you've got these fundamentals down, you're ready to start putting it all together. For a deeper dive into specific techniques and exercises, feel free to explore our comprehensive tutorials.
Orienting Your Map to Match the Terrain
Before you can figure out where you're going, you need to know where you are right now. The first real skill you'll use out on the trail is orienting your map. All this means is turning the map so that "north" on the paper actually points toward true north in the real world.
Once your map is oriented, it suddenly clicks. The paper becomes a miniature, top-down view of the world around you. That mountain peak off to your left will be on the left side of your map. The trail that veers right up ahead will also veer right on the paper. It’s a simple, powerful step that turns a confusing sheet of symbols into a reliable guide.
Orienting by Sight
If you have good visibility, the fastest way to get your bearings doesn't even involve a compass. This is a great trick for a quick check-in with your surroundings.
- Find two knowns: First, pinpoint your approximate location on the map. Next, find a major, unmistakable landmark in the distance that you can also find on the map—think a specific mountain peak, a lake, or even a radio tower.
- Line them up: Lay your map flat. Now, just turn the map itself until the line connecting your location to the landmark on the paper points directly at the actual landmark you're looking at.
For instance, say you're hiking the Highline Trail and can clearly see Long's Peak in the distance. You'd simply turn your map until the dot for Long's Peak on the map is in the same direction as the real thing. Just like that, your map is roughly oriented.
Orienting with a Compass for Precision
Orienting by sight is handy, but for real accuracy—especially in fog, dense woods, or unfamiliar terrain—the compass is your best friend. This is the method you’ll depend on time and again. The core technique is something old-timers call “putting red in the shed.”
Key Takeaway: "Putting red in the shed" is a catchy way to remember the goal: get the red, magnetic end of your compass needle perfectly aligned inside the outlined orienting arrow (the "shed") on your compass dial. When you do this, your compass is pointing to magnetic north.
First, lay your map on a flat surface. Place your compass flat on the map, making sure the long, straight edge of the baseplate is aligned with one of the vertical north-south lines on your map.
Now, keeping the compass perfectly still on the map, rotate both the map and compass together as a single unit. Turn them slowly until the red magnetic needle is perfectly boxed inside the orienting arrow. You've just put red in the shed.
That's it. Your map is now precisely oriented to magnetic north, giving you a true representation of the landscape. This is the bedrock of all other navigation skills, so practice it until it feels like second nature. Get this right, and everything else, like taking a bearing, becomes much more intuitive.
Understanding Magnetic Declination: Your Compass's Dialect
One of the biggest hurdles for anyone learning map and compass navigation is something called magnetic declination. Honestly, getting your head around this concept is what really separates the beginners from those who can truly find their way.
Think of it this way: your map and your compass don't quite point in the same direction. Declination is just the difference between them, and you need to account for it to make them work together.
To navigate accurately, you have to juggle three different "norths":
- True North: This is the geographic North Pole—the spot on the globe where all the lines of longitude converge. It’s a fixed point. It doesn't move.
- Grid North: Look at the vertical lines on your topographic map. That direction is Grid North. Mapmakers create a flat grid for our convenience, so it’s close to True North, but not a perfect match.
- Magnetic North: This is where the red end of your compass needle faithfully points. It’s a magnetic field deep within the Earth's core that’s constantly on the move, currently wandering around Northern Canada.
The angle between where your compass points (Magnetic North) and what your map is based on (True North) is the declination. Ignoring it is a recipe for getting seriously lost. A declination of just 10 degrees might not sound like much, but on a six-mile hike, it could land you over a mile off your intended course.
How to Find and Use Declination
So where do you find this magic number? Most good topographic maps have the declination information printed right in the margin. You'll usually see a small diagram illustrating the difference between Grid North (GN) and Magnetic North (MN), along with a specific value, like "12° East."
Expert Tip: Always check the map's publication date. Since Magnetic North is always drifting, an old map can have an outdated declination value. For the absolute latest data, you can check your location on a government site like NOAA's magnetic field calculator.
Once you have that number, you have to apply it. This is where people often get tripped up. If you have a compass with adjustable declination, life is easy. You’ll use a small key or tool to turn a screw on the compass housing, which offsets the orienting arrow by the correct number of degrees. Set it once, and your compass handles the translation for you.
If your compass doesn't have this feature, you'll need to do a little mental math every time you take a bearing. A great mnemonic to remember is "Maps Tell Almost Everything"—when you go from Magnetic (your compass) to True (your map), you Add Easterly declination. Conversely, you'd subtract a westerly one.
This isn't some new-fangled problem. Navigators have been dealing with this for hundreds of years. By the 15th century, sailors were already making adjustments for magnetic variation to keep their bearings true, a practice that required constant updates as they sailed across the globe and the magnetic pole itself wandered. You can find more on the fascinating history of this navigational challenge at Britannica.com.
Getting this adjustment right is the secret to ensuring the lines you draw on your map actually match the world around you.
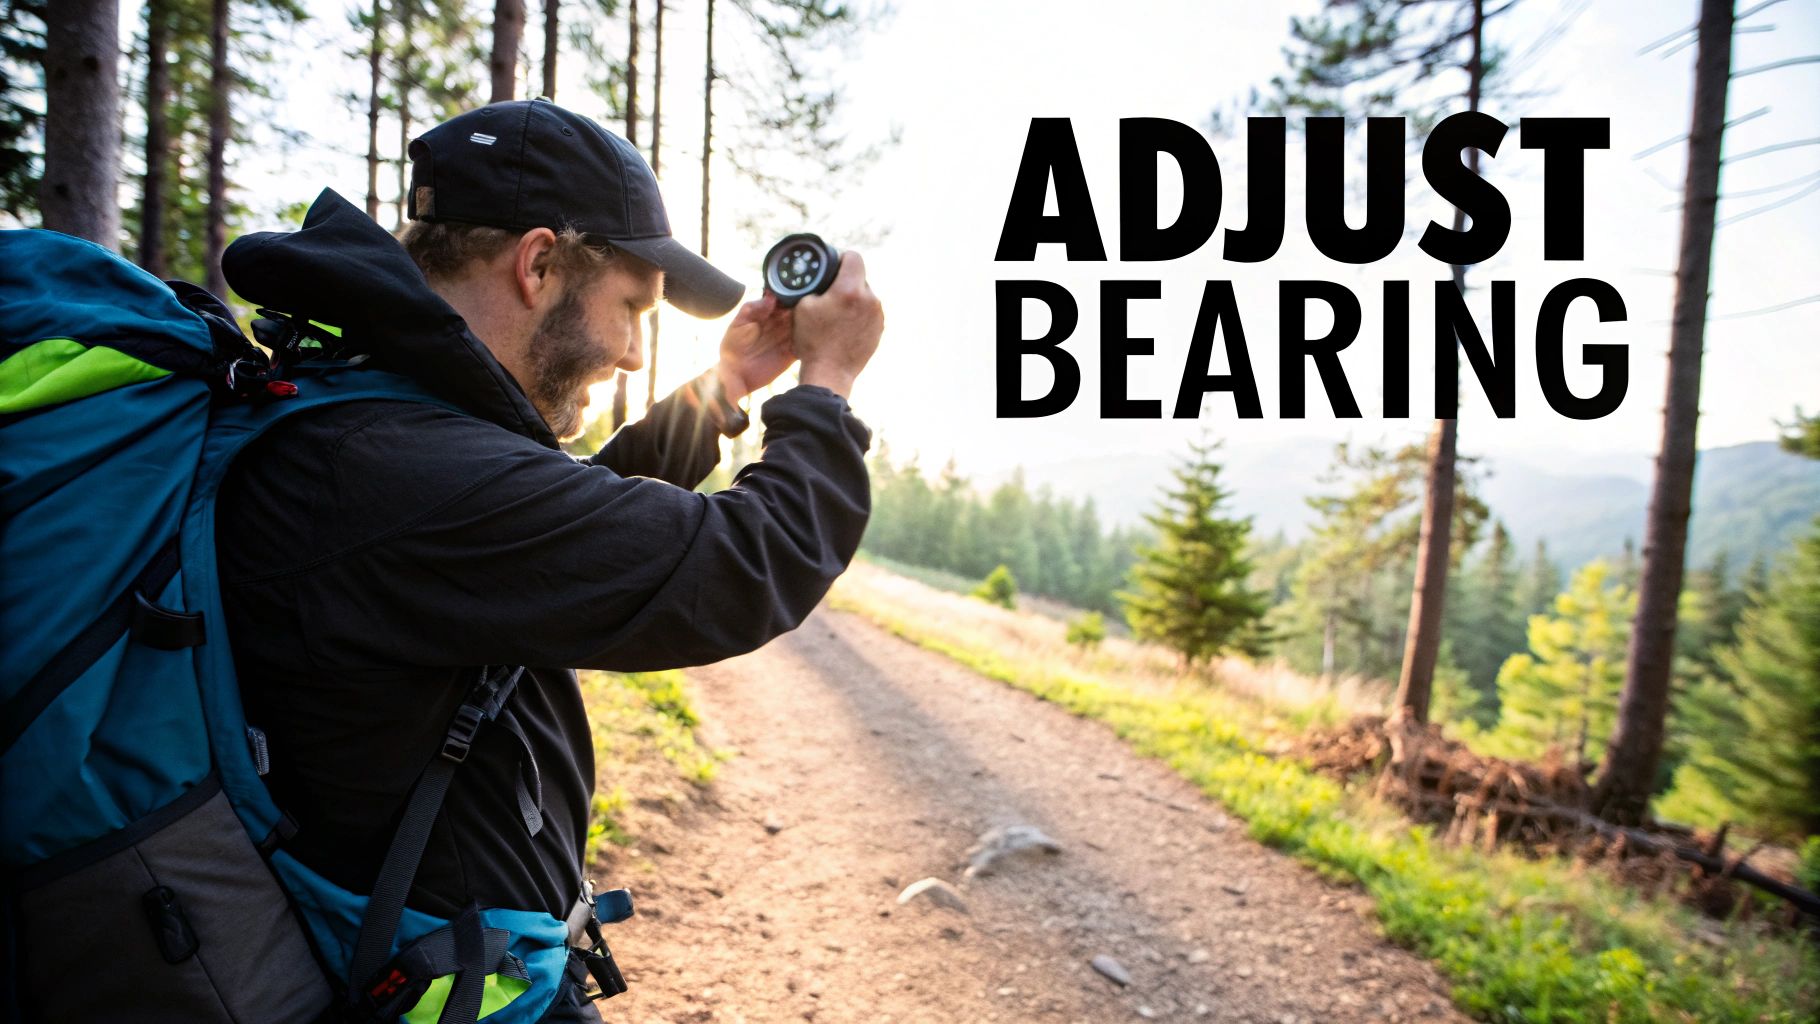
How to Take and Follow a Bearing Accurately
You’ve got your map oriented and your declination set. Now for the fun part: taking a bearing. This is the skill that turns a simple line on a piece of paper into a precise direction you can actually walk. Get this right, and you can confidently navigate from point A to B, whether you're aiming for a distant peak or just trying to find that hidden campsite.
You'll generally find yourself needing to do this in one of two situations. The first is when you're plotting a course directly from your map—planning the next leg of your hike, for example. The second is when you spot a landmark in the distance and want to take a bearing on it to figure out what it is or how to get there.
Plotting a Course From Your Map
Let's imagine a common scenario. You’re standing at a trail junction, and you want to hike cross-country to a small, remote lake. You can see both your current spot and the lake on your oriented map.
Here’s what you do:
-
Connect the Dots: First, lay your compass flat on the map. Line up the long, straight edge of the baseplate so it creates a line connecting where you are (the trail junction) to where you want to go (the lake). Critically, make sure the direction-of-travel arrow on the baseplate points towards the lake, not back at you.
-
Dial It In: Now, carefully hold the baseplate in place so it doesn't move. Rotate the bezel (the dial with the degrees) until the orienting lines etched inside it are perfectly parallel with the north-south grid lines on your map. The orienting arrow inside the bezel should also point to north on the map.
-
Read Your Bearing: You can now lift the compass off the map. Look at the number on the bezel that’s lined up with the fixed index line at the top of the compass. That’s your bearing. For our example, let's say it's 270 degrees.
This visual breaks down the core process of using your map and compass together to find your way.
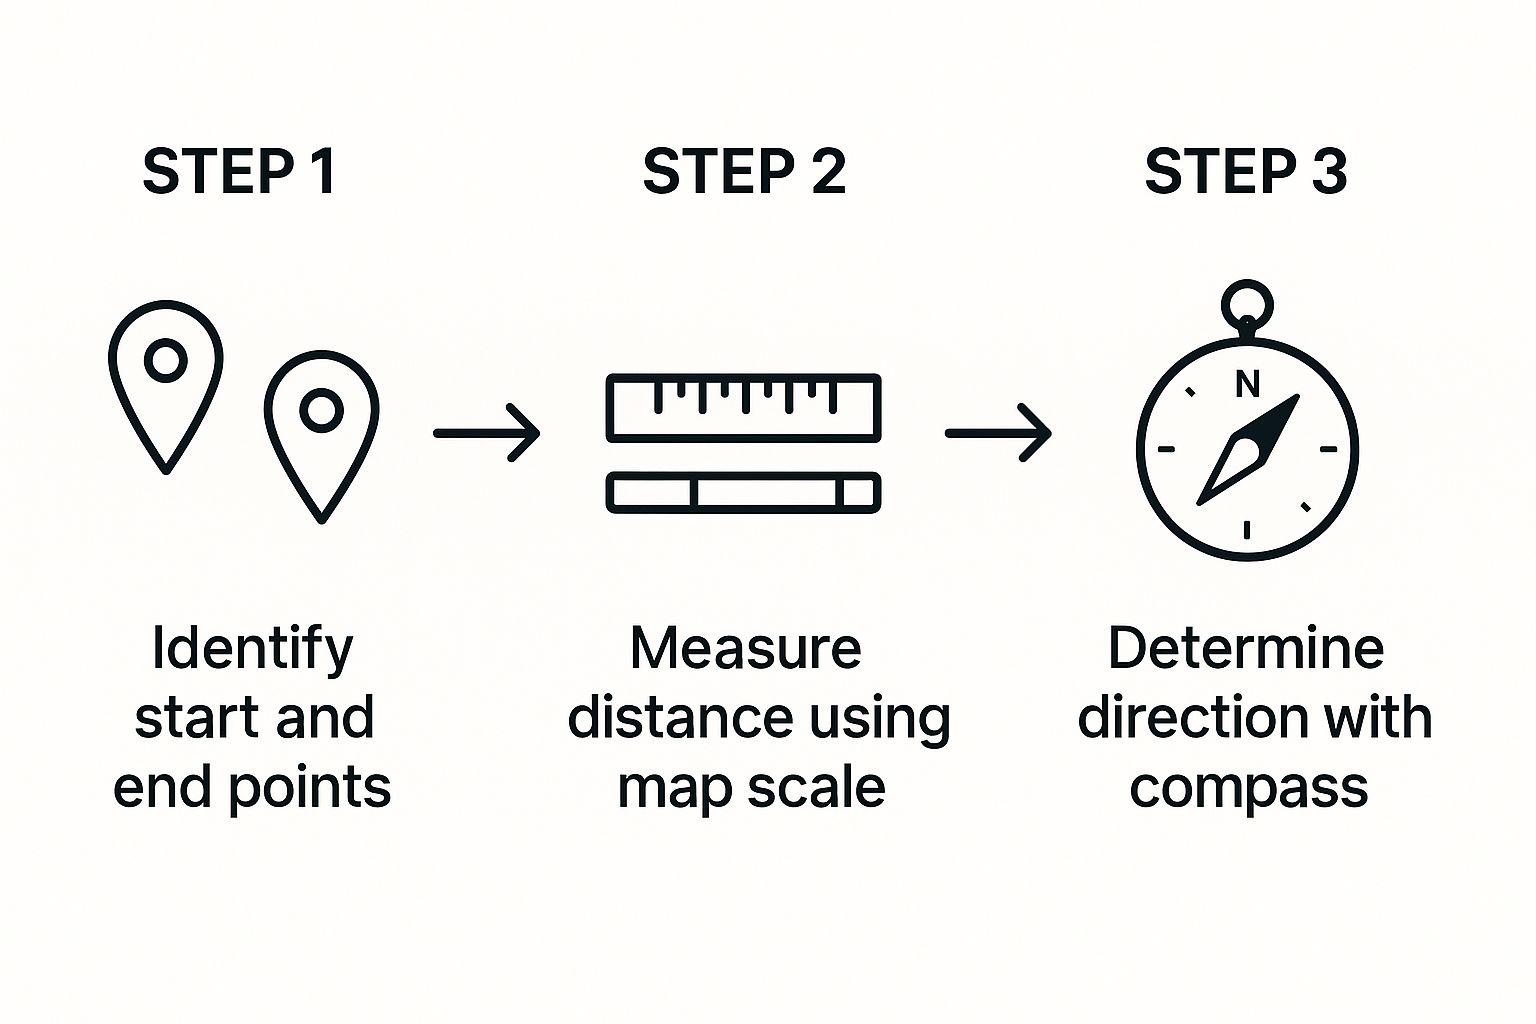
As the infographic shows, it’s all about identifying your points, measuring the path between them, and then setting your direction. These are the fundamental actions you'll repeat over and over again on any journey.
Following Your Bearing in the Field
So, you have your bearing: 270 degrees. It's time to start walking.
Hold the compass perfectly flat and level, right in front of your chest. The next step is to turn your entire body—not just your hands or your head—until the red end of the magnetic needle is perfectly boxed inside the outline of the orienting arrow. This is what experienced navigators call "putting red in the shed."
Once the needle is boxed, the direction-of-travel arrow on your baseplate is pointing precisely along that 270-degree bearing, straight toward the lake.
Pro Tip: Whatever you do, don't just stare down at your compass while you walk. It’s a recipe for walking in circles. Instead, look up along the direction-of-travel arrow and pick out a distinct landmark in the distance—a uniquely shaped tree, a big boulder, a dip in the ridgeline. Walk directly to it. Once you get there, repeat the process to find a new landmark. This "leapfrogging" technique is the secret to staying on a perfectly straight line.
This elegant integration of map and compass is a skill that has fueled exploration for centuries. Early mariners used the very same principles on their sea charts. By mastering this, you’re connecting with a timeless and reliable method for navigating the world with confidence. You can even read more about these foundational navigation techniques on ynetnews.com to see how deep these roots go.
Pinpointing Your Location with Triangulation
It’s a feeling every adventurer knows well—that slight knot in your stomach when the trail fizzles out or the terrain just doesn't look like you remember. This is where one of the most reliable skills in land navigation comes into play: triangulation.
Also known as resection, this technique lets you pinpoint your exact location using nothing more than your map, your compass, and a couple of visible landmarks. The idea is brilliant in its simplicity. If you can take a bearing to a known landmark, you know you're standing somewhere along that line. Find a second landmark, take another bearing, and your position is where those two lines cross. A third line from a third landmark? That’s your gold-standard confirmation.
Choosing Your Landmarks
The accuracy of your triangulation hinges almost entirely on the landmarks you choose. You’re looking for at least two, but ideally three, distinct features you can see from your spot and reliably identify on your topo map.
Good choices are sharp and unmistakable.
- Distinct mountain peaks or defined summits are perfect.
- Man-made structures like radio towers or fire lookouts are excellent.
- Even a sharp bend in a river or the defined point of a lake can work well.
What you want to avoid are broad, ambiguous features. A long, sprawling ridgeline or a wide, uniform valley makes it tough to get a precise bearing. You can’t take a bearing to "the ridge," but you can take one to that specific, pointy peak on the ridge. Sharp points lead to accurate fixes.
From Field Bearing to Map Line
Okay, you've picked your first landmark—let's say it's a radio tower you can see on a distant hill. Time to shoot a bearing.
Hold your compass level, aim the direction-of-travel arrow right at that tower, and turn the compass bezel until "Red is in the Shed." Now, read the number at your index line. For this example, let's say it’s 60 degrees.
That’s your bearing to the landmark. To draw that line on your map, you need the opposite direction, which is called a back bearing.
The Quick Math for Back Bearings:
If your bearing is less than 180 degrees, add 180. (Example: 60° + 180° = 240°)
If your bearing is greater than 180 degrees, subtract 180. (Example: 270° - 180° = 90°)
So, your back bearing is 240 degrees. Place your compass on your oriented map, line up one corner of the baseplate with the radio tower symbol, and rotate the entire compass until the bezel reading of 240 degrees aligns with the north index line. Draw a line along the compass edge, starting from the tower and heading back toward where you think you are. You’re somewhere on that line.
Now, do the exact same thing for your second and third landmarks. The spot where your lines intersect is your position. If they form a tiny triangle, you're somewhere inside it. A solid fix like this gives you the confidence to figure out your next move—whether that's finding the trail again or just taking a well-earned break for a cheesy smoked sausage pasta skillet before pushing on.
Common Questions About Map and Compass Use
Even after you've learned the basics, putting a map and compass to work in the real world can bring up some tricky situations. Practice is everything, and it's completely normal to hit a few snags as you build your confidence. Let's tackle some of the most common questions I hear from fellow navigators.
Getting sharp with these tools isn't just about safety; it's also about being physically ready for what the trail throws at you. If you're looking to boost your stamina for big backcountry days, you might find our guide on how to get fit for summer in 6 weeks a great starting point for your next adventure.
How Do I Navigate in Fog or at Night?
When visibility drops to near zero, you have to do one thing: trust your compass completely. This is where your skills are really put to the test. Before you're socked in, take a very careful bearing to your next landmark.
From that point on, you’ll be relying on a couple of key techniques:
- Pacing: This is crucial. You need to know your personal pace count—how many steps it takes you to cover a known distance, like 100 meters. By counting your steps, you can estimate how far you've traveled along your bearing.
- Following the Bearing: Keep that compass held flat and steady, making sure the magnetic needle stays perfectly inside the orienting arrow's "shed." Move deliberately and check it every few seconds. A headlamp with a red light is a lifesaver here, letting you read your map and compass without destroying your night vision.
What Happens if Metal Affects My Compass?
This is a very real problem called magnetic deviation, and it can throw your navigation way off. Everyday metal items—your phone, car keys, the metal tips of trekking poles, or even the wire frame in a rain jacket's hood—can pull the magnetic needle away from true north.
The fix is simple but requires constant awareness. Always hold your compass level in your open palm, extended away from your body and clear of any metal gear. If you take a bearing and something just feels off, move a few feet to a different spot and try again. When you get the same reading multiple times in a clear area, you know you can trust it.
Key Insight: The best map to pair with a compass is always a topographic map. It shows you the shape of the land—the hills, valleys, ridges, and draws—using contour lines. A simple road map or atlas just doesn't provide the three-dimensional detail you need for smart, safe travel in the backcountry.
Do All Compasses Work the Same?
Most baseplate compasses you'll see for hiking share the same fundamental design, but the features can vary quite a bit. While the core principles are the same, some tools are built for specific environments; for example, this guide explains how to pick a marine compass, which has different needs than one for land navigation.
For hikers, the most significant feature is adjustable declination. A compass with this feature lets you "set it and forget it" at the start of your trip. It automatically corrects the difference between magnetic north and true north for you.
Without it, you have to do the math—adding or subtracting the declination value—for every single bearing you take. A model with adjustable declination is much easier to use and helps eliminate one of the most common sources of navigational error.
At FindTopTrends, we're dedicated to helping you find the best gear for all your outdoor adventures. From reliable navigation tools to the latest in tech and apparel, we curate top-quality products to ensure you're always prepared for the trail ahead. Discover trending equipment and essentials at https://findtoptrends.com.
Leave a comment


