


No products in the cart.
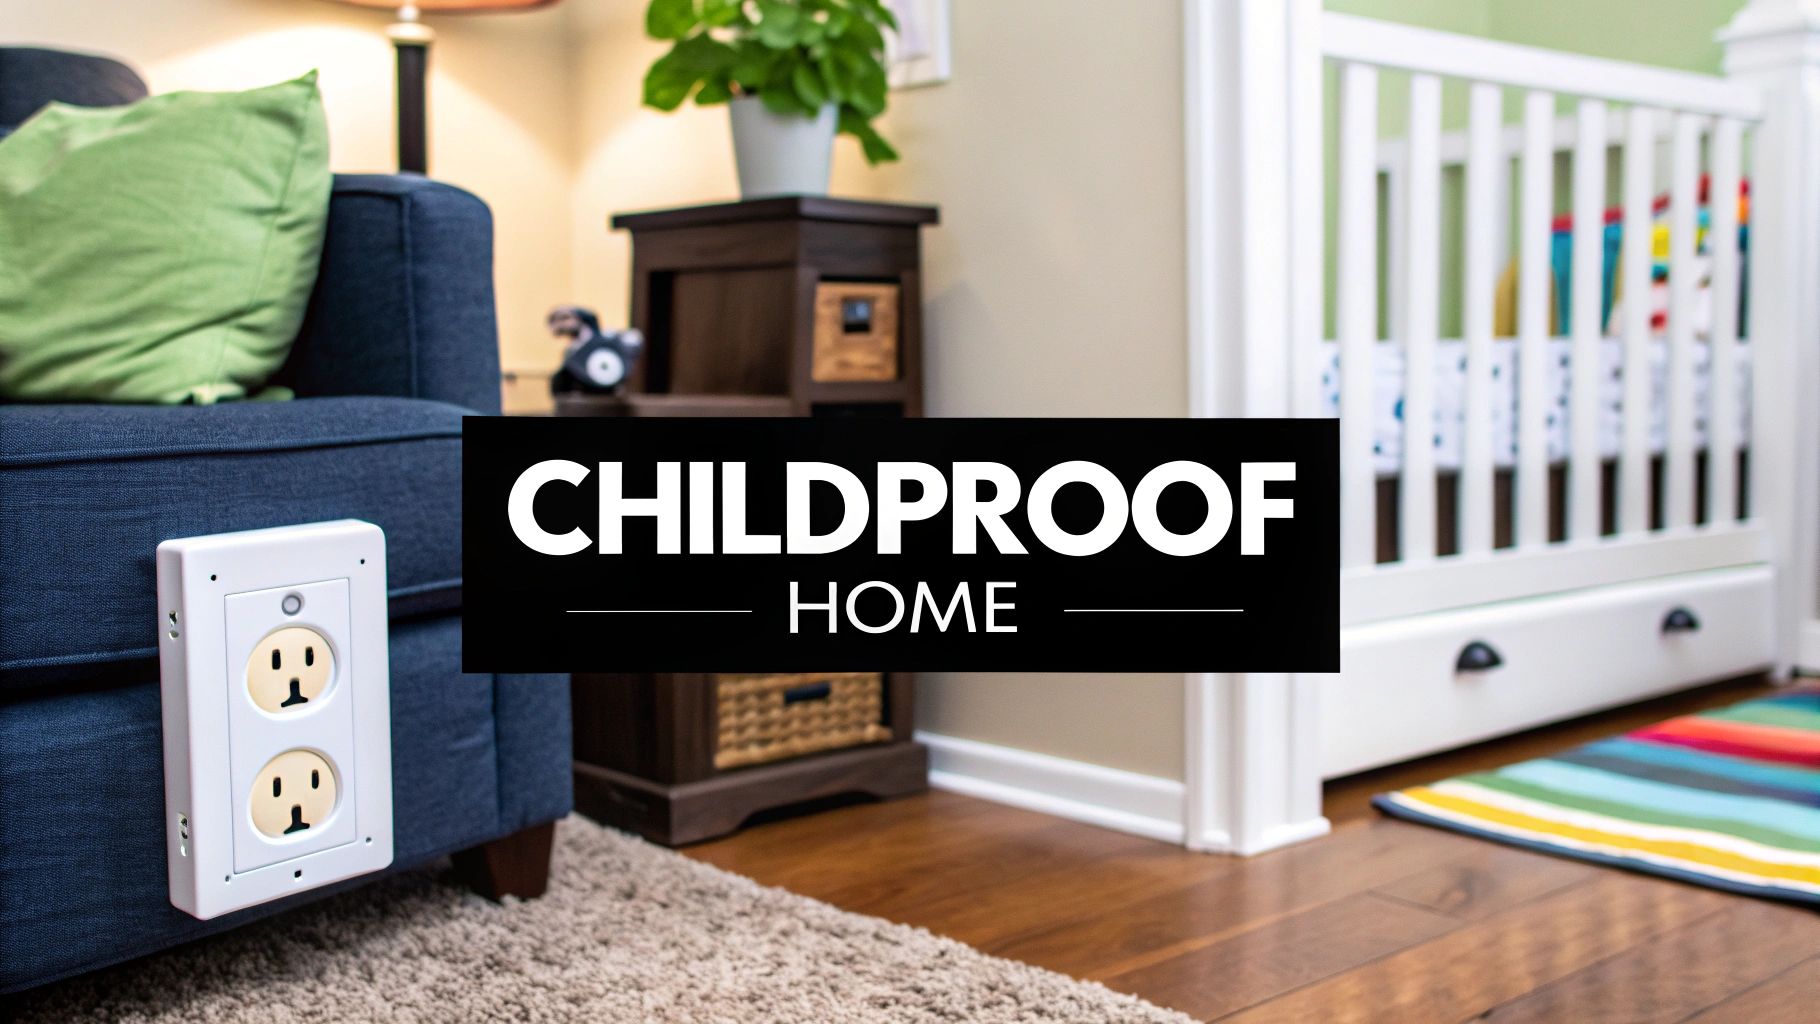
The best way to learn how to childproof your home is to get down on your hands and knees. Seriously. Seeing the world from your child's perspective is the only way to spot the dangers you'd otherwise miss. It’s all about getting ahead of the game—securing furniture, covering outlets, and locking up chemicals before they ever become a problem.
Thinking Like a Toddler to Childproof Your Home
Childproofing isn't just a weekend project; it's a completely new way of looking at your home. That beautiful coffee table? Now it's a collection of sharp corners at eye level. Those elegant blind cords? A potential strangulation hazard. This shift in mindset is crucial because a determined toddler can find trouble in places you never would have imagined.
The goal isn't to wrap your child in a sterile bubble. Instead, you're building layers of safety that let them explore and learn without facing serious risks. This guide will help you develop that safety-first intuition, starting with the big picture and then diving into the specifics of each room.
The Hard Truth About Home Accidents
Even with the best intentions, preventable injuries in the home are a startlingly common reality. A 2023 report highlighted a critical gap: while 81% of parents believe childproofing is 'very' or 'extremely' important, a staggering 55% of those whose children were injured at home admitted that better childproofing could have stopped it from happening.
Adopting a proactive mindset is the single most effective childproofing tool. By thinking one step ahead of your child's developmental milestones—crawling, pulling up, climbing—you can neutralize hazards before they ever become a threat.
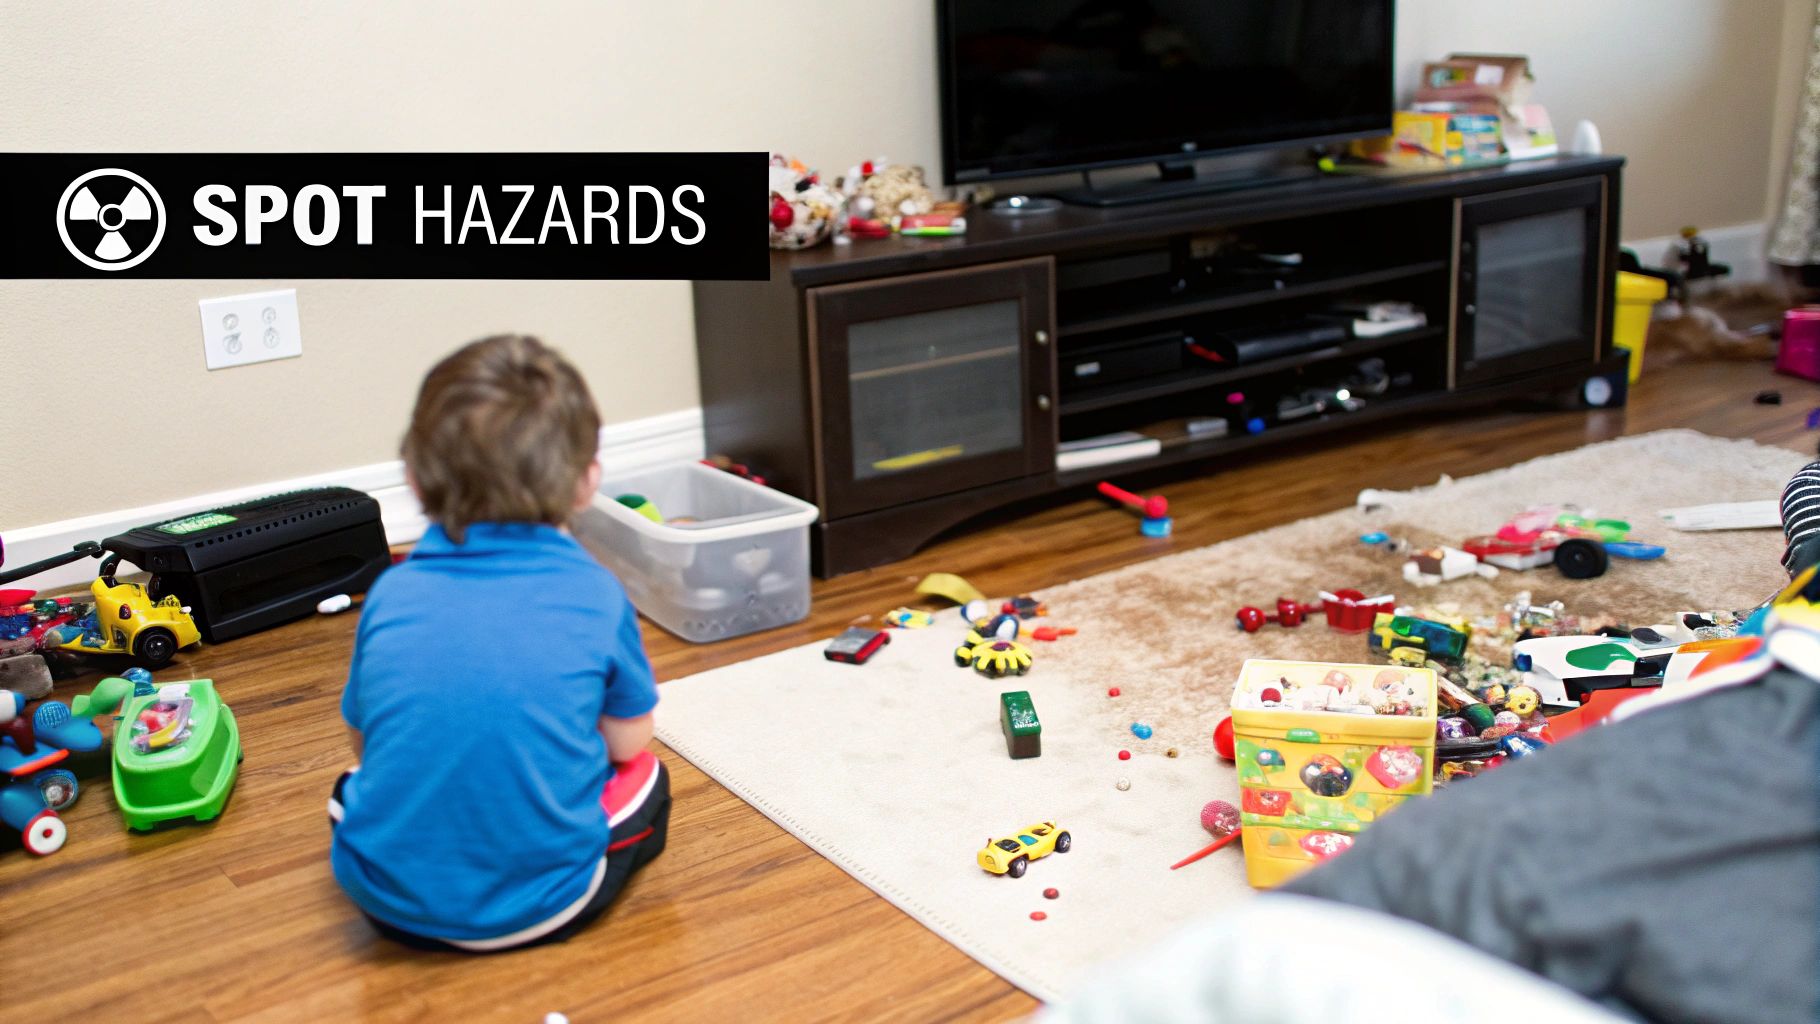
Where to Begin Your Safety Scan
Staring at an entire house and wondering where to start can feel overwhelming. Let’s make it simple. Focus on the "big three" hazards first, as these pose the most immediate and severe threats to a newly mobile baby.
- Electrical Outlets: They're right at crawling height, practically inviting curious little fingers. Basic outlet covers are an absolute must-have.
- Sharp Corners: Coffee tables, TV stands, and fireplaces are magnets for bumps and falls. Soft corner guards are an easy fix.
- Unsecured Furniture: This is the big one. Heavy dressers, bookcases, and TVs are serious tip-over risks. Anchoring them securely to the wall is non-negotiable.
To give you a clearer picture, here’s a quick summary of what to prioritize.
Childproofing Priorities At a Glance
This table breaks down the top five childproofing priorities, the specific dangers they address, and the gear you'll need to make your home a safer place for your little explorer.
| Priority Area | Common Risk | Essential Gear |
|---|---|---|
| Furniture & TVs | Tip-over accidents causing serious injury or death. | Furniture anchors, anti-tip straps. |
| Outlets & Cords | Electric shock, burns, and strangulation hazards. | Outlet covers, power strip protectors, cord shorteners. |
| Cabinets & Drawers | Access to cleaning supplies, medications, or sharp objects. | Magnetic locks, adhesive latches, tension rods. |
| Stairs & Doorways | Falls from stairs or access to unsafe rooms (e.g., kitchen). | Hardware-mounted safety gates. |
| Sharp Edges | Head injuries from falls against hard corners. | Corner guards, edge bumpers. |
Tackling these five areas first will address the most common and dangerous household risks, giving you a solid foundation for a safer home.
For a deeper dive and an alternative perspective, you might find it helpful to explore a practical room-by-room guide to childproof your home. Seeing how others approach it can give you fresh ideas as you prepare for our detailed breakdown.
Securing the Heart of Your Home: The Kitchen and Living Room
The living room and kitchen are where all the action happens. They're the hubs for family life, full of connection and comfort, but they're also surprisingly full of hazards for a curious toddler. As your little one becomes more mobile, these high-traffic areas demand a really thorough approach to safety.
Many homes now have open-concept layouts, which means a toddler can zip from the living room rug to the kitchen danger zone in the blink of an eye. The goal is to create a secure space where your child can explore freely, giving you some much-needed peace of mind. Let’s walk through the essentials for these central parts of your home.
Locking Down the Living Room
To a toddler, the living room is a giant, fascinating playground. Your first job is to tackle the biggest threats: furniture and electronics. It’s terrifyingly easy for a climbing toddler to pull over a heavy piece of furniture, which can lead to devastating injuries.
Here are the absolute non-negotiables for this space:
- Anchor Everything Heavy: Use anti-tip straps or furniture anchors to secure bookcases, dressers, TV stands—anything that could be climbed—to wall studs. This is probably the single most important thing you can do.
- Secure the Television: Modern flat-screen TVs look sleek, but they're incredibly top-heavy. They can be pulled over in an instant. Mount the TV to the wall or use TV straps to anchor it firmly to its stand.
- Manage Cords and Outlets: Bundle up any loose electrical cords with organizers and hide them behind furniture. Cover every single unused electrical outlet. The best options are sliding plate covers or box covers that are tough for little fingers to remove.
Once you’ve handled the big stuff, get down on your hands and knees. Seeing the room from their perspective helps you spot other potential hazards. Soften sharp coffee table corners with bumpers and move heavy, breakable decor to higher shelves.
Fortifying the Kitchen Danger Zone
The kitchen is, without a doubt, the most hazardous room in the house for a small child. It’s a treasure trove of sharp objects, hot surfaces, and cleaning chemicals, all conveniently located at toddler-height. Your mission here is to create barriers and make dangerous items completely inaccessible.
Just picture a toddler yanking on an open dishwasher door while you’re unloading knives, or reaching up to grab a pot handle on the stove. These are real-world scenarios that drive home just how critical kitchen safety is.
A veteran parent tip: Dedicate one lower cabinet as a "safe cabinet." Fill it with kid-friendly items like plastic bowls and wooden spoons. This simple trick can redirect their curiosity away from off-limits areas and give them a safe spot to "help" while you cook.
This strategy helps them feel included and can make preparing meals a whole lot less stressful for everyone.
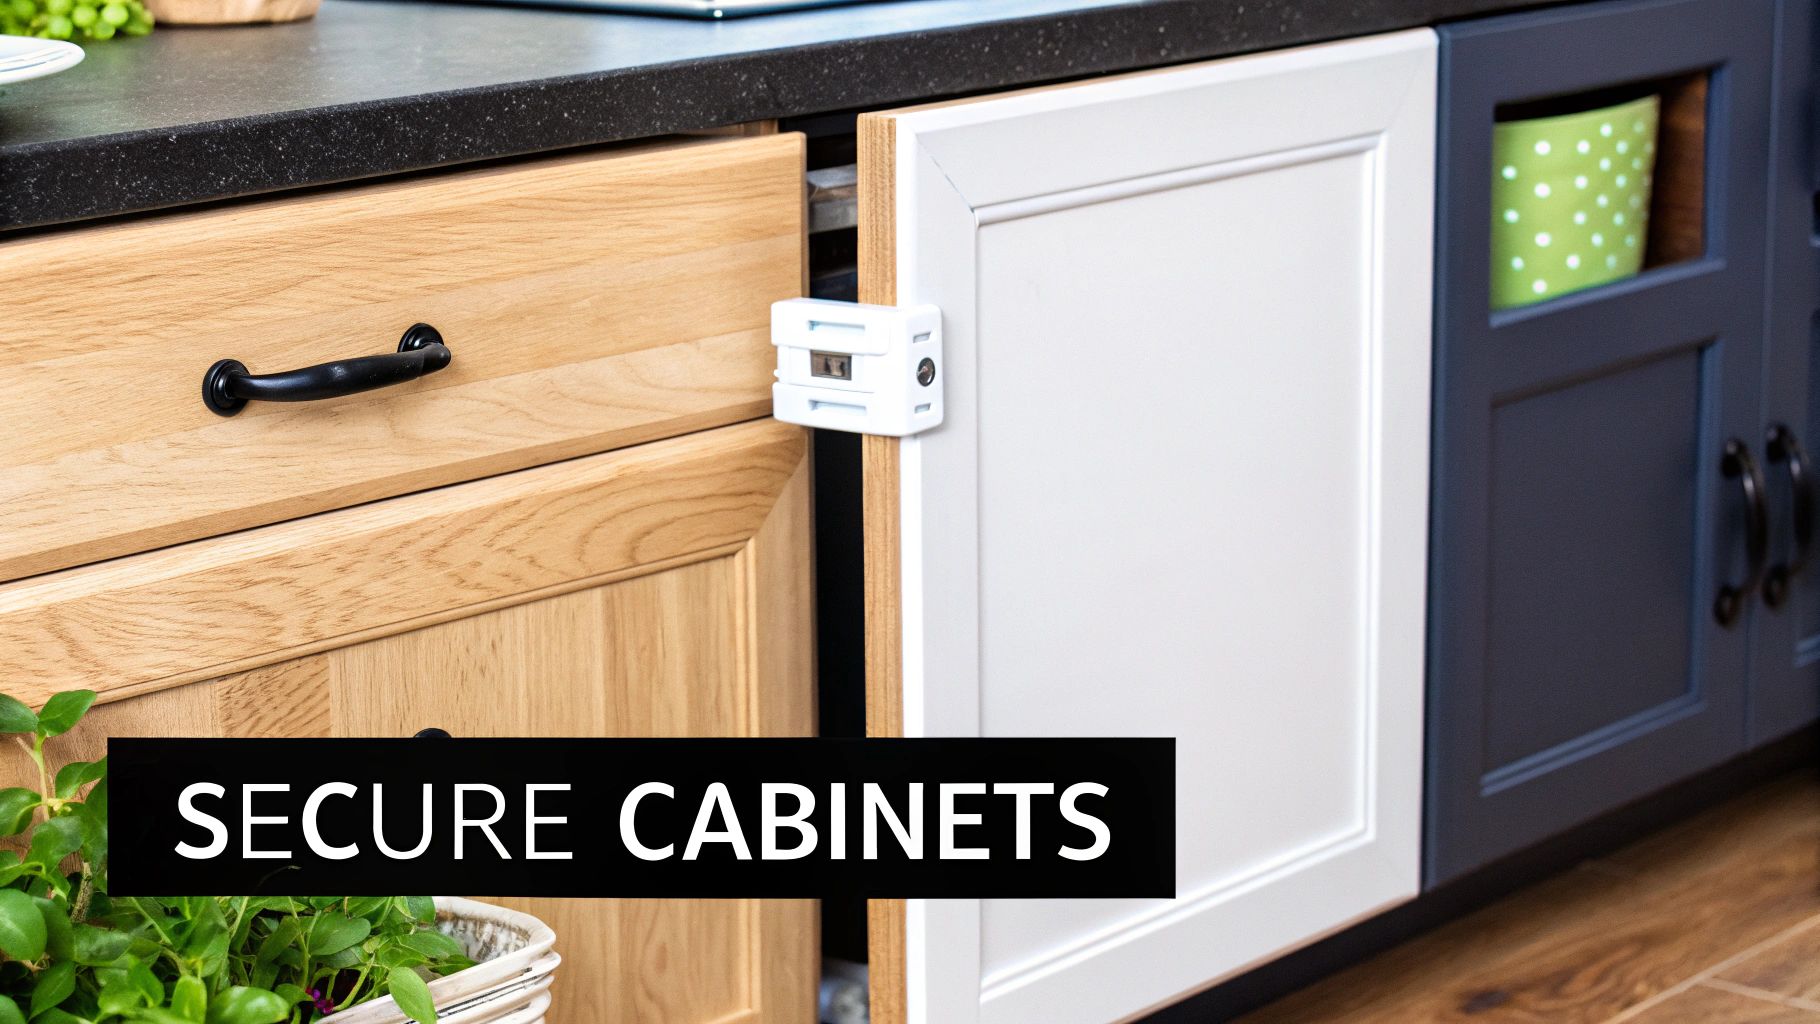
Essential Kitchen Safety Measures
Start by securing every cabinet and drawer. You’ll find different types of locks work for different setups, but the key is to be consistent. It only takes one unlocked cabinet for an accident to happen.
Here’s a quick breakdown of what to lock down:
- Under-Sink Cabinets: This is the classic spot for cleaning supplies. Use a strong magnetic or adhesive latch here to keep toxic chemicals far out of reach.
- Drawers with Sharp Objects: Any drawer with knives, peelers, scissors, or other sharp utensils needs to be secured.
- The "Junk Drawer": We all have one, and it’s a notorious choking hazard. Think coins, batteries, pen caps, and other small, dangerous items. Lock it up.
- Major Appliances: You can get locks for the refrigerator, oven, and dishwasher. These prevent kids from climbing inside or pulling heavy items down on themselves.
Don't forget the stovetop. Use stove knob covers to stop your child from turning on the burners. And always, always turn pot and pan handles toward the back of the stove where they can't be grabbed by curious little hands.
With families spending more time at home these days, these precautions are more critical than ever. During the COVID-19 pandemic, a 2021 survey revealed that 42.3% of parents took new childproofing steps and 39.0% installed at least one new safety device. People are becoming more aware of just how important proactive safety is. You can dig into the data in this study on parental childproofing behaviors.
By methodically tackling each of these potential dangers, you can transform the busiest rooms in your house into much safer environments for your whole family.
Creating a Safe Sleep Space in Nurseries and Bedrooms
https://www.youtube.com/embed/ZytjRcjoq1Y
Your child's bedroom should be their sanctuary—a place for rest, comfort, and peaceful dreams. As parents, it’s our job to make sure that space is free from hidden hazards. Childproofing a nursery or bedroom is about more than just cute decorations; it’s a methodical process of eliminating risks that can lead to preventable accidents.
From the crib itself to the furniture and windows, every single element needs a careful look. This isn't about creating a sterile, boring room, but a genuinely safe haven where your little one can sleep and play without you constantly worrying.
The Foundation of Safe Sleep: Crib and Mattress Safety
The crib is the absolute centerpiece of the nursery, and it has to meet modern safety standards. The single most important rule to live by is Bare is Best. Seriously. A truly safe crib contains nothing more than a firm mattress with a tightly fitted sheet.
That means no pillows, no bumpers, no blankets, and no stuffed animals. I know they look cozy and cute, but they all pose a serious suffocation risk. A firm, flat surface is essential for reducing the risk of Sudden Infant Death Syndrome (SIDS). And always, always place your baby on their back to sleep.
When you're setting up the nursery, the number of choices can be overwhelming. For a curated list of must-haves that keeps safety top of mind, check out this guide on the top 10 baby registry essentials for new parents in 2025.
A quick but critical check: make sure the crib slats are no more than 2 3/8 inches apart. A good rule of thumb is the soda can test. If a can fits through, the space is too wide and becomes an entrapment hazard. Also, be sure to place the crib well away from windows, blinds, and anything with cords.
Securing the Surrounding Environment
Once the crib is safe, it’s time to look at the rest of the room. As your baby grows into a curious, mobile toddler, they will start to pull up on, climb, and investigate everything. This is where anchoring furniture becomes completely non-negotiable.
A dresser or changing table might seem perfectly stable, but a toddler using the drawers as a makeshift ladder can easily cause it to tip over, which can lead to severe or even fatal injuries. Every single piece of heavy or tall furniture in the room must be securely anchored to a wall stud with anti-tip straps.
Do a full sweep of the room and pay attention to these key areas:
- Toy Chests: Look for a toy box without a heavy, free-falling lid. If you have one with a lid, make sure it has a safety hinge that keeps it from slamming shut on tiny fingers.
- Doors: Use doorknob safety covers. They're a simple way to keep your child from wandering out of the room or getting into closets where small, unsafe items might be stored.
- Electrical Outlets: Cover every unused outlet. Sliding safety covers or outlet boxes are a much better choice than the simple plastic plugs, which can become choking hazards themselves if a clever toddler pries them out.
Eliminating Strangulation and Other Hidden Hazards
Some of the most dangerous hazards in a bedroom are the ones we tend to overlook. Cords from window blinds and baby monitors are at the top of that list.
A child can get tangled in a dangling blind cord in seconds. The absolute safest solution is to replace all corded window treatments with cordless blinds or shades. If that's not in the budget, you can install cord cleats to wrap the cords tightly, keeping them high up and completely out of reach.
Baby monitors give us incredible peace of mind, but their cords can be a real danger. Never, ever place a monitor on the crib rail or anywhere your baby could reach the cord from inside the crib. Mount the camera high on the wall and secure the cord so there is absolutely no slack hanging down.
Finally, think about the overall health of the room. Beyond physical safety, the air quality in your child's space is a huge factor in their well-being. Keeping the room clean and well-ventilated is a great start. You can learn even more about creating healthy indoor environments for children to help protect their developing respiratory systems. By taking these thoughtful steps, you really can create a truly secure space for them to sleep and play.
Tackling Dangers in Bathrooms and Laundry Rooms

When you start thinking about childproofing, the bathroom and laundry room should be at the very top of your list. These are utility spaces, plain and simple, which means they're packed with a dangerous mix of water, electricity, potent chemicals, and unforgiving hard surfaces.
From the drowning risk in a toilet bowl to the potent poisons stored under the sink, the threats are real and serious. But the good news is you can neutralize these dangers with a targeted approach. Let's walk through the most important steps for making these rooms safe.
Creating a Safer Bathroom Environment
Water and slippery surfaces are the bathroom's most obvious hazards. It's a shocking fact, but a small child can drown in as little as an inch of water, and it happens silently and terrifyingly fast. This is why active supervision is your number one defense.
Never, ever leave a young child alone near water, not even for a split second to grab a towel. It's just not worth the risk. Beyond that constant vigilance, your job is to add physical barriers and safeguards to the room itself.
Here's where to focus your efforts:
- Install a Toilet Lock: A toilet looks like a fun, personal splash pad to a curious toddler. A simple, sturdy toilet lock keeps the lid firmly shut, removing a major drowning hazard.
- Use Faucet Covers: That hard metal bath spout is right at head level for a little one. A soft, cushioned faucet cover is an easy fix that can prevent some nasty bumps and cuts during a slippery bathtime.
- Add Non-Slip Mats: Slick, wet tile is an accident waiting to happen. Make sure you have non-slip mats both inside the tub and on the floor next to it to give little feet a secure grip.
Pro Tip: Your water heater is likely set to 140°F, hot enough to cause a third-degree burn in seconds. Check the thermostat on your water heater and lower it to a much safer 120°F (49°C). It's one of the most effective, and often overlooked, childproofing steps you can take.
Securing Medications and Cleaning Supplies
Think about what's in your medicine cabinet: pills, cosmetics, ointments, and first-aid supplies. To a child, it’s a treasure trove of interesting things to taste and touch. Remember, "child-resistant" does not mean "childproof." A determined toddler can and will get those caps open.
All medications, both prescription and over-the-counter, belong in a high cabinet secured with a childproof latch. If you don’t have a high cabinet, a dedicated lockbox is a great alternative. Whatever you do, don't leave pills sitting out on the counter.
The same rules apply to cleaning chemicals. A household cleaning supplies checklist can be a real eye-opener, helping you take stock of all the potential poisons lurking in your home. Products like toilet bowl cleaner and drain opener should always be kept in their original containers and stored up high, behind a latched door.
Addressing Laundry Room Hazards
The laundry room has its own unique set of dangers. Modern front-loading washers and dryers, with their inviting little windows, can seem like a perfect hiding spot for a small child. The risk of them getting trapped inside is terrifyingly real.
Thankfully, the solution is simple. You can buy adhesive-mounted appliance locks specifically designed to keep washer and dryer doors from being pulled open.
The most urgent chemical threat in this room is usually the laundry pods. They are brightly colored, squishy, and look just like candy. The problem is they contain highly concentrated, toxic detergent.
- Store Them Securely: Always keep laundry pods in their original container with the lid sealed tight.
- Keep Them Out of Reach: This container needs to live on a high shelf or in a locked upper cabinet where a child absolutely cannot get to it.
- Clean Spills Immediately: If a pod ever breaks or leaks, clean it up thoroughly and right away.
By working through these specific risks one by one, you can transform your bathroom and laundry room from danger zones into safe, functional parts of your home.
Choosing the Right Childproofing Gear
Walking into the baby safety aisle can feel like a pop quiz you didn't study for. The sheer volume of locks, latches, gates, and guards is enough to make your head spin. But the secret isn't to buy one of everything. It's about making smart investments in gear that provides real, reliable protection for your home's unique layout.
Making the right choices helps you build effective layers of security. It's the difference between a cabinet lock a toddler can crack in seconds and one that holds strong, or a gate that stands firm versus one that gives way under pressure.
Navigating the World of Safety Gates
Safety gates are your first line of defense for keeping a newly mobile baby or a curious toddler out of trouble spots like the kitchen or away from stairs. But not all gates are created equal, and using the wrong type in the wrong place creates a dangerous false sense of security.
The two main players are pressure-mounted and hardware-mounted gates, and knowing when to use each is non-negotiable.
Safety Gate Comparison: Pressure-Mounted vs. Hardware-Mounted
Deciding between a pressure-mounted and a hardware-mounted gate comes down to one thing: location. One is perfect for convenience between rooms, while the other is an absolute necessity for stair safety. This table breaks down the key differences to help you choose wisely.
| Feature | Pressure-Mounted Gates | Hardware-Mounted Gates |
|---|---|---|
| Installation | Held by tension, no tools or drilling needed. | Screwed directly into wall studs or doorframe. |
| Best For | Doorways and hallways on the same level. | Top of stairs (essential) and bottom of stairs. |
| Portability | Excellent. Easy to move and reinstall. | Permanent. Requires tools to remove. |
| Safety Concern | Can be pushed over by a determined child. | Extremely secure and stable when installed correctly. |
| Trip Hazard | Often has a bottom bar you have to step over. | No bottom bar, providing a clear walkway. |
| Renter-Friendly | Yes, as it leaves no marks or holes. | No, as it requires drilling into walls. |
Ultimately, a hardware-mounted gate is the only safe option for the top of a staircase. The stability is unmatched, and there’s no trip bar at the bottom. Save the pressure-mounted gates for less critical areas, like blocking off the kitchen while you cook.
A quick pro-tip: Always look for a gate with a certification seal from the Juvenile Products Manufacturers Association (JPMA). This seal means the product has been independently tested to meet high safety standards, giving you an extra layer of confidence.
Selecting the Best Locks and Latches
Once you've blocked off entire rooms, it's time to secure the dozens of drawers and cabinets within them. This is a huge market for a reason. In 2023, it hit $229.18 billion, with guards and locks making up a whopping 43.44% of that total. They're a low-cost, high-impact solution for keeping little hands away from cleaning supplies, sharp objects, and other hazards. You can discover more insights about baby proofing market trends to see just how essential these products are.
Here are the most common types you’ll find:
- Magnetic Locks: These are my personal favorite for a clean look. They mount inside the cabinet or drawer, so they’re completely invisible. You just tap a magnetic "key" on the outside to unlock them. The only downside? You have to remember where you put the key.
- Adhesive Strap Locks: Super versatile and great for renters. These stick to the outside of appliances, drawers, and even toilet lids. They work well, but a determined toddler might eventually figure out how to peel them off.
- Spring-Action Latches: An old-school, inexpensive option. You mount them inside, and to open the drawer, you have to push down on the plastic latch. They work, but they can be a pain to operate one-handed while you're holding your baby.
Understanding Your Outlet Cover Options
Electrical outlets are magnets for tiny, curious fingers. Luckily, securing them is one of the easiest childproofing tasks. Those little plastic plug-in caps are the most common solution, but honestly, they're not the best—they can become a choking hazard if a child yanks one out.
This infographic lays out just how important it is to cover your outlets.
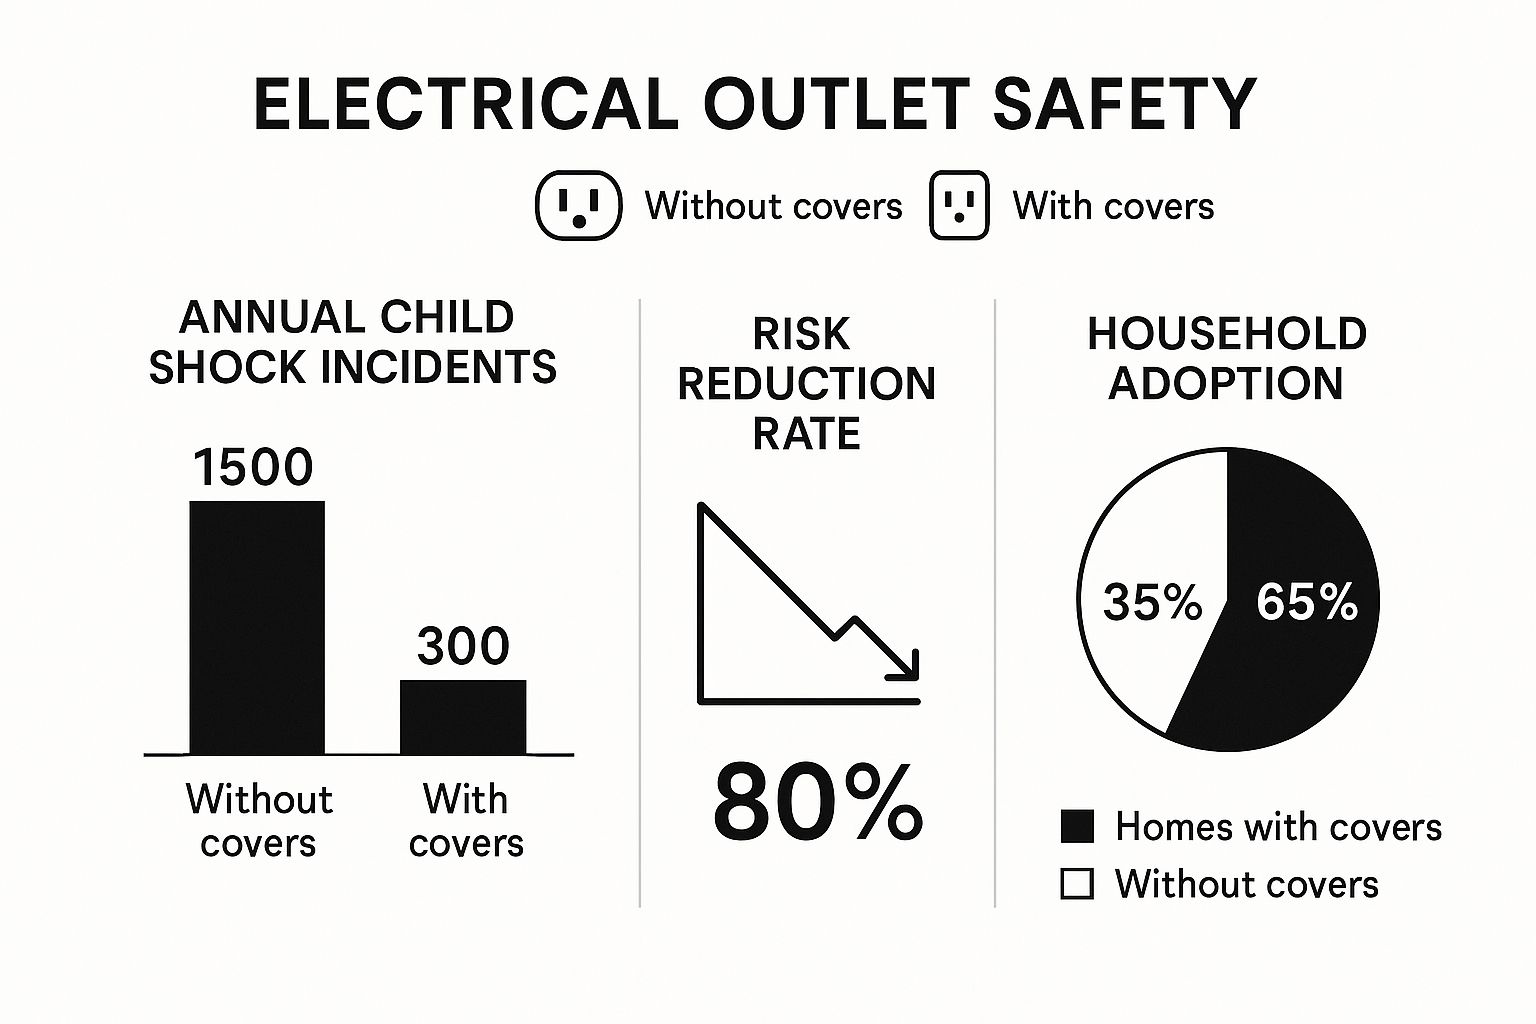
The data speaks for itself. Using covers drastically cuts down the risk of electrical shock incidents.
For safer, more permanent solutions that you don't have to think about, I always recommend these alternatives:
- Sliding Outlet Covers: You simply replace your existing outlet plates with these. A spring-loaded cover automatically slides shut over the socket holes when you unplug something. Set it and forget it.
- Box Outlet Covers: These are perfect for outlets that are always in use, like the one behind your TV or a lamp. The plastic box encloses the entire outlet, preventing your little one from yanking out the plugs. They're a bit bulky, but they get the job done.
Common Questions About Childproofing Your Home
Even after reading a guide, it’s completely normal to have questions pop up as you get started. Childproofing is a huge responsibility, and every home is a little different. Let’s tackle some of the most common questions I hear from parents, so you can move forward with a lot more confidence.
When Is the Right Time to Start Childproofing?
The absolute best time to start is well before your baby is on the move. I always suggest tackling it during the second or early third trimester of pregnancy. This gives you a clear runway to handle the bigger projects—like anchoring furniture or installing hardware-mounted gates—without a tiny, curious assistant getting underfoot.
Try to have the basics in place by the time your baby is about five to six months old. You’d be surprised how quickly they hit milestones like rolling and crawling, and it almost always happens sooner than you think.
Childproofing isn't a one-and-done chore. It's an ongoing process. As your child grows, learns to climb, and figures out how things work, you'll need to constantly re-evaluate your home and update your safety measures.
What works for a crawler might not be enough for a clever toddler who has figured out how to defeat a simple cabinet lock. Think of it as your home's security system, evolving right alongside your child.
What Are the Most Overlooked Childproofing Hazards?
It’s easy to spot the big, obvious dangers. The real troublemakers are often the ones hiding in plain sight, the things we as adults just don't notice.
Here are a few of the dangers parents most frequently miss:
- Dangling Window Blind Cords: These are a serious strangulation risk and need to be dealt with immediately. Your best bet is to switch to cordless blinds, but at a minimum, use cord cleats to wrap the cords up high and out of reach.
- Unsecured TVs and Furniture: I know we’ve mentioned this, but it’s critical. Tip-over accidents happen in a split second, and they can be fatal. Every single heavy piece of furniture or large TV must be anchored to the wall.
- Everyday Items Within Reach: This is a massive category. It includes things like a purse on the floor with medication inside, the dog's food bowl (a choking and bacteria risk), or small decorative objects on a low coffee table.
- Button Batteries and Small Magnets: These are incredibly dangerous if swallowed and are often hidden in remote controls, musical greeting cards, and kids' toys.
My single best piece of advice? Get down on your hands and knees and crawl through every room. This simple change in perspective is the only way to truly see the world—and all its hidden dangers—from your child's point of view.
Can I Effectively Childproof My Home on a Budget?
Absolutely. In fact, some of the most effective safety strategies are completely free. When you're on a tight budget, prevention and relocation are your most powerful tools.
For example, moving all cleaning supplies, medications, and toxic chemicals to a high, locked cabinet costs nothing. Rearranging furniture to block off access to certain areas or to hide a nest of electrical cords just takes a bit of time and effort.
When you do need to buy products, focus your money on the highest-risk areas first. These are the non-negotiables:
- Outlet Covers: Simple plug-in covers are incredibly cheap and offer a vital first line of defense.
- Cabinet Locks: Start by securing the cabinets under the kitchen and bathroom sinks, where hazardous materials are usually kept. You can buy these in cost-effective multi-packs.
- A Hardware-Mounted Gate: If you have stairs, this is the one place you cannot cut corners. A pressure-mounted gate is not safe for the top of a staircase; you need the security of a hardware-mounted one.
By prioritizing your spending on these critical items, you can create a genuinely safe space for your child without breaking the bank.
Are Professional Childproofing Services Worth the Cost?
For some families, hiring a professional childproofer is a fantastic investment that buys invaluable peace of mind. A certified pro brings a trained, objective eye into your home and will spot hazards you might never have considered.
Hiring a pro is especially helpful in a few common scenarios:
- You're short on time: Juggling work and a new baby is a lot. A professional can get the entire home secured quickly and correctly.
- You feel overwhelmed: The to-do list can feel endless and paralyzing. A pro can create a clear plan and just get it done for you.
- Your home has unique challenges: Tricky staircases with wrought iron banisters or open-concept layouts can make installing gates a nightmare. Professionals have the right tools and experience for these custom jobs.
While it is an extra cost, the expertise and guarantee of a correct installation can prevent a serious accident, making it a truly worthwhile service for many families.
Finally, remember that even in the most well-proofed home, bumps and scrapes can still happen. Being prepared is key. Make sure you have a well-stocked first-aid kit ready to go. You can see what we recommend by checking out our list of first aid kit supplies for your home.
Leave a comment


