


No products in the cart.
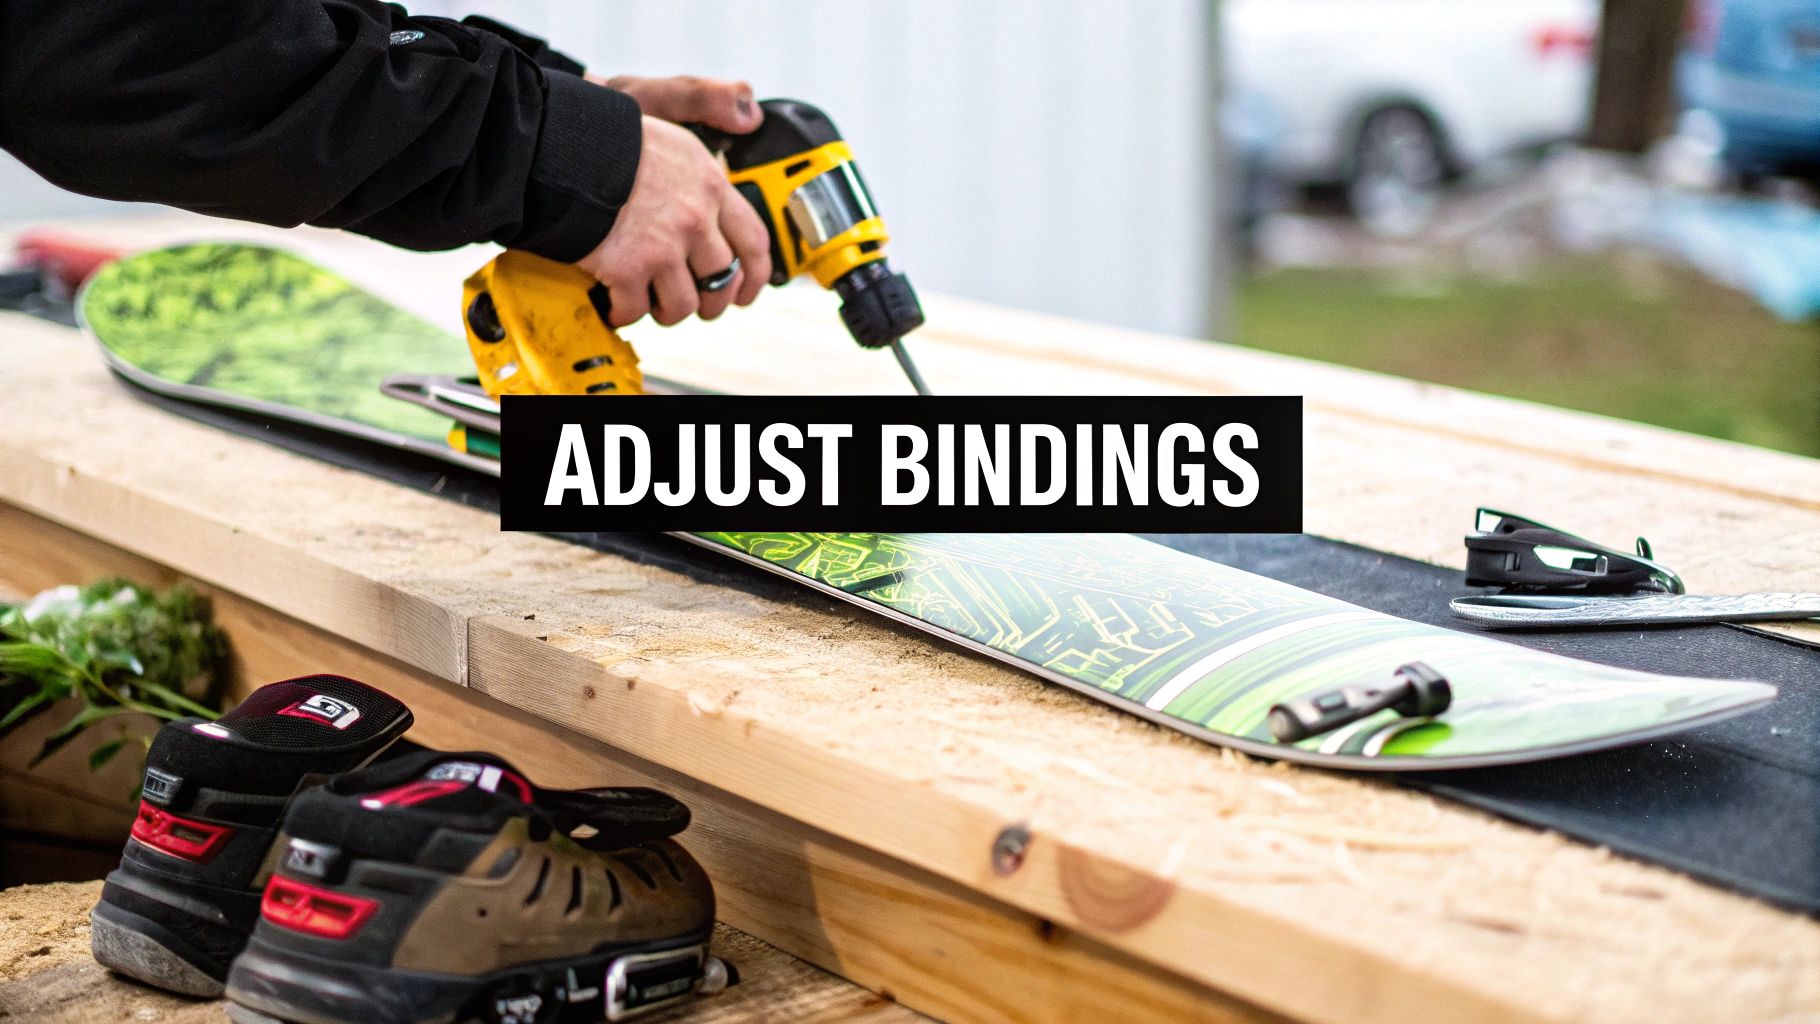
Getting your snowboard bindings dialed in is probably the single best thing you can do for your riding. It's not just about screwing them onto the board; it’s about fine-tuning your stance width, binding angles, and strap positions to work with your body and how you ride. A few small adjustments can honestly make a world of difference out on the snow.
Why Your Binding Setup Is Such a Big Deal
Before you start tinkering, let's talk about why this matters so much. Old-school snowboards were pretty basic, but today's bindings are sophisticated pieces of equipment. They're designed to be the bridge that transfers every little movement from your body straight to the board's edges. A good setup makes that connection feel instant and intuitive.
Here's the best way I can put it: your bindings are the steering wheel and suspension for your snowboard. If they aren't set up for you, it’s like driving a car that’s constantly pulling to one side. Sure, you can manage, but you're fighting your gear all day instead of flowing with it.
Control, Comfort, and Staying Healthy
Nailing your binding setup really comes down to improving three things:
- Better Control: The distance between your feet and the angles they're at directly influences how you pressure your edges. Getting this right makes turning feel natural and carving feel powerful and locked-in.
- More Comfort: We've all been there—that one strap that digs in, creating a painful pressure point that ruins your day. Proper adjustments eliminate those hotspots and reduce muscle strain, so you can ride longer.
- Injury Prevention: This is the most critical one. A bad stance puts unnatural twisting forces on your knees and ankles. Over time, that leads to aches, pains, or even serious injuries.
Industry data consistently shows that properly adjusted bindings can boost a rider's stability and cut the risk of injury by as much as 20%. For riders who are really pushing it, tiny tweaks of just 1-5 degrees can completely change how a board turns and responds. If you're a gear nerd, you can dive deeper into the market trends in this snowboard bindings market report.
This idea of a personalized setup isn't just a snowboarding thing, either. It’s a core principle in all winter sports, something we also cover in our ultimate downhill ski length guide.
At the end of the day, spending a few minutes with a screwdriver now means more confidence, more fun, and a safer day on the mountain later.
Finding Your Ideal Stance Width and Setback
Before you even think about angles, you need to nail down your stance. This is your personal platform on the board, and getting it right is fundamental to your balance, control, and overall feel on the snow. The first piece of this puzzle is your stance width—basically, how far apart your feet are.
Most boards come with a "reference stance" marked on them. Think of this as a helpful suggestion, not a hard rule. A great starting point for most people is a width that's just a little wider than their shoulders.
Not sure what that feels like? Here’s a quick trick I tell everyone: just jump straight up and land naturally. Look down. The distance between your feet is probably a pretty good approximation of your natural athletic stance, and it's an excellent place to start with your bindings.
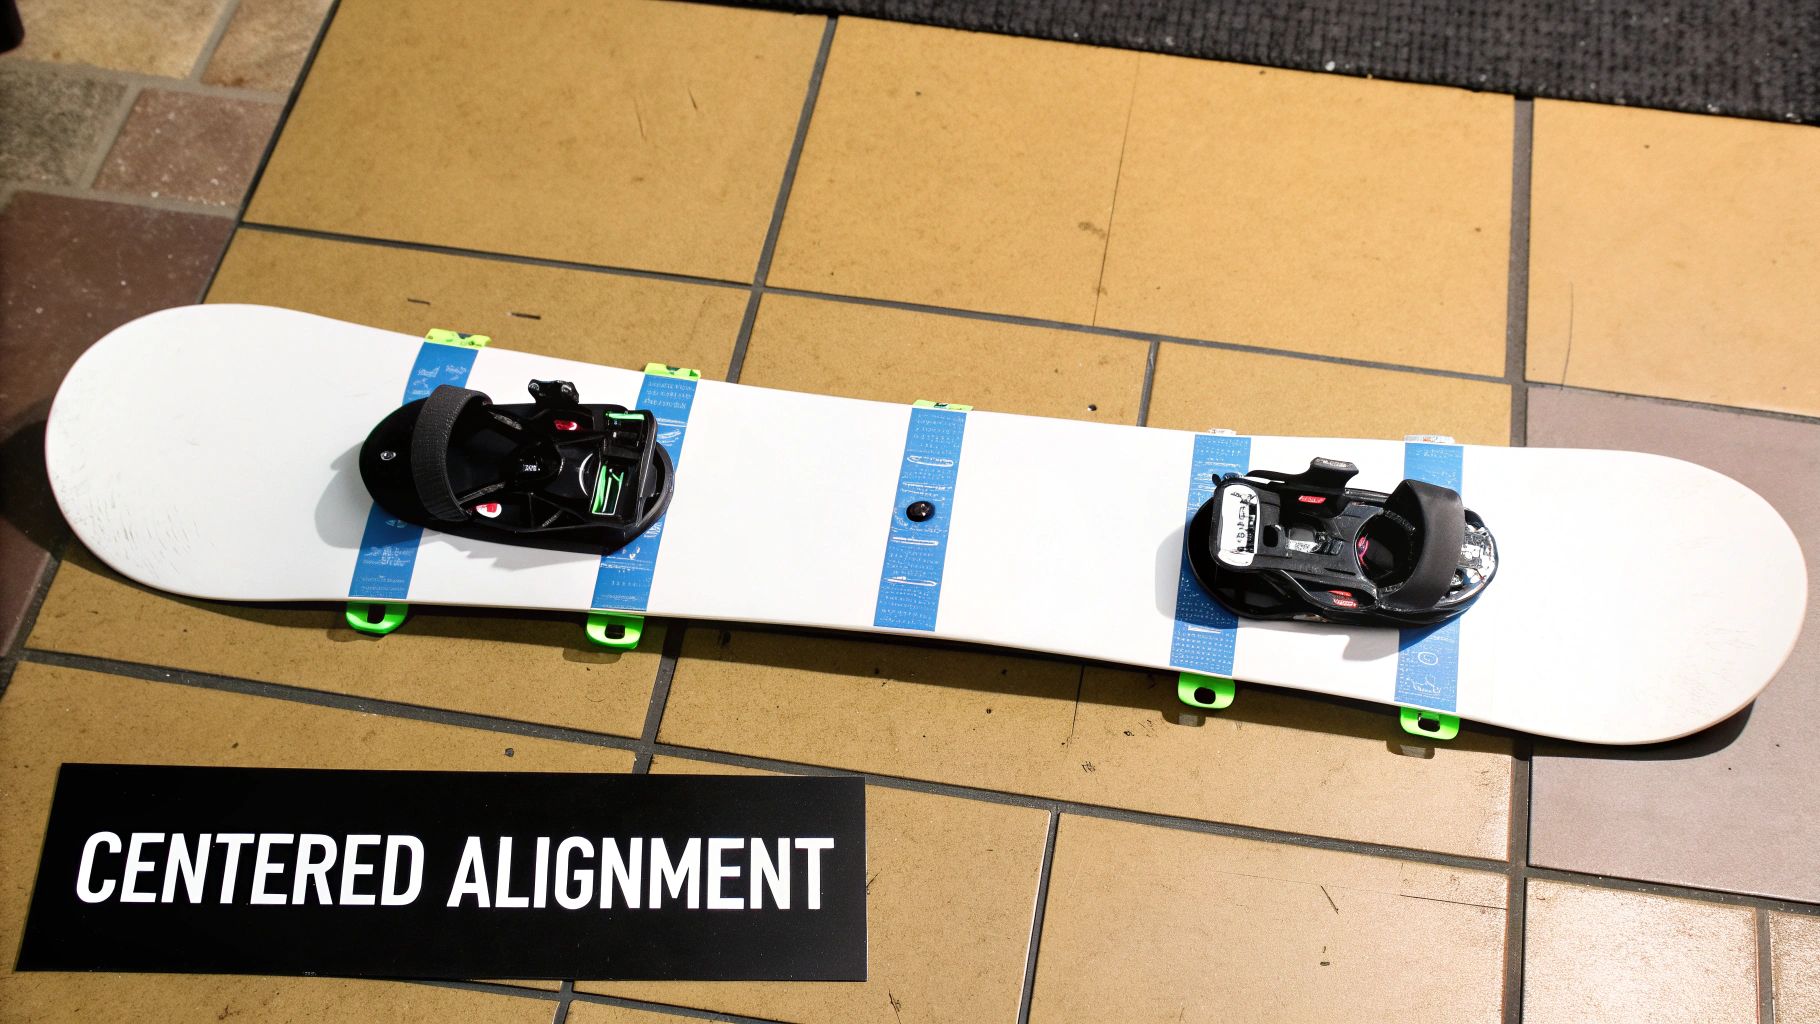
Dialing in Your Stance Setback
With your width figured out, the next question is where on the board to place your bindings. This is your stance setback, which is just the measurement of how far back from the board's true center your stance is positioned. Your ideal setback really comes down to what kind of terrain you ride most.
Here's how to think about it:
- Centered Stance (Zero Setback): If you live in the park, a centered stance is your best friend. It gives you a perfectly balanced, symmetrical feel that's essential for riding switch, spinning off jumps, and locking onto rails.
- Setback Stance: For pretty much everything else, especially all-mountain and powder riding, a setback is the way to go. Pushing your bindings back toward the tail of the board shifts your weight back automatically. This makes the nose naturally want to float up in deep snow, which means more effortless powder turns and way less back-leg burn.
Your board has multiple inserts for a reason, so don't be afraid to use them. For a dedicated powder day, a setback of around one inch (2.5cm) can make a world of difference.
Your stance width isn't just about feel; it's also tied to your board's size. If you get the width right but the board is too long or short, you'll still feel off. Make sure you've got the right foundation by checking out our guide on how to know your snowboard size.
Ultimately, finding the perfect setup is a process of trial and error. Start with these guidelines, but then get out on the hill and experiment. Make small adjustments, ride a few runs, and listen to what your body is telling you. This is your connection to the snow, so take the time to get it just right.
Dialing In Your Binding Angles for Peak Performance
With your stance width and setback sorted, the next piece of the puzzle is your binding angles. We're talking about the degrees your feet are pointed toward the nose or tail, and it’s a game-changer for how your board feels underfoot. The right angles align your knees and hips, letting you drive power into your edges without feeling tweaked. Get this wrong, and you'll feel it in your knees by lunchtime.
Finding Your Sweet Spot
You'll often hear riders talk about the classic "duck stance." Think of a setup like +15 degrees on the front foot and -15 on the back. This symmetrical, V-shaped stance is huge in freestyle and park riding. Why? It makes riding switch (backwards) feel just as natural as riding forward, which is essential when you're spinning, landing, or just playing around on the mountain.
But not everyone is hitting kickers all day. A lot of all-mountain and freeride enthusiasts lean towards a "forward stance," where both feet are angled toward the nose. A common example would be something like +18 degrees on the front and +6 on the back. This setup points your whole body in the direction of travel, giving you maximum leverage for powerful, driving carves on groomers and stability when charging through choppy snow.
Ultimately, there’s no single "correct" answer here. It’s all about what feels right for your body and your riding style.
If you’re just starting out, something mild like +12° / -6° is a fantastic place to begin. It's stable and intuitive, giving you a slightly directional feel without being too aggressive. On the flip side, a seasoned rider who lives to lay trenches on corduroy might push their angles to something like +21° / +9° to get every last ounce of power into their carves.
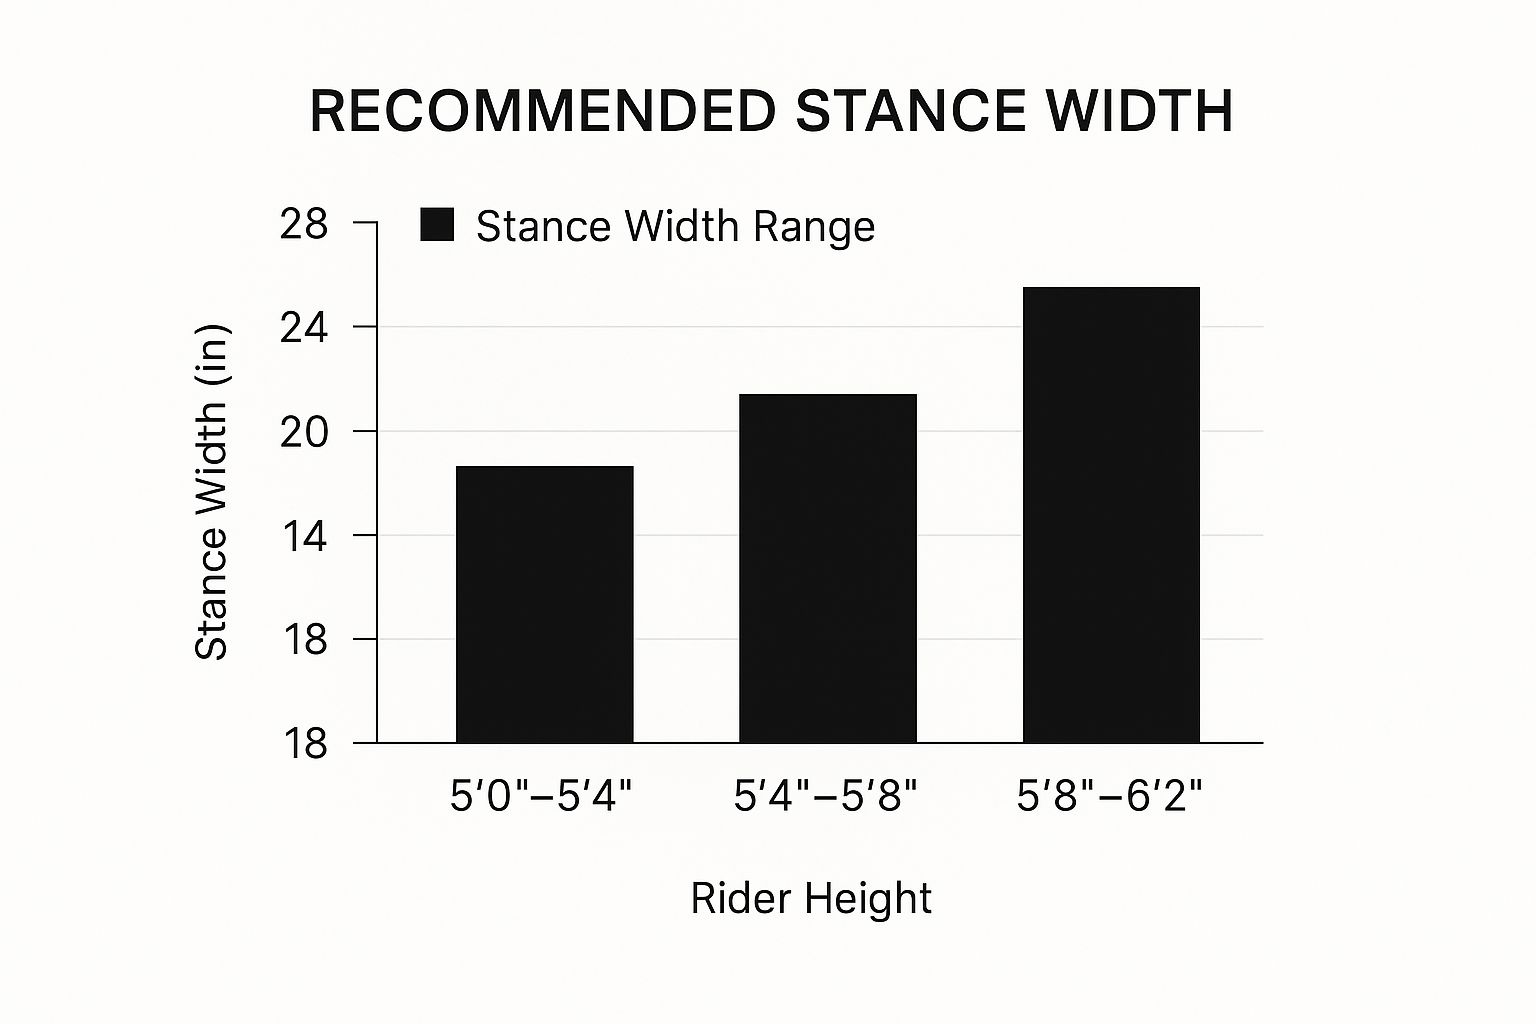
The chart above gives you a solid visual on how stance width generally corresponds with rider height, which is another key part of building your perfect setup.
A Quick Guide to Common Angles
To help you find a good starting point, I've put together this quick reference table. Think of these as proven baselines, not rigid rules.
Common Binding Angle Setups by Riding Style
| Riding Style | Typical Front Foot Angle | Typical Back Foot Angle | Best For |
|---|---|---|---|
| Freestyle/Park | +15° to +12° | -15° to -9° | Riding switch, hitting jumps, rails, and jibbing. |
| All-Mountain | +18° to +15° | -6° to -3° | Versatility across the entire mountain, from groomers to powder. |
| Freeride/Powder | +21° to +18° | 0° to +6° | Charging steep lines, deep powder, and aggressive carving. |
| Beginner | +15° to +12° | -6° to -3° | Learning basic turns and edge control with a stable, forgiving feel. |
| Alpine/Carving | +30° to +21° | +15° to +9° | Maximum edge hold and laying deep, clean trenches on hardpack. |
Once you've picked a starting point from the table, ride it for a few runs and see how it feels. From there, you can start making small tweaks to dial it in perfectly.
Your body is the ultimate judge. Don't be afraid to pull out your tool on the hill and make a one-degree adjustment. A tiny change can make a massive difference in comfort and control. Listen to what your knees are telling you—if something feels off, it probably is.
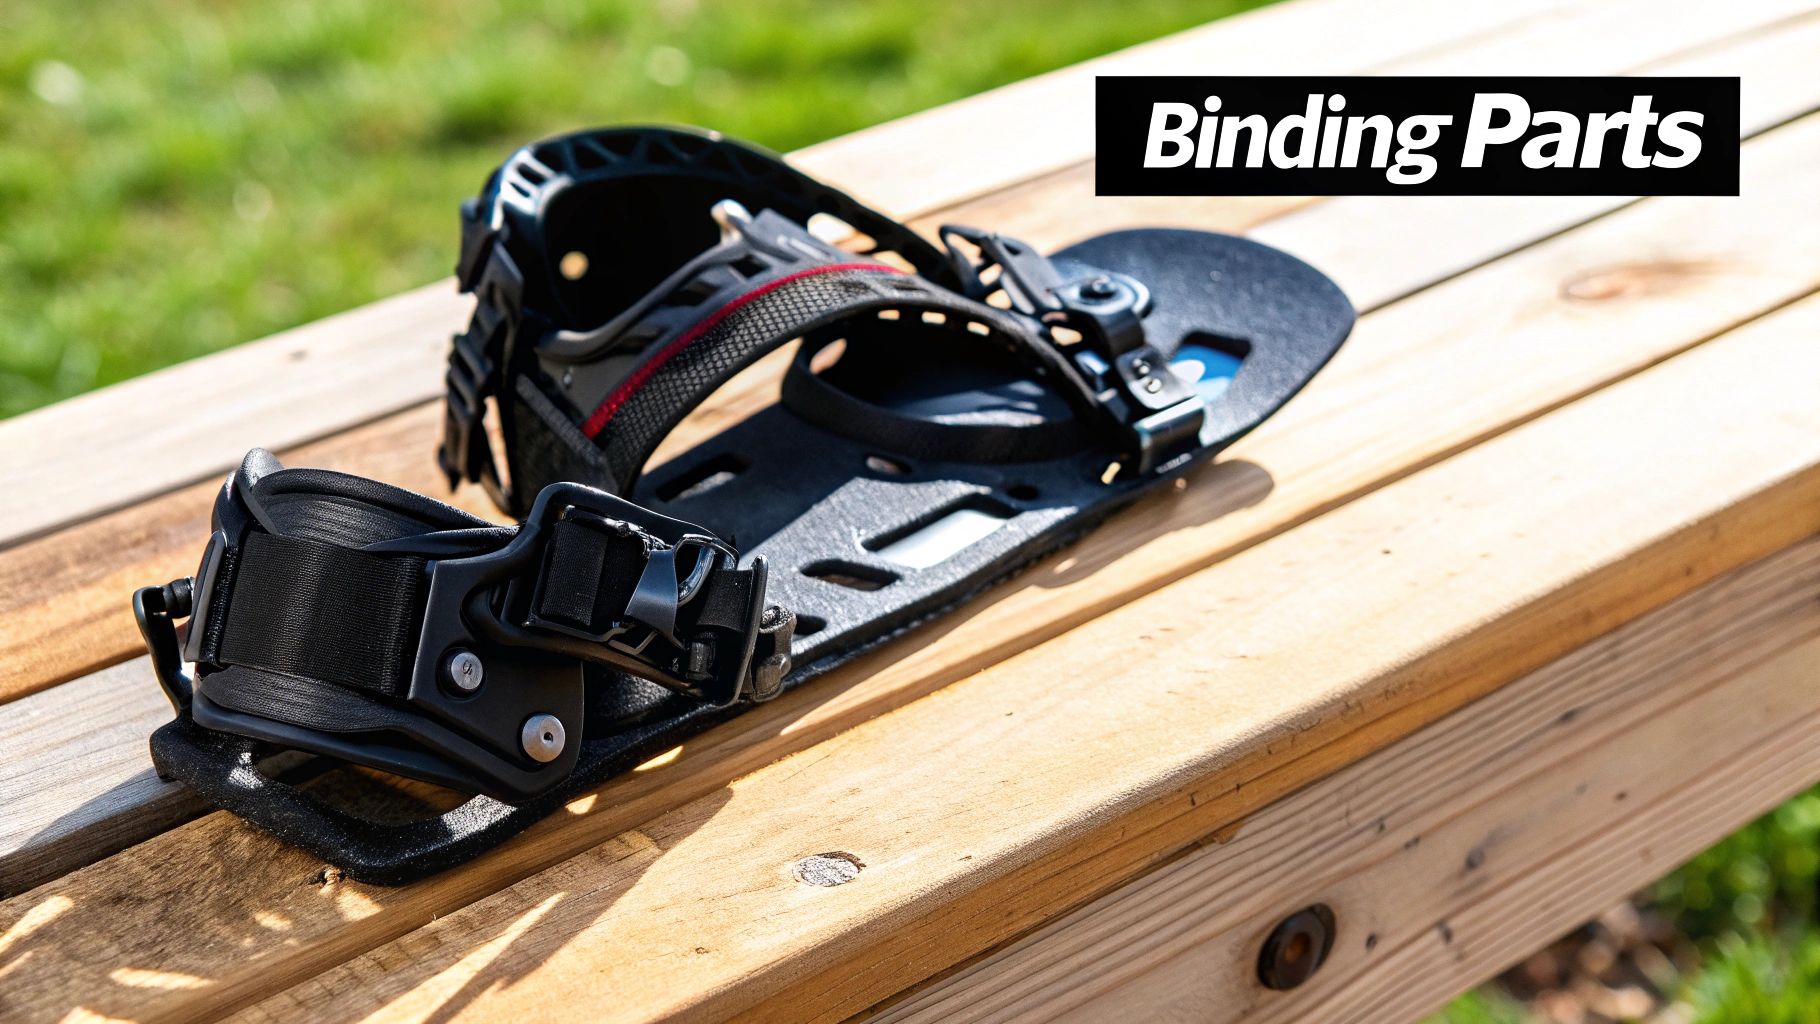
Fine-Tuning Your Straps and Highbacks

Alright, your stance is locked in. Now we get into the nitty-gritty: the small tweaks to your straps and highbacks that make all the difference between a painful day and a perfect one. This is where you really dial in comfort and board response.
Let's start with the straps. A poorly centered strap is a fast track to numb feet and pressure points that will have you calling it quits by lunchtime.
Pop your boot into the binding and just lightly latch the straps. Look at where the thick, padded section lands on your boot. You want it perfectly centered over the top of your foot and across your toes. If it's yanking to one side, you'll feel it. Most bindings have a tool-free adjustment on the opposite side of the ratchet, allowing you to lengthen or shorten the strap to get that perfect alignment.
Dialing in Your Highbacks for Heelside Power
With your straps feeling good, let's look at the highbacks. These are your direct line of communication for heelside turns, and two adjustments—rotation and forward lean—are total game-changers for how your board feels.
Highback rotation is all about getting the highback parallel with your board’s heel edge. When you're strapped in, the highback should follow the line of the board, not sit flush against the back of your boot. This small change creates even contact along the entire edge, giving you a much more powerful and responsive heelside carve. It just feels right.
Pro Tip: Before you tighten everything down, lock your boot in and rock the board up on its heel edge. Look for "heel drag" or "toe drag." If your boot hangs way over either edge, it’s going to catch in the snow on a deep turn and send you flying.
Finally, there's forward lean. This is simply the angle your highback pushes into your boot calf. Cranking up the forward lean forces you into a lower, more athletic stance, which makes your edge-to-edge transitions much quicker. Riders who love to carve hard or ride the pipe often prefer a lot of forward lean. On the flip side, most park riders use little to no forward lean for a looser, more forgiving feel that makes spinning and landing switch easier.
Making On-Mountain Tweaks and Troubleshooting
Getting your bindings set up in your living room is one thing, but the real test always happens on the snow. The mountain has a way of telling you exactly what’s working and what isn’t. Learning to listen to that feedback and make small adjustments on the fly is what separates a good day from a great one.
This is why a multi-tool is one of the most important things you can carry. If you start feeling your feet cramp up, that's a classic sign your straps are cranked down too tight or aren't centered over your boot. Before you do anything else, try loosening the strap that's giving you trouble by just one or two clicks. It's a tiny change that often brings instant relief without making you feel loose in the binding.
Translating Feedback into Adjustments
Does your board feel slow or unresponsive when you try to start a turn? A little more forward lean might be all you need. Adding just a click or two can help your heelside edge bite into the snow much more quickly. You’ll really feel this on those icy, hard-packed days where you need all the grip you can get.
On the other hand, if you feel like your heel edge is catching when you don’t want it to, you might have too much forward lean for your riding style. Easing it back can make your ride feel a bit looser and more forgiving, which is great for a more playful, freestyle feel.
My best advice? Change only one thing at a time. Seriously. Tweak your forward lean, take a full run, and really focus on how it feels. Then, if you’re still not happy, try adjusting the angle on your back foot. This is the only way to know what each change is actually doing.
For many of us who ride all over, from deep powder in the Rockies to slick slopes on the East Coast, having adjustable bindings is non-negotiable. It’s all about tailoring your setup to the conditions of the day. You can find more insights on the market for this kind of adaptable gear in this splitboard bindings report.
Having the right equipment is always half the battle, especially when you start pushing into more remote terrain. If you're someone who loves spending time in the mountains, check out our guide on essential https://findtoptrends.com/blogs/news/backcountry-camping-gear for more helpful tips.
Still Have Questions About Your Bindings?
Got your bindings mounted but still have a few things you're wondering about? That’s totally normal. Getting your setup dialed in isn't a one-and-done deal. It's more of a running dialogue between you, your board, and the mountain. Let's dig into some of the questions I hear all the time.
A big one is how often to check your gear. I always tell people to give every piece of hardware—screws, straps, and buckles—a thorough once-over before the season kicks off. After that, a quick look before you strap in each day is a smart habit to get into.
Here's a pro tip: The vibrations from just riding down the hill will absolutely loosen your hardware over time. I've seen it happen countless times. Tossing a small snowboard tool in your pocket and checking your screws on the chairlift can save you from a major headache (and a long walk down).
Regular vs. Goofy and Making Changes on the Fly
New riders are often confused by "Regular" and "Goofy" stances. Don't overthink it. Regular just means you ride with your left foot forward. Goofy means you lead with your right. That's it. The way you set your stance width and angles is exactly the same for both; it just changes which binding goes on the nose.
Not sure which you are? Try this: imagine you're going to kick a soccer ball. The foot you plant with is probably your front foot, and the one you'd kick with is your back foot.
Another question that comes up a lot is what you can realistically adjust on the mountain. You can definitely fine-tune your straps or mess with your forward lean without even taking your boots off. But for the big stuff—like changing your stance width, tweaking your binding angles, or rotating your highbacks—you really need to take the bindings completely off the board. It's a job best done inside, on a flat surface, with your boots right there so you can test the fit as you go.
At FindTopTrends, our whole goal is to hook you up with the best gear and knowledge to make every day on the snow unforgettable. Check out our hand-picked collections of outdoor and travel essentials at https://findtoptrends.com.
Leave a comment


