


No products in the cart.

When people ask me for the best camera for night photography, my answer usually starts the same: look at a full-frame mirrorless or DSLR camera. Models from the Sony A7 series, Canon's EOS R line, and Nikon's Z series consistently top the list. The reason is simple—they are masters at capturing as much light as possible with the least amount of digital grain, which is the name of the game in the dark.
What Makes a Great Night Photography Camera
Before we get into specific models, let's talk about what actually makes a camera good after the sun goes down. This isn't about picking a brand and sticking with it; it's about understanding the core tech that lets you pull a clean, sharp image out of a dark scene. Once you grasp these fundamentals, you can evaluate any camera's potential for yourself.
I like to use an analogy: think of a camera sensor as a bucket in the rain. A bigger bucket catches more water. A larger sensor works the exact same way with light. Its bigger surface area can gather those faint photons from a starry sky or a dim cityscape, giving you a brighter, cleaner picture. This is precisely why full-frame cameras are the go-to recommendation for shooting at night.
Key Performance Pillars for Low Light
The best cameras for night photography really nail three key things. These features are a trifecta, all working together to create incredible images when light is scarce.
-
High ISO Performance: ISO measures your camera's sensitivity to light. A camera that handles high ISO well can shoot in near-total darkness without turning the image into a grainy mess. You're looking for a camera that produces clean, usable files at ISO 3200, 6400, or even higher.
-
Wide Dynamic Range: This is all about the camera's ability to see details in the absolute brightest and darkest parts of a single photo. Good dynamic range means the bright streetlights don't just blow out to pure white, and the deep shadows don't just crush into a black abyss.
-
Lens Compatibility: A camera body is only half the story. You need a system with a great selection of "fast" lenses—those with wide apertures like f/1.8 or f/1.4 that can gulp in light.
A camera essentially "sees" in the dark by balancing three things: a high ISO to amplify the available light, a wide aperture to let more light hit the sensor, and a long shutter speed to soak up every last detail.
Of course, this applies to most night photography on land. For highly specialized situations, like finding cameras suited for scuba diving at night, you have to add other critical factors like robust waterproofing and specialized lens ports to the list.
Ultimately, getting a feel for how sensor size, ISO capability, and dynamic range work together is the real secret to capturing those jaw-dropping images after dark.
Reading Between the Lines: What Specs Really Matter for Low-Light Photography
Staring at a camera's spec sheet can feel like trying to crack a secret code. When your goal is capturing incredible photos after the sun goes down, you have to learn which of those numbers actually translate into real-world performance. This is where we cut through the noise and figure out what makes the best camera for night photography.
Sensor Size: Why Bigger is Usually Better
Think of your camera's sensor as a bucket left out in the rain. A big, full-frame sensor is like a wide-mouthed barrel—it has a massive surface area to catch as many raindrops (light particles) as possible. Smaller sensors, like APS-C or Micro Four Thirds, are more like small pails; they just can't collect as much light in the same amount of time.
This simple analogy gets right to the heart of why full-frame cameras are the go-to for so many low-light shooters. When you can capture more light from the start, you get a brighter, cleaner image with much less of that grainy digital noise. Sure, modern APS-C cameras can do amazing things, but a full-frame sensor almost always holds the advantage when things get really dark.
The Megapixel Myth and Night Photography
It’s a common trap to think more megapixels automatically means a better camera. For night photography, that's just not true. Let's go back to our full-frame "barrel." If you try to cram an insane number of megapixels onto that sensor, each individual light-catcher (or photosite) has to be incredibly tiny.
These smaller pixels just aren't as sensitive and they struggle to gather faint light. This forces you to crank up the camera's sensitivity (the ISO), which introduces a lot of that ugly digital noise. You'll often find that a camera with a more moderate megapixel count, say 24-33MP, on a full-frame sensor strikes a perfect balance. Its pixels are large and hungry for light, which is exactly what you need for clean shots at high ISOs.
The sweet spot for night photography is often found in a camera that balances a large sensor with a reasonable megapixel count. This combination ensures each pixel is large enough to effectively capture faint light, which is the foundation of a clean low-light image.
The infographic below really nails down the key ingredients for a camera's low-light prowess.
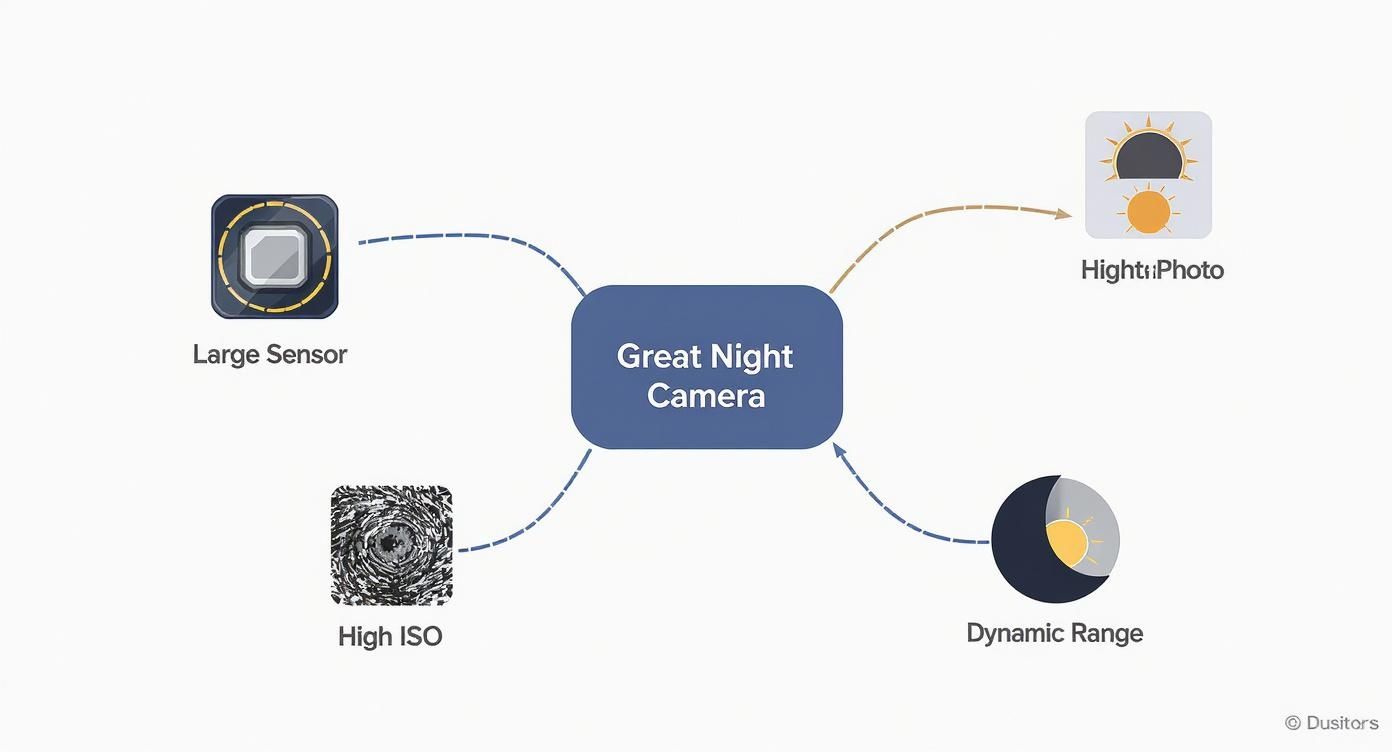
As you can see, a large sensor, a high and clean ISO range, and solid dynamic range are the three pillars that hold up a great night photography camera.
Understanding Sensor Impact at a Glance
Choosing a camera for night photography often comes down to the sensor. Here's a quick breakdown of how different sensor sizes typically perform when the lights go out.
Camera Sensor Size Impact on Night Photography
| Sensor Size | Typical Low-Light Performance | ISO Noise Handling | Best For |
|---|---|---|---|
| Full-Frame | Excellent | Best-in-class, clean images at high ISOs. | Professional astrophotography, low-light landscapes, and any situation where top-tier quality is a must. |
| APS-C | Very Good | Strong performance, but noise appears sooner than full-frame. | Serious hobbyists and travelers wanting a great balance of performance and a more compact system. |
| Micro Four Thirds | Good | Capable, but noise is more noticeable at mid-to-high ISOs. | Photographers who prioritize a lightweight, portable setup for travel or street photography. |
| 1-Inch Sensor | Fair | Struggles in very dark conditions; best kept at lower ISOs. | Compact and bridge cameras where convenience is the main goal; suitable for well-lit cityscapes. |
This table shows the clear trade-offs. While a full-frame sensor offers the ultimate in low-light image quality, modern APS-C and Micro Four Thirds cameras are more than capable for most night photography adventures, especially when paired with the right lens and technique.
Native ISO and Other Game-Changing Features
A camera’s native ISO range refers to the sensitivity it can achieve purely through its hardware, before it starts using software tricks to artificially brighten the image. Pushing the ISO beyond this native range is what introduces that messy, detail-destroying noise. A camera with a high native ISO, like 25,600 or 51,200, gives you much more headroom to shoot in near-darkness.
The progress in sensor technology has been staggering. Where older DSLRs started to fall apart above ISO 800, a modern camera like the Sony A7 IV can produce beautifully clean files at ISO 12,800 and beyond. It's a different world. In fact, it's estimated that over 85% of professional night photographers now rely on cameras with these high-ISO capabilities—a massive jump from less than 5% back in 2010.
Beyond just ISO, a few other features have completely changed the game for night shooters:
- In-Body Image Stabilization (IBIS): This is a huge one. The camera's sensor physically moves to counteract your hand movements. IBIS lets you shoot handheld at shockingly slow shutter speeds without getting motion blur, which is an absolute lifesaver for grabbing sharp shots of city streets at night.
- Dual Native ISO: You'll find this on higher-end cameras. It's a clever technology that gives the sensor two optimal "base" ISOs—one for bright daylight and another for low light. When you switch to the high base ISO in the dark, you get a dramatically cleaner image than you would by just pushing a single-base-ISO camera to the same high number.
While this guide is all about shooting in the dark, the principles for evaluating a camera are pretty universal. For example, learning about choosing the best camera for product photography also involves a deep dive into sensor quality and image clarity. And if you're just starting your journey, our guide to essential photography equipment for beginners is a great place to build that foundational knowledge.
Why Your Lens Is Your Most Important Tool
It’s easy to get caught up in the specs of a new camera body, but when the sun goes down, your lens is the real star of the show.
Think of it like this: your camera’s sensor is a bucket designed to catch light. Your lens is the funnel that directs light into that bucket. A tiny, narrow funnel will only let in a trickle, no matter how massive your bucket is. This is why a “fast” lens—one with a really wide maximum aperture like f/1.8 or f/1.4—is an absolute game-changer for shooting in the dark.
The lower the f-number, the wider the lens opening, and the more light it can guzzle down. To put it in perspective, a basic f/1.8 lens can gather four times more light than a standard f/3.5 kit lens. That’s a monumental difference when you’re working with nothing but moonlight.
Prime Lenses Versus Zoom Lenses
The age-old prime vs. zoom debate gets a lot simpler when you’re shooting at night. While zooms give you flexibility, prime lenses (which have a single, fixed focal length) almost always come out on top after dark.
Here’s why:
- Wider Apertures: Prime lenses are just plain faster. It’s common to find primes with maximum apertures from f/1.2 to f/1.8. A budget-friendly 50mm f/1.8 prime will collect far more light than even a professional-grade f/2.8 zoom that costs thousands.
- Superior Sharpness: Because their engineering is focused on just one focal length, primes tend to deliver much sharper, clearer images. You’ll really notice this when trying to capture pin-sharp details in distant stars or city lights.
- Fewer Optical Flaws: The simpler optical design of a prime lens means you’ll run into fewer problems with distortion and other weird optical effects that can mess up a great night shot.
Your lens choice will have a bigger impact on your night photos than your camera body. I'd take a mid-range camera with a great, fast prime lens over a top-of-the-line camera with a slow kit zoom any day of the week.
Choosing Your Focal Length
So, what focal length should you get? That depends entirely on what you want to shoot. There's no single "best" lens; it's all about matching the tool to your vision.
For those epic, sweeping landscapes with the Milky Way arcing across the entire sky, you’ll want a wide-angle lens—something like a 14mm or 20mm. These lenses let you cram more of the scene into the frame and give you the bonus of being able to use a longer shutter speed before the stars start to streak.
Of course, wide-angle isn't the only option. Different subjects demand different tools, which is why we cover things like the best camera lens for wildlife photography in other guides.
If you’re shooting atmospheric cityscapes or more intimate night scenes, a standard focal length like a 35mm or 50mm is perfect. They offer a natural field of view that feels a lot like what our own eyes see, making them incredibly versatile for just about any low-light situation.
Spotting Critical Lens Flaws
Here's a word of warning: not all fast lenses are created equal. When you push a lens to its absolute limit at night, some ugly optical flaws can creep in and ruin an otherwise perfect shot.
The two biggest offenders to watch out for are coma (or comatic aberration) and chromatic aberration. Coma is a nasty distortion that turns points of light, like stars, into strange, bat-wing-shaped blobs, especially near the corners of your photo. Chromatic aberration shows up as distracting purple or green color fringing along high-contrast edges.
Before you drop your hard-earned cash on a new lens, do your homework. Look for reviews that specifically test for these issues in astrophotography or other demanding night-sky situations.
Top Camera Picks for Every Night Photographer
Now that you've got a handle on the tech that makes or breaks a night photo, let's talk gear. Putting that knowledge into practice means finding the right camera for the job. Instead of just dropping a list of the "best" cameras, I’ve broken down my top picks based on where you are in your photography journey.
Each camera here was chosen because it nails the fundamentals we've covered: fantastic high-ISO performance, great dynamic range for editing flexibility, and access to a solid lineup of lenses. This way, you can feel confident you’re getting a tool that truly comes alive after dark.
For Enthusiast Beginners
Just dipping your toes into night photography? You need a camera that’s easy to get along with but still delivers those "wow" shots. The goal is to find something with a great sensor and intuitive controls that make you want to go out and shoot, not fight with menus in the dark.
My go-to recommendation here is the Sony a6700. It's an APS-C mirrorless camera that punches way above its weight, easily competing with older full-frame models in low light. The sensor and processor are modern and efficient, which means they handle high ISOs beautifully, giving you clean images that are a joy to edit.
Plus, its small size makes it perfect for travel or just tossing in a bag. Pair it with a budget-friendly, fast prime lens like Sony's 11mm f/1.8, and you’ve got an incredibly powerful—yet lightweight—setup for everything from city lights to starry skies.
For Advanced Hobbyists
Okay, you've got the basics down and you're starting to feel the limitations of your current gear. It's time for an upgrade that gives you more creative firepower. This is where moving to a full-frame sensor really starts to pay off, offering a noticeable jump in image quality and latitude in tough lighting.
The Sony A7 IV is an absolute workhorse and a fantastic choice for the serious enthusiast. It hits that perfect sweet spot between pro-level features and a more manageable price. Its 33MP full-frame sensor is a dream to work with, capturing incredible dynamic range that lets you pull a shocking amount of detail out of the shadows and highlights when you're editing.
The high-ISO performance on this camera is incredibly clean, so you can push it in near-total darkness and still come away with usable shots. It also has rock-solid in-body image stabilization and a tough, weather-sealed body, making it a reliable partner for those damp, windy nights on the coast or gritty urban adventures.
For many photographers, a camera like the Sony A7 IV or the Canon R6 Mark II is the ultimate sweet spot. It offers the vast majority of a flagship camera's low-light performance without the top-tier professional price tag.
For Professionals
When your photography is your livelihood and "good enough" won't cut it, you need a flagship camera. These are the tools built without compromise. They offer class-leading performance in the dark, are built like tanks, and have specialized features designed for the most demanding work, like deep-sky astrophotography.
The Sony A7R V is a monster of a camera and a top-tier choice for professionals. Don't let its massive 61MP resolution fool you; modern sensor technology allows it to produce images with staggering detail and surprisingly low noise. That resolution gives you incredible flexibility for massive prints or for cropping aggressively without losing an ounce of quality.
Its autofocus system is so advanced it can lock onto the faintest stars, and the build quality is meant to survive the rigors of constant professional use. For photographers who need the absolute best tool to capture gallery-worthy images of the night sky, the A7R V is pretty much unmatched.
Recommended Cameras for Night Photography by User Level
To make things even clearer, I've put together a quick-reference table. It summarizes some excellent choices that align with the principles we've discussed, giving you a starting point no matter your budget or experience.
| User Level | Recommended Camera Model | Key Night Photography Feature | Price Range |
|---|---|---|---|
| Enthusiast Beginner | Sony a6700 | Excellent high-ISO performance in a compact APS-C body | $$ |
| Advanced Hobbyist | Sony A7 IV | 33MP full-frame sensor with outstanding dynamic range | $$$ |
| Advanced Hobbyist | Canon R6 Mark II | Superb low-light autofocus and clean high-ISO files | $$$ |
| Professional | Sony A7R V | 61MP resolution for extreme detail in astro & landscapes | $$$$ |
| Professional | Nikon Z8 | Flagship performance with excellent noise control and build | $$$$ |
This list isn't exhaustive, of course, but every camera here is a proven performer in the dark. They represent some of the best technology available at their respective price points, ensuring you get a camera that won't hold you back when the sun goes down.
Essential Accessories for Tackling the Dark
Having a great low-light camera is a fantastic starting point, but the body itself is only half the battle. To really nail those incredible after-dark shots, you need the right support system. Think of your camera as the star of the show, and these accessories as the indispensable crew working behind the scenes.
If you buy only one thing, make it a sturdy tripod. This is non-negotiable. Night photography is all about using long shutter speeds to soak up every last photon of light. The slightest wobble—even from your own breathing—will turn a tack-sharp scene into a blurry disappointment. A solid tripod is the bedrock of every great night photo.
Stability and Control
Even when your camera is locked down on a tripod, the simple act of pressing the shutter button can introduce a tiny vibration that ruins the shot. That's where a remote shutter release or an intervalometer comes in. These little gadgets let you fire the camera without laying a finger on it, eliminating that last point of contact.
An intervalometer takes things a step further, letting you automate a whole sequence of photos. It’s the secret sauce for creating mesmerizing star trails and time-lapses. While many newer cameras have this function built-in, a separate remote is often easier to handle with gloves on in the freezing cold.
A tripod provides the stable foundation, and a remote shutter provides the gentle touch. Together, they form the non-negotiable duo for achieving maximum sharpness in any long-exposure photograph.
Preparing for the Elements
Shooting at night often means long, cold hours, and the elements can be tough on your gear. The cold, in particular, absolutely zaps battery life. Always pack at least one or two fully charged spare batteries. Keep them in an inside pocket, close to your body heat, until you're ready to swap them in.
A good headlamp is another must-have, but not just any headlamp. Make sure you get one with a red light mode. A blast of white light will instantly wreck your night vision, making it impossible to see faint stars or compose your shot. Red light, on the other hand, lets you see your camera controls while preserving your eyes' adaptation to the dark.
Finally, if you're out for a long time, especially when it's cold or humid, dew can form on your lens and fog up your shot. A simple lens warmer—a powered strap that wraps around your lens barrel—provides just enough gentle heat to keep condensation at bay. This small accessory can easily be the difference between a crystal-clear image and a wasted night. Building out your kit is an important step; you can find more tips in our guide to creating the best photography starter kit for beginners.
Common Questions About Night Photography Cameras
Diving into camera gear for shooting after dark can feel a bit overwhelming. Let's tackle some of the most common questions photographers have when picking out the right camera for night photography. The aim here is to cut through the noise and give you some straightforward advice to help you choose wisely.
Do I Really Need a Full-Frame Camera?
Honestly? No, not always. But it definitely makes a difference.
Full-frame cameras have a huge advantage because their bigger sensors can physically gather more light, which means cleaner images with less digital noise. That said, modern APS-C cameras have come a long way and are surprisingly capable in low light. For most of us shooting for fun, a newer APS-C body matched with a fast prime lens (like an f/1.8) can produce absolutely gorgeous night shots.
The real magic happens when you pair a good, modern sensor with a wide-aperture lens. A full-frame camera really only becomes a must-have for pros who need incredibly clean files for massive prints or high-stakes client work, where every last drop of image quality is non-negotiable.
What’s More Important: The Camera or The Lens?
For night photography, the lens wins this fight almost every time.
Your lens is the first and most important gatekeeper for light. It's the piece of gear that decides how much of that faint starlight or dim city glow actually makes it to your camera's sensor. A "fast" lens with a wide aperture like f/1.4 or f/1.8 is your single best tool for sucking in as much light as possible.
A decent, mid-range camera body with a fantastic, fast lens will consistently outperform a top-of-the-line professional camera stuck with a slow, cheap kit lens. If you have to choose where to spend your money, put it into the glass first. It will have the biggest impact, period.
This is one of the foundational truths of photography. You can own the most sophisticated sensor ever made, but if your lens is only letting in a tiny trickle of light, that amazing sensor is just being starved.
What Are The Key Camera Settings to Know?
To really get great shots at night, you have to take the training wheels off and shoot in Manual (M) mode. This gives you full control over the "exposure triangle"—aperture, shutter speed, and ISO. They're your three pillars for every shot.
Here’s a solid starting point for just about any night scene:
- Set Your Aperture: Go as wide as your lens will allow. That means using the lowest f-number available, like f/1.8. This opens the floodgates for light.
- Set Your Shutter Speed: If you're shooting the stars and want them to be sharp points of light (not blurry trails), a shutter speed between 15-25 seconds is a great place to start. For cityscapes where you want to create those cool light streaks from cars, a few seconds might be all you need.
- Adjust Your ISO: Begin with a moderately high ISO, maybe 1600 or 3200, and take a test shot. Too dark? Bump the ISO up until the exposure looks right. The trick is to only raise it as high as you absolutely have to, which helps keep that grainy digital noise under control.
Learning to juggle these three settings is the fundamental skill behind all great night photography.
At FindTopTrends, we curate the best photography equipment to help you capture stunning images, day or night. Explore our collection of top-rated cameras and lenses to find the perfect gear for your next adventure. Visit us to see the latest trending products.
Leave a comment


