


No products in the cart.

When you're trying to find the best mountain bike hydration pack, you'll quickly realize it's a super personal decision. What works for your buddy might not work for you. But the best packs out there all nail the same fundamentals: smart storage, rock-solid stability, and great ventilation.
The right pack should feel like it's part of you, not just another thing you're lugging up the trail.
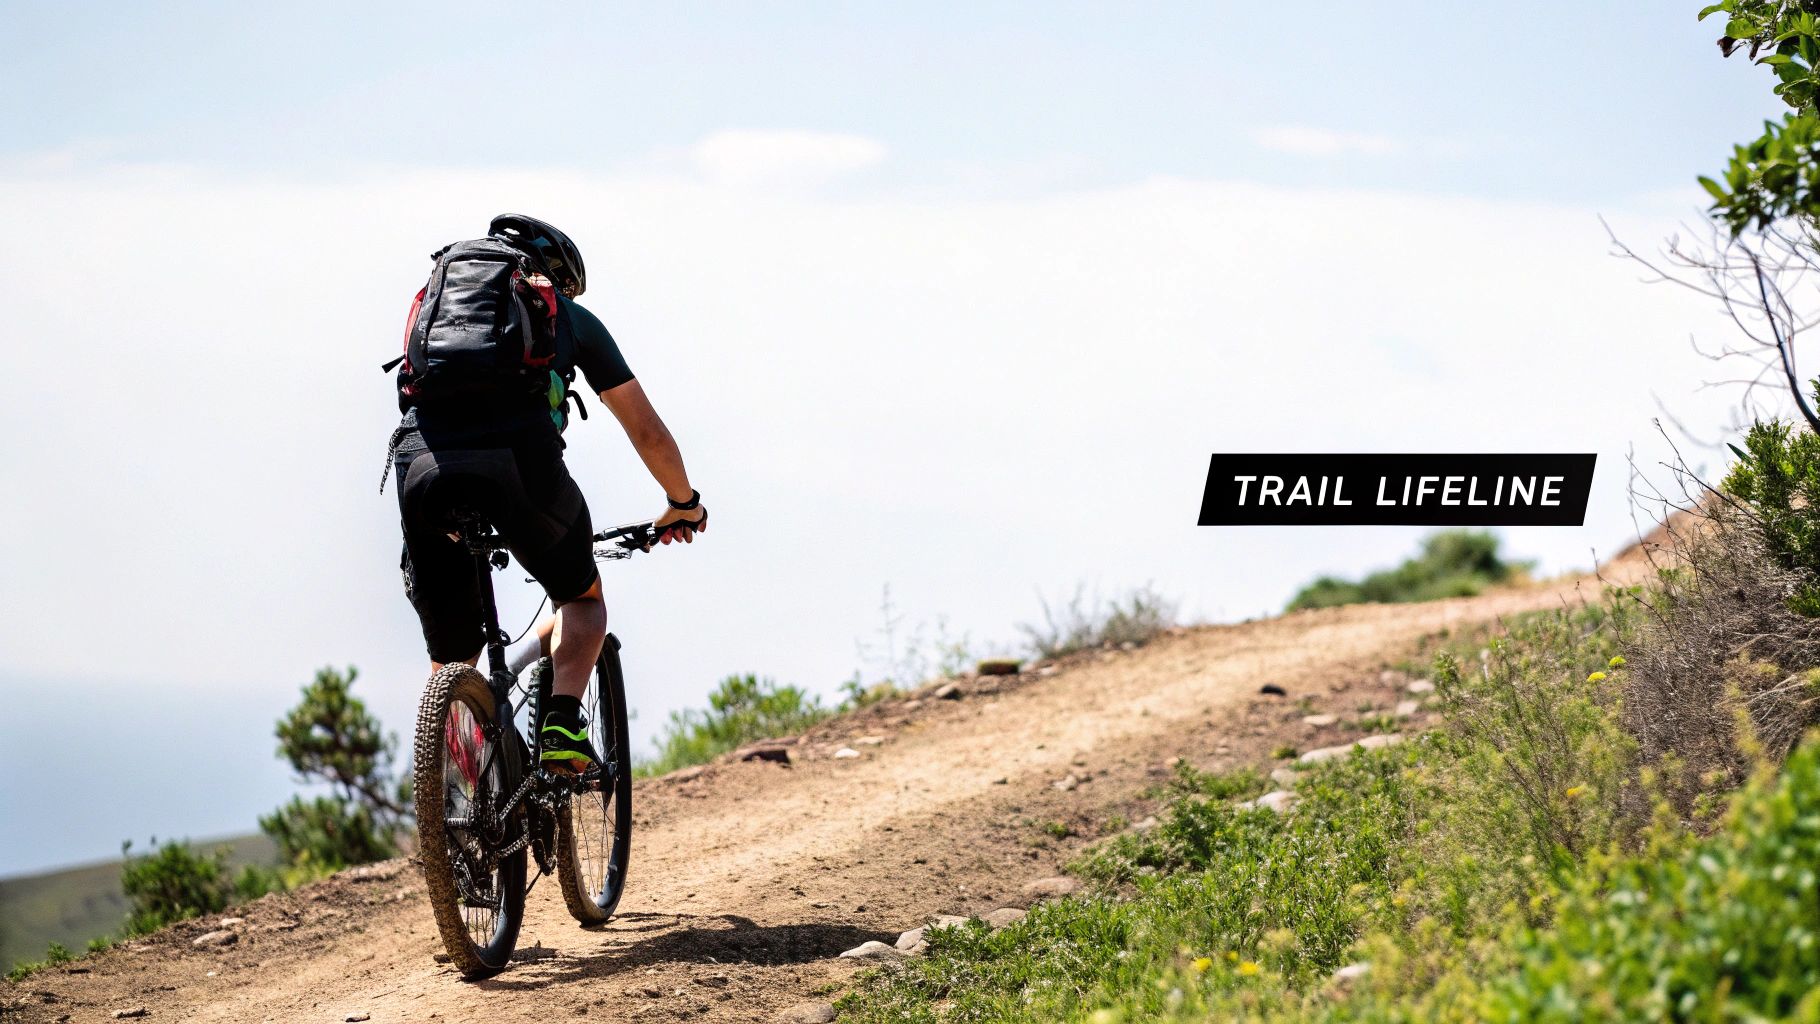
Why Your Hydration Pack Is Your Most Important Upgrade
Let’s get real for a second. A good MTB hydration pack is way more than a fancy water bottle—it's your lifeline out on the trail. It's the one piece of gear that lets you venture further, grind out longer climbs, and handle those annoying mechanicals without having to turn back. Most importantly, it keeps you hydrated and safe.
This guide isn't just a list of specs. I want to show you how the perfect pack can actually improve your balance on the bike, boost your endurance, and make sure you’re ready for whatever the trail throws your way. We'll dig into how to match key details like capacity, fit, and pocket layout to your specific riding style.
Think of this as the roadmap to finding a pack that feels completely invisible, not a clumsy sack of bricks on your back. The "best" pack is the one that's best for you, and by the time you're done reading, you'll know exactly what to look for.
More Than Just a Backpack
Hydration packs have come a long way, evolving right alongside the sports we love. You can see this in the market numbers alone. The global hydration backpack market was valued at USD 403.7 million in 2024 and is expected to climb to USD 661.6 million by 2030. That's a lot of people realizing how crucial on-the-go hydration is.
Speaking of which, staying hydrated is one of the most effective ways to keep your performance high and your muscles happy. For a deeper dive, check out these proven strategies to prevent muscle cramps.
Here’s what we'll cover to help you make sense of it all:
- The essential parts of a modern MTB hydration pack.
- How to figure out the right bladder and cargo size for your typical rides.
- Why getting the fit just right is non-negotiable for comfort and stability on techy trails.
- The real differences between a budget pack and a high-end one (and when it's worth splurging).
Getting to Know Your Hydration Pack
Think of choosing a hydration pack like you would a bike. You wouldn't buy a bike without understanding the difference between a hardtail and a full-suspension, right? The same logic applies here. Once you know what each part does, you can zero in on the pack that's truly right for you. A good pack is a complete system, and every single piece matters for comfort and function out on the trail.
Let's start with the most important part: the water reservoir, or bladder. This is your fuel tank. Its size, measured in liters, dictates how long you can ride before you're high and dry.
The Fuel Tank and Suspension System
You'll generally see three common sizes for reservoirs: 1.5L, 2L, and 3L. A smaller 1.5L bladder is great for short, after-work rips. A massive 3L tank, on the other hand, is a must-have for those all-day adventures deep in the backcountry where water sources are non-existent. For most riders, a 2L reservoir is the sweet spot, holding plenty of water for a solid 2-3 hour ride.
But carrying that water is only half the story. The harness system—the shoulder, sternum, and waist straps—is basically your pack’s suspension. Its entire job is to lock the pack down so it doesn't slam into your back on every drop or swing around and throw you off balance in a fast corner. A bad harness will chafe, bounce, and turn a great ride into an exercise in frustration.
A great harness makes you forget you're even wearing a pack. It distributes the weight so well that it just feels like part of you, moving with you instead of fighting against you.
Staying Cool and Organized
Now let's talk about the back panel. Think of this as the pack's cooling system. A pack that sits flat against your back on a hot day is a recipe for a swampy, uncomfortable mess. Better packs use smart designs like suspended mesh panels or molded foam with deep air channels to create a gap, letting air flow through to evaporate sweat and keep you much cooler.
Finally, you have to consider storage. And I don't just mean the total volume. It's about how that space is organized.
- Smart Pockets: The best packs have a place for everything. Look for dedicated tool rolls, soft-lined pockets for your phone or sunglasses, and quick-grab hip belt pockets for gels and snacks. No one wants to empty their entire bag on the side of the trail just to find a multi-tool.
- Bite Valve Design: This is where the water meets your mouth. A good one delivers a high flow of water with little effort and has a solid locking mechanism to prevent annoying leaks all over your gear.
- Integrated Protection: If you're an aggressive trail or enduro rider, this is a game-changer. Some packs come with a certified back protector built right in. It’s a brilliant way to combine hydration, gear storage, and critical safety equipment into one piece of kit.
Once you understand these key components, you can see past the flashy colors and marketing buzz. You'll have the knowledge to look at any pack and know if it’s truly built for the kind of riding you do.
Matching Your Pack to Your Riding Style
Let's get one thing straight: the "best" hydration pack doesn't exist. The best pack is the one that fits you and the way you ride. It's a personal piece of gear, just like your bike.
Thinking about your primary riding style is the absolute best way to start narrowing down the choices. A cross-country racer's needs are worlds apart from a bike park enthusiast's. Figuring out which camp you fall into will instantly highlight the features that actually matter and help you ignore the rest.
Hydration Pack Features by Rider Type
This table breaks down the essentials for the most common types of mountain bikers. Think of it as a cheat sheet to match your trail habits with the right gear.
| Rider Profile | Ideal Bladder Capacity (Liters) | Recommended Cargo Space | Key Features to Prioritize |
|---|---|---|---|
| Cross-Country (XC) Racer | 1.5L | Minimal (keys, multi-tool, plug kit) | Lightweight design, streamlined profile, bounce-free fit |
| All-Day Trail Explorer | 2.0L - 3.0L | Moderate (tools, pump, jacket, food) | Balanced cargo/water, good back ventilation, hip belt pockets |
| Gravity/Enduro Rider | 2.0L - 3.0L | Generous (pads, tools, full-face carry) | Stability, integrated back protector, low center of gravity |
This gives you a solid starting point. A pack that feels perfect on a two-hour trail ride might feel like a lead weight in a race, so honesty about your riding habits is key.
The Cross-Country (XC) Racer
For the XC crowd, it's all about speed. Every gram is an enemy on the climbs, so efficiency is the name of the game. You need a pack that’s so light and minimal you forget you're even wearing it.
- Bladder Capacity: A 1.5L reservoir is usually the sweet spot. It's plenty for race day or those short, lung-busting training sessions.
- Cargo Space: Think tiny. You just need enough room for the bare essentials: a CO2 inflator, a tire plug, and a small multi-tool.
- Key Feature: The number one priority is a super-secure harness that eliminates any hint of bouncing when you're hammering out of the saddle.
The All-Day Trail Explorer
This is most of us—the riders who love disappearing into the woods for hours on end, exploring new networks and linking up big loops. Your pack is your lifeline. It needs to strike that perfect balance between carrying enough water and having space for tools, snacks, and a "just-in-case" rain jacket.
For the trail explorer, a hydration pack is less of an accessory and more of a mobile command center. It has to hold everything you need to be self-sufficient, miles from the car, ready for a flat tire or a sudden downpour.
This kind of versatility is precisely why sports applications are expected to make up over 54% of sales in the booming hydration pack market. It's a huge category, with the overall market projected to hit around $1.5 billion by 2035.
The simple chart below gives you a quick visual guide for matching water volume to your ride time.
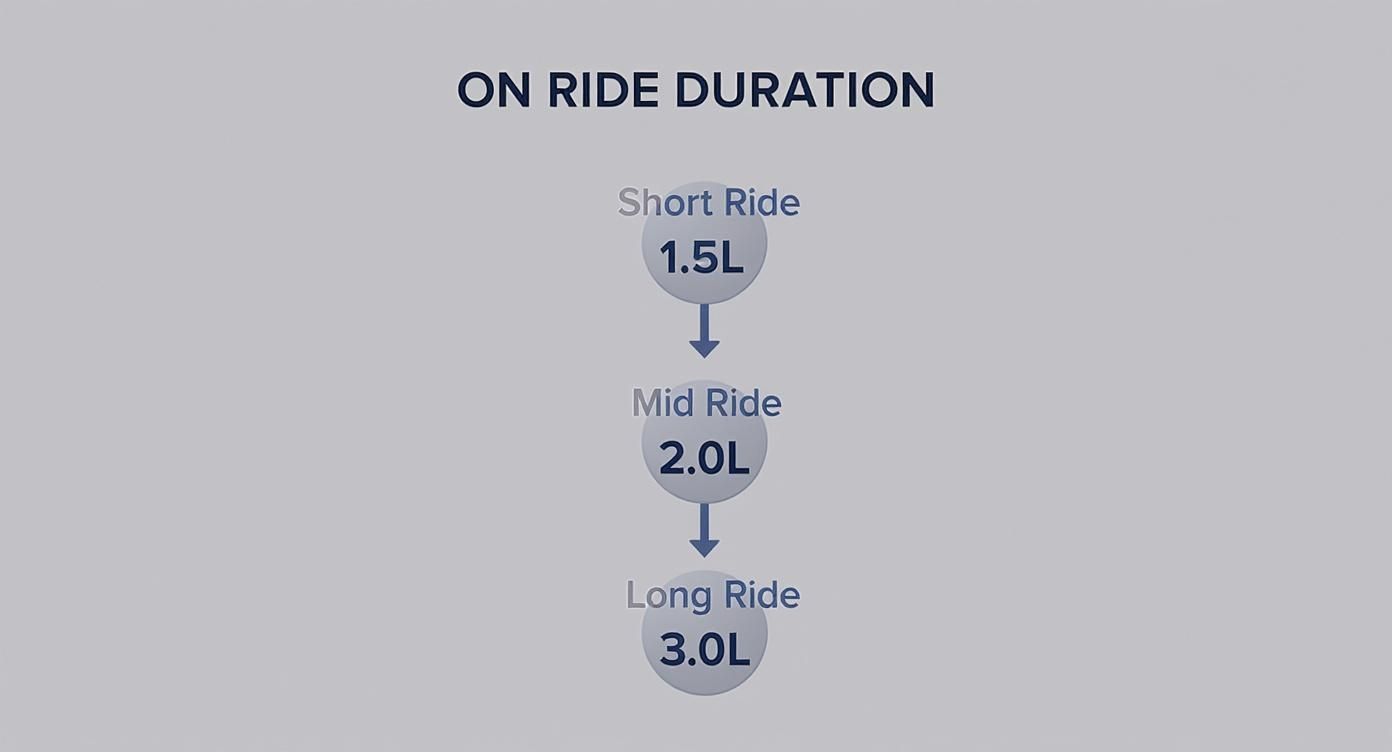
As you can see, jumping from a quick after-work lap to a proper backcountry epic completely changes your hydration needs.
The Gravity-Focused Rider
If your days are spent lapping the bike park or hunting down steep, technical enduro stages, your priorities shift dramatically. It's all about stability and, frankly, protection. The last thing you want is your pack flying over your head when you're hitting a jump or getting bucked through a rock garden.
- Bladder Capacity: A 2-3L bladder is standard. Many gravity packs use a wide, low-slung lumbar reservoir to keep your center of gravity as low as possible.
- Cargo Space: You need smart storage options, like straps to carry a full-face helmet or knee pads on the climbs, along with dedicated, well-organized tool pockets.
- Key Feature: For many, an integrated back protector is a must-have. It's a non-negotiable safety feature that can make a huge difference in a crash.
Getting a handle on these rider profiles really simplifies the process of finding the right gear. For a broader look at pack selection, you can also read our guide on how to choose a backpack.
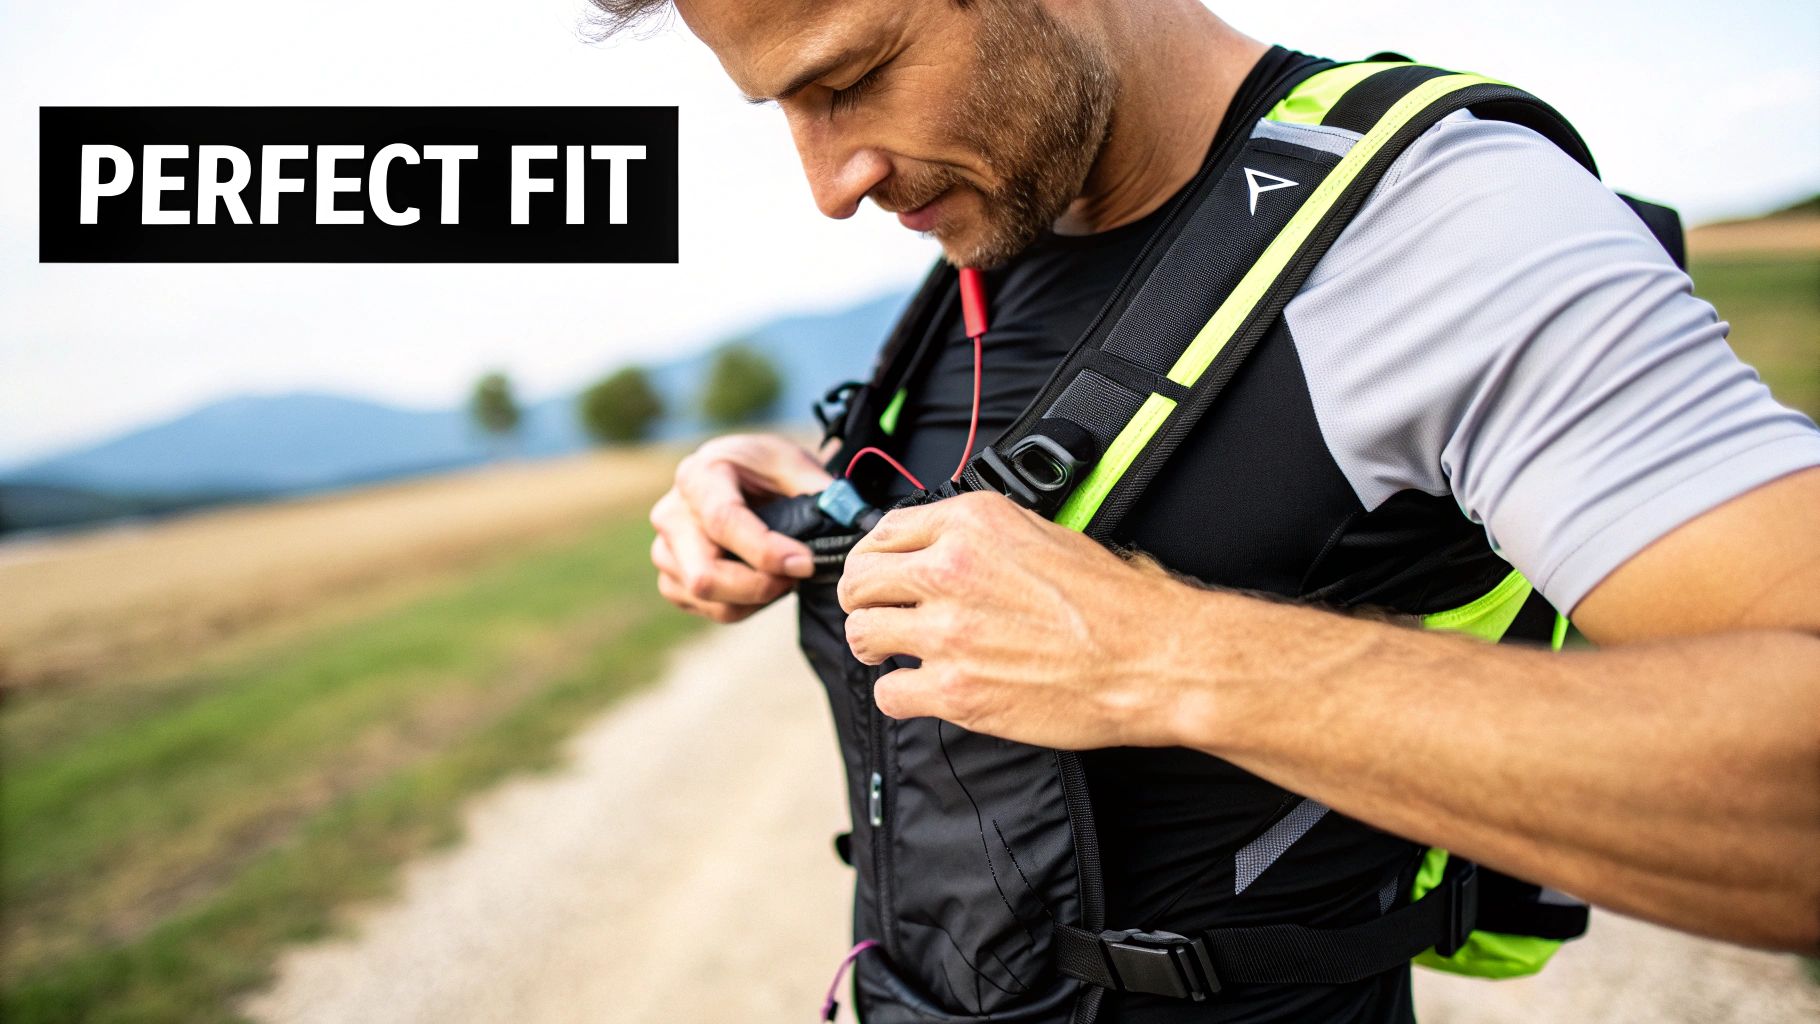
Dialing in the Perfect Fit for All-Day Comfort
Nothing kills a good ride faster than a hydration pack that just won't cooperate. If your pack is bouncing around, sliding side-to-side, or digging into your shoulders, it's more than just an annoyance. That unwanted movement can throw off your balance on a technical climb or descent and lead to some serious chafing and soreness after a few hours.
The whole point is for your pack to feel like a part of you—so much so that you forget it's even there.
Getting that "disappearing" feeling starts with picking the right size. And here’s a tip many riders miss: it’s all about your torso length, not your overall height. Buying a pack that's too long or too short is a one-way ticket to discomfort.
Measuring and Adjusting for a Second-Skin Feel
So, how do you find your torso length? It’s easy. Grab a friend and a soft measuring tape. Have them measure from the bony bump at the base of your neck (that's your C7 vertebra) straight down your spine to the top of your hip bones (your iliac crest).
This number is your magic key. Use it to find the right pack size, which is usually listed as S, M, or L.
Once you’ve got the right size in hand, it’s time to fine-tune the fit. Here’s how I do it:
- Start Fresh: Loosen every single strap on the pack. Don't skip any.
- Hip Belt First: Put the pack on and position the hip belt so it sits right on top of your hip bones, not riding up on your stomach. Cinch it down so it's snug but not crushing you.
- Shoulder Straps Next: Pull down on the shoulder straps. You want them to be firm and contour to your shoulders, but they shouldn't be so tight that they lift the hip belt off your hips.
- Clip the Chest Strap: Fasten the sternum (or chest) strap. A good spot for it is about an inch below your collarbone. Tighten it just enough to keep the shoulder straps from slipping outwards.
When you get it right, about 80% of the pack's weight should rest on your hips, not your shoulders. This little secret is what makes a full pack comfortable for hours on end. It lets the pack move with you, not against you.
Why Gender-Specific Fits Matter
You'll see a lot of brands offering women's-specific packs these days, and it's not just a marketing gimmick. The differences are actually pretty important for a good fit.
For female riders, these packs typically have S-curved shoulder straps that work around a woman's chest instead of awkwardly pressing against it. They also tend to have shorter torso lengths and hip belts that are angled to better fit wider hips. These small ergonomic tweaks make a massive difference in comfort and completely eliminate chafing.
This focus on fit is part of a larger trend—lightweight, body-mapped designs are changing the game for mountain bikers on tough trails. If you want to dive deeper into how athletic gear is evolving, there's some great info on the importance of athletic apparel's fit and materials.
Keeping Your Gear Clean and Ready to Ride
Let's be honest. After a long, muddy ride, the last thing you want to do is clean your gear. It's so tempting to just toss your hydration pack in a corner and forget about it. But letting sweat, grime, and leftover water sit is a surefire way to create a funky, germ-filled mess inside that reservoir.
A little bit of upkeep goes a long way. Think of it like a water bottle—you wouldn't keep drinking from it for weeks without a wash. Your pack's bladder is no different. Regular cleaning is the key to preventing that gross, slimy film and making sure the water you’re sipping on the trail is always fresh.
Caring for the Reservoir and Hose
Your reservoir, hose, and bite valve are ground zero for hygiene. A quick rinse after every single ride is a fantastic habit to get into. For a deeper clean, especially if you’ve let it sit for a day or two, you’ll want to get a bit more thorough to stop any bacteria from setting up shop.
You don't need fancy cleaners. Some of the best tools are probably already in your kitchen:
- Mix Your Solution: Fill the bladder up with warm water. Toss in two tablespoons of baking soda or a good squeeze of lemon juice. Both are great for cleaning and killing any stale odors.
- Shake and Soak: Seal it up tight and give it a really good shake for about 30 seconds. Then, just let it sit and soak for 20-30 minutes to let the solution work its magic.
- Flush the Hose: Hold the reservoir up high and pinch the bite valve. Let that cleaning mixture run all the way through the hose and out the end.
- Rinse, Rinse, Rinse: Dump the solution and rinse everything—the bladder, hose, and bite valve—with clean, warm water until you can't taste any baking soda or lemon.
The absolute most critical step to prevent mold and mildew is getting everything 100% dry before you put it away. Hang that reservoir upside down. A kitchen whisk or a dedicated hanger works perfectly to prop it open and let air circulate.
Maintaining the Pack Itself
The pack itself gets hammered with sweat, dirt, and dust. It doesn't need a full wash after every outing, but giving it some occasional attention will stop all that grime from destroying the zippers and wearing out the high-tech fabrics. A lot of these same principles apply to other durable gear, which you can read about in our guide to the best waterproof backpacks.
For a quick wipe-down, a damp cloth is all you need to get rid of surface mud. For a serious deep clean, hand-wash it in a sink with some mild, non-detergent soap and lukewarm water. Use a soft brush for any really stubborn spots. And always, always let it air dry completely before storing it.
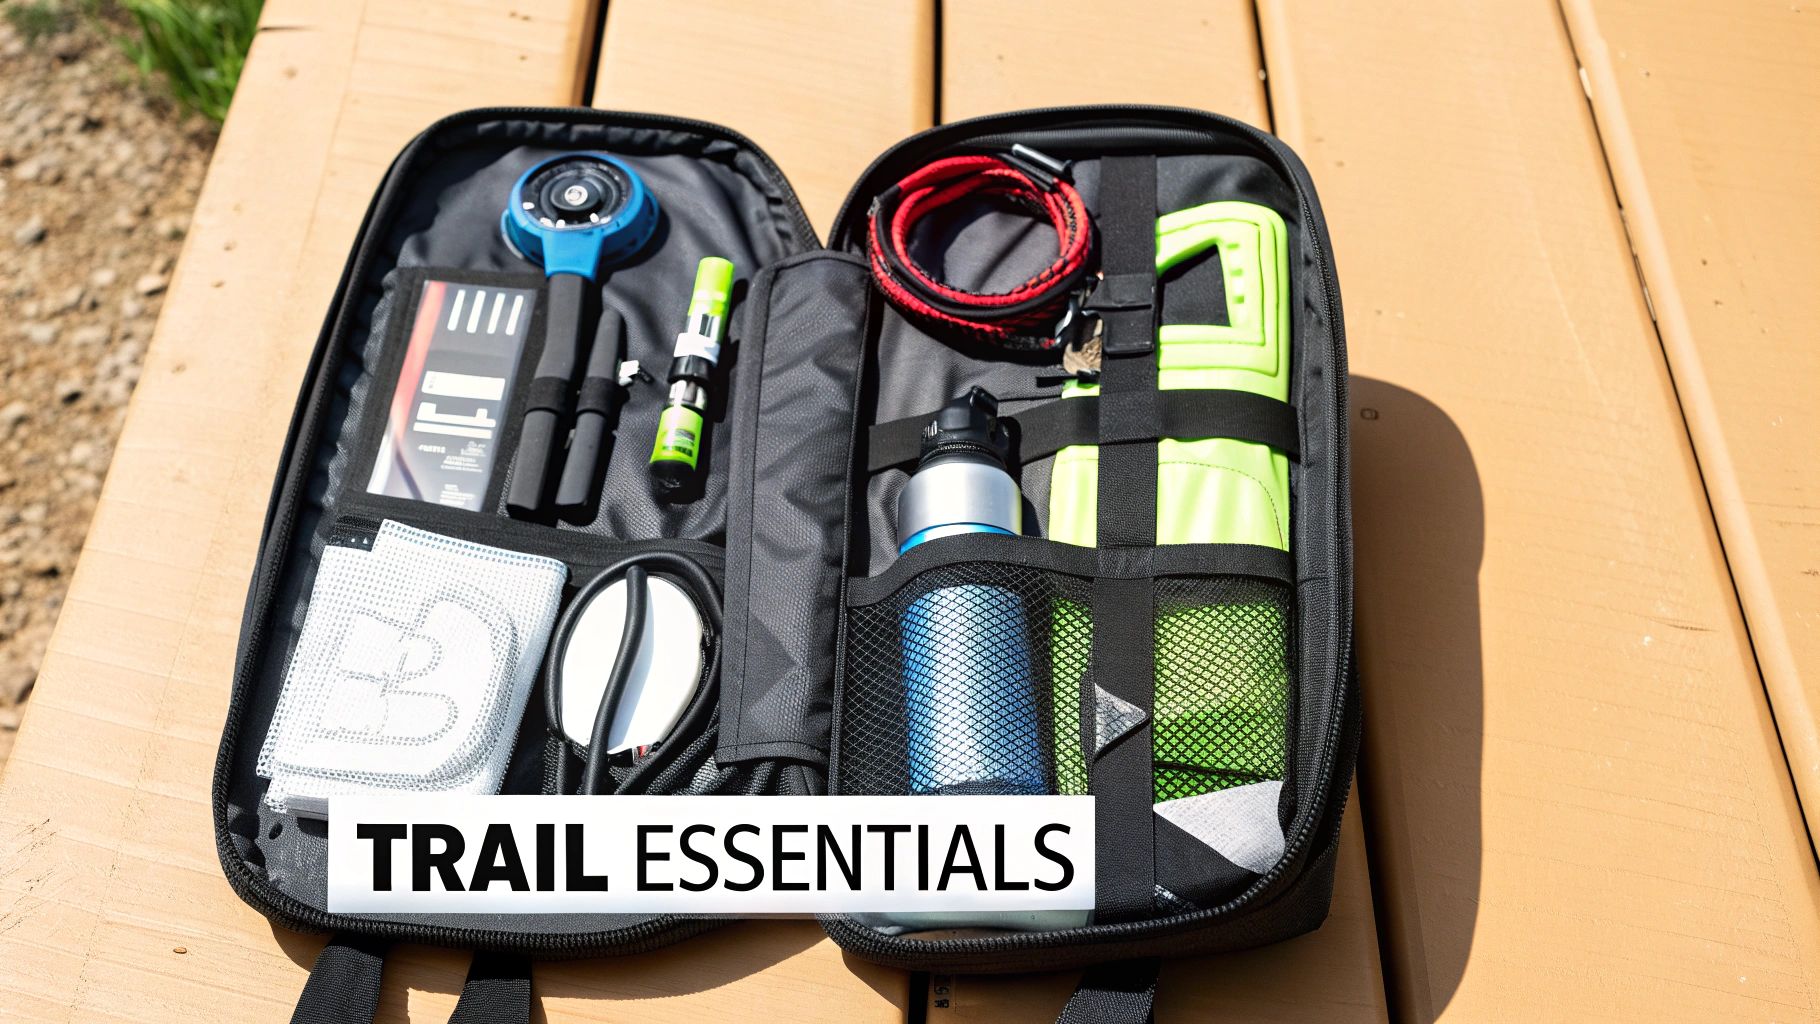
Packing Essentials for Trailside Confidence
A good hydration pack does way more than just hold water. It’s your rolling toolkit, your first-aid station, and your snack bar all in one. Packing it right transforms a potential ride-ending disaster into a quick fix and a good story for later. It's about having the confidence to push a little further down that unfamiliar trail, knowing you’ve got your own back.
This shift from simple water bladder to all-in-one support system is a big reason why the global hydration pack market is expected to hit around $2.5 billion by 2025. Riders everywhere are catching on. If you're curious about the numbers, you can read the full research on hydration pack trends and see how the market is evolving.
When you load your pack correctly, it stops being just a bag and becomes a genuine lifeline on the trail.
The Non-Negotiable Trail Kit
Even if you're just heading out for a "quick" loop, there are a few things you should never leave behind. This basic kit is your ticket to self-sufficiency and can get you out of 90% of the typical jams you'll encounter.
- Multi-Tool with Chain Breaker: This is your pocket-sized bike shop. From a loose bolt to a snapped chain, this is your first line of defense.
- Tire Repair Kit: At the very least, you need a spare tube, tire levers, and a plug kit if you're running tubeless. Walking your bike home is no fun for anyone.
- Inflation: You've got two main choices here: a mini-pump or a CO2 inflator. A pump is infinitely reusable, while CO2 is lightning-fast for getting back on the trail in a hurry.
- Chain Quick-Link: This tiny piece of metal can literally save your ride. It lets you repair a broken chain in a couple of minutes. Just make sure it matches your drivetrain's speed (e.g., a 12-speed link for a 12-speed chain).
Smart Packing for Stability and Access
What you pack is one thing; how you pack it is another. A poorly loaded pack can slosh around, throwing off your balance right when you need it most. The goal is to create a dense, stable load that feels like a part of you, not a sack of potatoes on your back.
Pro Tip: Your heaviest items—like your multi-tool and a full water bladder—should go at the very bottom of the pack, right up against your spine. This keeps your center of gravity low and makes a huge difference in how stable you feel on chunky descents.
Lighter, bulkier stuff like a rain shell or a first-aid kit can be packed on top or in the outer pockets. And keep your phone and snacks in those super-handy hip belt or shoulder strap pockets for quick access without having to stop.
By the way, if you’re an all-around outdoor enthusiast, many of these same packing principles apply to other activities. We’ve got a whole guide on the best water bottles for hiking that touches on similar ideas of being prepared.
A Few Final Questions About MTB Hydration Packs
Even after digging into all the features, a few common questions always seem to surface when you're zeroing in on the right pack. Think of this as the final check before you commit. Getting these last few details sorted is often what makes the difference between a good purchase and a great one.
Let's clear up some of the most common head-scratchers.
How Often Should I Actually Clean This Thing?
Look, ideally, you'd rinse the reservoir with warm water after every single ride and hang it up to dry. That simple step alone prevents 90% of the funk. Just get all the air out and let it dry completely.
For a proper deep clean, maybe every few weeks, toss in a cleaning tablet or use some baking soda and water. You'll definitely want to do this more often if you're putting sports drinks in there. The sugar is a magnet for mold and other gross stuff if you let it sit.
A clean reservoir is non-negotiable. Seriously. You wouldn't leave a half-finished Gatorade on your counter for a week and then drink it. Give your hydration bladder the same courtesy.
So, Can I Put Sports Drinks In My Hydration Pack?
Yes, absolutely. But—and this is a big but—you have to be on top of cleaning it immediately. Those sugary, electrolyte-filled drinks are the perfect food for bacteria.
If you fill your pack with anything besides plain water, make it a non-negotiable rule to scrub the reservoir, hose, and bite valve with hot, soapy water the second you walk in the door. It's the only way to avoid that nasty, lingering taste and prevent a science experiment from growing in your tube.
What's The Real Difference Between A Biking Pack and A Hiking Pack?
Great question. They look pretty similar, but the difference is all about stability and how they sit on your back. A mountain bike hydration pack is designed to basically glue itself to your torso so it doesn't flop around when you're railing a berm or bouncing through a rock garden.
- MTB Packs: They're almost always slimmer and use more sophisticated harness systems for that "no-bounce" feel. They're also built with bike-specific tool pockets in mind.
- Hiking Packs: These are built more for carrying big loads comfortably while you're on your feet. They often sit higher on the back, which is totally fine for walking but can throw your balance off on a bike.
Is A Hip Pack Better Than A Backpack?
It really depends on the ride. One isn't "better" than the other, they just shine in different situations.
For shorter rips—say, under two hours—a hip pack is tough to beat. Your center of gravity stays super low, which feels amazing on the bike, and your back is completely free to sweat. It's a game-changer on hot days.
But for anything longer, the backpack is still king. Once you need more than 1.5L of water, a rain shell, real food, and more than just a multi-tool, a backpack is the only way to carry that weight comfortably. It simply has the space you need to be self-sufficient on a big day out.
Ready to find the pack that’s just right for your rides and keeps you set for whatever the trail throws your way? Check out the curated selection over at FindTopTrends. You'll find top-rated gear that truly delivers. Visit us at https://findtoptrends.com to get geared up for your next adventure.
Leave a comment


