


No products in the cart.

Before you even think about striking a match, the real work of building a great campfire begins. It all starts with getting the foundation right—clearing a proper space, knowing the local rules, and then assembling your tinder, kindling, and fuel. Getting this groundwork done properly is non-negotiable; it's what separates a safe, enjoyable fire from a potential disaster.
Laying the Groundwork for a Safe Campfire
The art of the campfire isn’t just about making flames; it’s about responsible preparation. This isn't just bureaucratic box-checking. It's about respecting the wild places we love and making sure your trip is memorable for the right reasons. When you learn that nearly nine out of ten wildfires are started by people, you realize just how critical these first steps are.
This sense of responsibility is more important than ever. Camping is booming, with the global market expected to jump from USD 38.9 billion in 2025 to a staggering USD 64.8 billion by 2035 as more people seek out nature. You can read more about this incredible growth in outdoor recreation and its impact. With more boots on the ground, mastering campfire safety is a skill everyone needs.
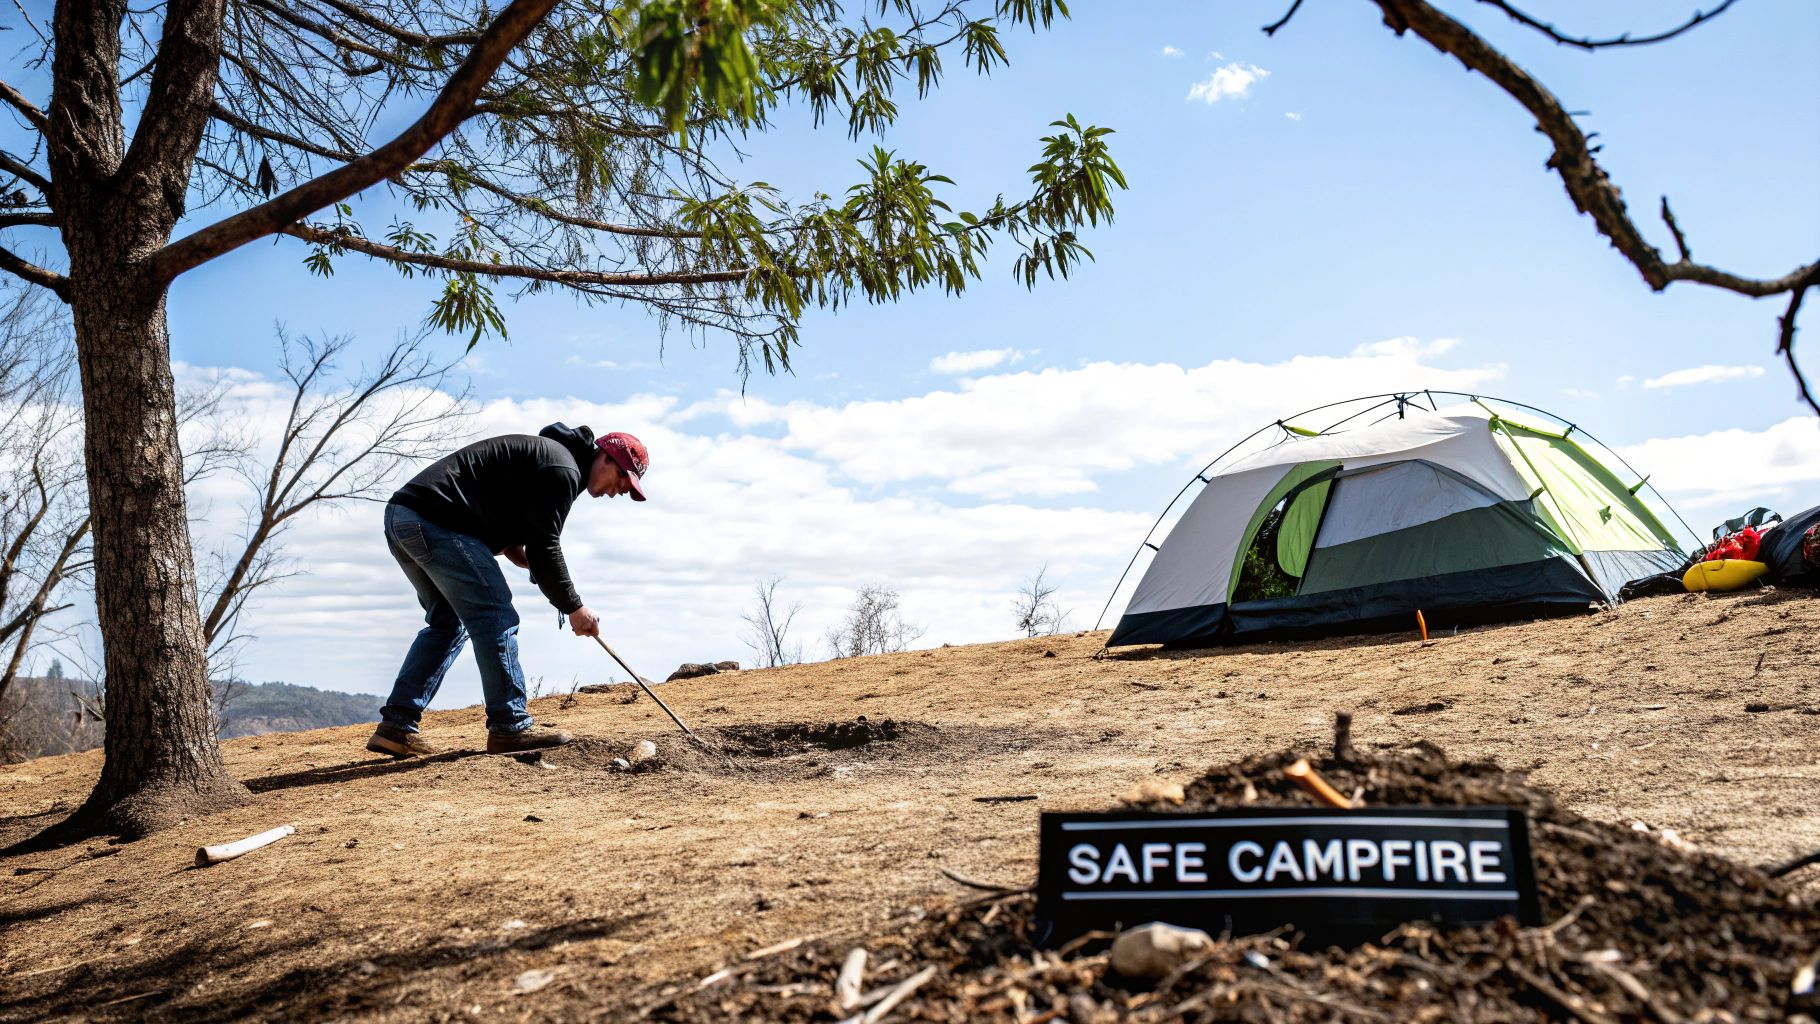
Choosing the Perfect Spot
Your first real decision is where to build your fire. If there's an existing fire pit or ring, use it. No exceptions. These spots have been hardened to handle fires and using them drastically reduces your impact on the landscape.
If you have to start from scratch, find a level, open area that’s at least 15 feet away from absolutely everything—tents, gear, your vehicle, and especially low-hanging tree branches. Think of this as your safety buffer. It’s a non-negotiable rule to prevent a stray spark from turning into a serious problem.
Key Takeaway: A good campfire spot is defensively positioned, not just convenient. Always put distance between your fire and anything flammable, and stick to established fire rings whenever possible to protect the environment.
With your spot picked out, it's time to prep the ground.
- Clear a 10-Foot Diameter Circle: Get down to the bare dirt. Scrape away every last bit of grass, twig, dry leaf, and pine needle. This creates a fuel-free zone that will stop embers in their tracks.
- Dig a Small Pit: If you're not using a pre-made ring, dig down about a foot in the center of your cleared circle.
- Ring the Pit with Rocks: Grab some nearby rocks and build a circle around your pit. This simple wall helps contain the fire and keeps logs from rolling out unexpectedly.
A quick pre-burn check can make all the difference. I use a mental checklist every single time to ensure I haven't missed anything crucial.
Campfire Readiness Checklist
This quick rundown covers the essential checks I perform before every burn. It’s a simple routine that guarantees a safe and successful fire from the start.
| Check | Why It's Critical | Quick Tip |
|---|---|---|
| Site Selection | Prevents fires from spreading to tents, trees, or gear. | Look for established fire rings first. If none, find a spot at least 15 feet from all flammable objects. |
| Ground Clearance | Creates a "fuel break" to stop embers from igniting surrounding vegetation. | Scrape a 10-foot circle down to bare mineral soil. Don't eyeball it—pace it out. |
| Overhead Hazards | Avoids setting fire to low-hanging branches, a common and dangerous mistake. | Look straight up. If you see branches, you're in the wrong spot. Find clear sky. |
| Wind Conditions | Strong winds can carry embers hundreds of feet, starting spot fires. | If it's too windy to keep a match lit, it's too windy for a campfire. Consider a camp stove instead. |
| Water Source | You need a way to extinguish the fire before you light it. | Have at least 5 gallons of water or a full fire extinguisher right next to your fire pit. No excuses. |
Running through this list takes less than five minutes but pays huge dividends in safety and peace of mind.
Understanding the Fire Triangle
Every fire you’ll ever build, from a tiny survival flame to a roaring bonfire, needs three things to exist: heat, fuel, and oxygen. This is the famous fire triangle. Grasping how these elements work together is the secret to getting a fire lit easily and keeping it burning steadily.
- Heat: The spark that gets it all started. This could be from a match, a lighter, or a ferro rod.
- Fuel: What actually burns. For our purposes, we’ll break this down into three categories: tinder, kindling, and fuelwood.
- Oxygen: The air the fire breathes. Too little air will smother it, but too much can make it burn out way too fast.
Building your fire structure correctly is really all about managing airflow. A well-built fire lets oxygen circulate from below, feeding the flames efficiently for a hotter, less smoky burn. Keep that simple principle in mind as we get ready to gather our materials.
Gathering the Right Fuel for Your Fire
A campfire isn’t just a pile of burning logs; it’s a living, breathing thing. And just like anything that lives, it needs the right kind of food to get going and stay healthy. The real secret to a roaring, dependable fire is understanding its diet, which comes in three courses: tinder, kindling, and fuelwood.
Nailing this progression is what separates the person who gets a fire going on the first try from the one who spends an hour getting smoked out. It all starts with learning to look at the forest floor not just as dirt and leaves, but as a pantry full of fire-starting ingredients. You’re not just grabbing random sticks; you’re on a mission for specific materials, sizes, and levels of dryness.
The Spark Catcher: Tinder
First up is tinder. This is the baby of the fire family—it's the most delicate, flammable stuff you can find. Its entire job is to catch a spark or a tiny flame and flare up for just a few seconds. That’s all you need to get the next stage, the kindling, to catch. Think light, fluffy, and bone-dry.
Nature provides some amazing tinder if you know where to look:
- Birch Bark: This is my absolute favorite. The paper-thin bark from a birch tree is full of flammable oils, so it often lights even when it’s a bit damp. Just be sure to peel it from dead, downed trees, never a living one.
- Cattail Fluff: If you’re near a marsh, the fluffy brown heads of cattails are basically nature’s cotton balls. They go up in a flash.
- Fatwood: This is a goldmine. It's the resin-soaked heartwood from the stumps of old pine trees. Shave off a small pile of fine dust, and it’ll catch a spark like nothing else.
- Dry Grass & Pine Needles: A classic for a reason. In dry weather, a bundled-up ball of dead grass or dry pine needles works beautifully.
A Tip From the Trail: Never trust Mother Nature completely. I always carry a small waterproof bag with some "cheats"—a few cotton balls smeared in petroleum jelly or a Ziploc bag of dryer lint. They weigh nothing and are a lifesaver in wet conditions.
Building the Bridge: Kindling
With your tinder bundle ready, it's time for kindling. This is the crucial bridge between that initial flash of flame and a self-sustaining fire. Kindling is just a collection of small, dry twigs and sticks, ranging from the size of a pencil lead up to about as thick as your thumb.
The golden rule here is the "snap test." Pick up a twig and try to bend it. If it’s flexible and just bends, it’s too wet or green. You want twigs that break with a clean, sharp snap. That sound is your proof that the wood is dry enough to burn well. Gather way more than you think you'll need and sort it into little piles by thickness. This lets you gently feed the fire, starting with the thinnest sticks and gradually adding larger ones as the flames grow.
The Main Event: Fuelwood
Finally, we have fuelwood. These are the bigger logs—anything thicker than your wrist—that will provide the steady heat and glowing coals for the rest of the evening. Just like your kindling, fuelwood has to be dead, downed, and as dry as you can find.
The type of wood you burn makes a big difference:
- Softwoods: Think pine, fir, or cedar. These woods are less dense, so they light up fast and burn hot. They're fantastic for getting a fire roaring quickly, but they'll burn out just as fast.
- Hardwoods: This is your long-burn fuel. Woods like oak, maple, or hickory are dense and heavy. They take a bit more convincing to light, but once they're going, they produce a fantastic bed of hot coals that’s perfect for cooking or keeping you warm all night.
A good practice is to only gather wood you can break over your knee or by stepping on it. If you need a saw or an axe, the wood is probably too big for a responsible campfire anyway. And remember to forage over a wide area instead of picking one spot clean. It's much easier on the environment. Above all, never, ever cut branches from a living tree. Green wood is full of water and won’t burn, and you’ll be needlessly damaging the forest.
Choosing Your Campfire Build
Alright, you’ve gathered your tinder, kindling, and fuelwood. Now for the fun part: building the fire itself. How you stack your wood is more than just making a neat pile; it's about architecture. A good structure is the difference between a sputtering, smoky mess and a roaring, confident flame. It's all about managing airflow and heat.
Thinking about the structure before you strike a match is a skill that separates the rookies from the seasoned campers. Each design has its own personality and purpose. Do you need to boil water in a hurry, or are you settling in for a long night of cooking? Picking the right build for the job is what turns a good campfire into a great one.
Let's walk through three classic, time-tested campfire lays that every camper should know.
This visual guide shows the essential progression of fuel, from the initial spark-catching tinder to the long-burning fuelwood that sustains your fire.
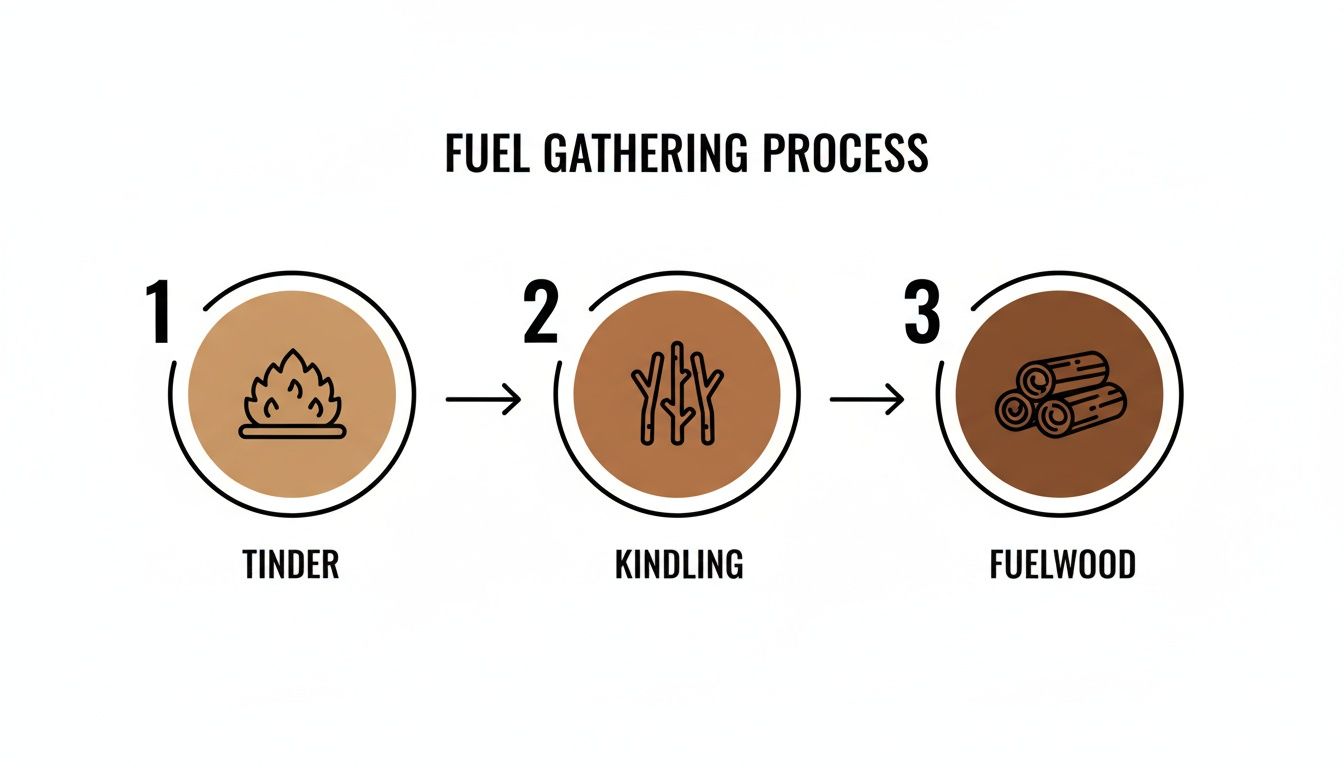 Getting this sequence right is fundamental. Every build we're about to discuss relies on layering these materials correctly to get the perfect balance of heat and oxygen.
The Classic Teepee Fire
If you’re just starting out, the teepee is your best friend. It’s intuitive, easy to get the hang of, and fantastic for generating a quick, hot flame. The design is a masterclass in convection, creating a natural chimney that sucks oxygen up from the bottom and funnels all the heat straight up.
To build it, start with a fluffy bundle of tinder right in the center of your fire pit. Next, lean your smallest kindling sticks against each other to form a cone—a teepee—right over the tinder. One crucial tip: leave a little doorway on the upwind side. This gives you a clear shot to light the tinder without smothering it.
Once the tinder catches, the flames will eagerly climb the kindling. From there, you just keep feeding it, adding slightly larger kindling and then small pieces of fuelwood to the outside of the cone. This method is a lifesaver in damp conditions because that intense, focused heat does a great job of drying out wood that’s a little moist.
Expert Tip: The teepee is my go-to for a quick boil. That focused cone of flame will have a kettle screaming in minutes. The trade-off? It’s a fuel hog and tends to collapse, so you have to keep a close eye on it.
The teepee's efficiency is no secret. Some studies have shown that stacking kindling at sharp 30-degree angles can lead to 70% faster ignition. It’s a go-to technique for the more than 81.1 million campers who now head outdoors each year. This boom has fueled a massive market for camping gear, projected to grow from $21.1 billion in 2025 to a staggering $39.4 billion by 2035. You can dig into more data on the booming campground industry if you're curious.
The Stable Log Cabin
When you need a fire that's more of a marathon runner than a sprinter, look no further than the log cabin. This build is all about stability and longevity. It’s designed to be self-feeding, eventually collapsing into a perfect bed of hot coals, making it the undisputed champion for cooking.
Think of it like building with Lincoln Logs. Start by placing two of your thickest fuelwood logs parallel to each other, with your tinder pile nestled between them. Then, lay two slightly smaller logs across the top of them, perpendicular, to form a square.
Keep stacking alternating layers, with the logs getting a little smaller as you go up. Inside this "cabin," you can build a small teepee of kindling over your tinder to get things going. The outer walls act as a fantastic windscreen, trapping heat and allowing the bigger logs to catch slowly and burn evenly.
The Efficient Star Fire
The star fire, sometimes called a council fire, is the master of conservation. If you've got a limited wood supply and want it to last all evening, this is your build. It's perfect for those long, lazy nights when you just want consistent, gentle warmth without constantly getting up to feed the fire.
The setup couldn't be simpler. You just arrange three to five large logs so their ends meet in the middle, like the spokes of a wheel. In that central point, you build a small, simple fire with your tinder and kindling.
The real beauty of the star fire is how easy it is to manage. As the ends of the logs burn down, you just give them a gentle nudge toward the center. This gives you incredibly precise control over the fire's intensity and how fast you burn through your wood. It’s a low-maintenance, smoldering fire that's perfect for storytelling.
Bringing Your Campfire to Life
Alright, your fire lay is built and waiting. This is the moment of truth, where all that careful prep work pays off with a satisfying roar of flame. Lighting a fire is a real skill, and like any craft, it gets a whole lot easier once you know the right techniques and have the right tools on hand.
The goal isn't just to make a fire—it's to make one reliably, efficiently, and safely, every single time. Let's walk through the best ways to get that initial spark going, from the gear you'll find in my pack to some classic old-school methods.
The Modern Fire Starter's Go-To Gear
For most of us out on the trail, a couple of dependable tools are all it takes to guarantee a fire. These are simple, effective, and should have a permanent spot in your kit.
- Butane Lighter: Let's be honest, it's the undisputed king of convenience. A quick flick gives you a steady flame you can place exactly where you need it on your tinder bundle. Its only real weakness is struggling in deep cold or at high altitudes, but for most three-season camping, you just can't beat it.
- Waterproof Matches: These aren't the matches from your kitchen junk drawer. Coated in wax, they're built to strike even after taking a dunk. I always keep a stash in a small waterproof case as my primary backup. You never want to rely on just one ignition source.
With a good lighter and a case of waterproof matches, you're covered for pretty much any situation you’ll run into on a standard trip.
Mastering the Ferro Rod
When you're ready to move beyond the basics, the ferrocerium rod—often called a ferro rod or fire steel—is your next best friend. This thing is a game-changer. It works when it's wet, cold, or windy, and a single rod can light thousands of fires. It will never fail you.
Using one well takes a bit of practice, though. It’s not about just scraping wildly; it’s about controlled force and aiming those sparks right where they need to go.
- Prep That Tinder: A ferro rod throws a shower of hot sparks, not a sustained flame. This means your tinder has to be incredibly fine and fluffy to catch. Think cotton balls, the papery thin scrapings from birch bark, or a small pile of fatwood dust.
- Brace the Rod: Get right down close to your fire lay. Anchor the tip of the ferro rod directly into your tinder bundle at roughly a 45-degree angle. This keeps it stable and guarantees the sparks have nowhere else to go.
- Scrape with Purpose: Use your scraper—the back of your knife spine is perfect for this—and hold it at a 90-degree angle to the rod. Here's the key trick: instead of pushing the scraper down, pull the rod back while keeping the scraper locked in place. This directs a waterfall of molten-hot sparks right into your tinder without blowing your carefully made bundle all over the place.
So many beginners make the mistake of flicking sparks from a distance. Get right on top of your tinder. You want to smother it in sparks, not just sprinkle a few on and hope for the best. Overwhelm it with heat.
The Secret is a Good Tinder Bundle
It doesn't matter what you use to create the spark if your tinder can't catch it. A well-built tinder bundle is designed to burst into flame from the tiniest bit of heat.
Some of the best options are the ones you can make yourself for next to nothing:
- Petroleum Jelly Cotton Balls: This is a classic for a reason. Work a small dab of petroleum jelly into a regular cotton ball. It instantly becomes waterproof and will burn for a solid minute or two, giving your kindling more than enough time to catch fire.
- Fatwood Shavings: As far as natural fire starters go, it’s tough to beat fatwood. This resin-soaked pine offers an incredible 90% success rate for ignition. It’s so reliable that mastering the perfect campfire has become an obsession for countless outdoor adventurers.
That obsession is part of a much bigger picture. The global camping market is on track to explode from $66.37 billion in 2025 to a massive $143.93 billion by 2033. You can read more about these market trends in outdoor recreation to see just how many people are rediscovering the outdoors.
Once your tinder finally catches, gently shield it from the wind. Now, carefully start adding your smallest, driest pieces of kindling to feed and nurture that brand-new flame.
Putting Your Campfire Out The Right Way
A good night around the fire doesn't end when the last story is told. The true mark of an experienced and respectful camper is leaving the site exactly as they found it—or even better. That means keeping an eye on your fire while it's burning and knowing, without a doubt, how to make sure it's dead-out cold before you leave.
This is the most critical part of the whole process. With nearly nine out of ten wildfires started by humans, being meticulous about putting out your fire isn't just a good idea; it's a responsibility we all share.
Tending Your Fire Safely
Once you've got a good, steady burn going, your role switches from fire-builder to fire-keeper. A well-managed fire provides all the warmth and ambiance you want without becoming a hazard.
The number one rule? Never leave a campfire unattended. Not for a second. Always make sure a responsible adult is watching it. It’s also crucial to have a bucket of water and a shovel or spade within arm's reach of the fire pit at all times. Think of them as your fire extinguisher and first line of defense.
Resist the urge to build a massive bonfire. While they look impressive, they're wasteful, dangerous, and incredibly hard to control. A smaller, well-contained fire is much more efficient for cooking and warmth. Just add fuel logs one or two at a time to keep a consistent, manageable flame.
Leave No Trace Principle: Your goal is to erase any sign you were ever there. Proper fire management is a core part of this ethic, protecting the landscape and ensuring the next person gets to enjoy the same wild space you did.
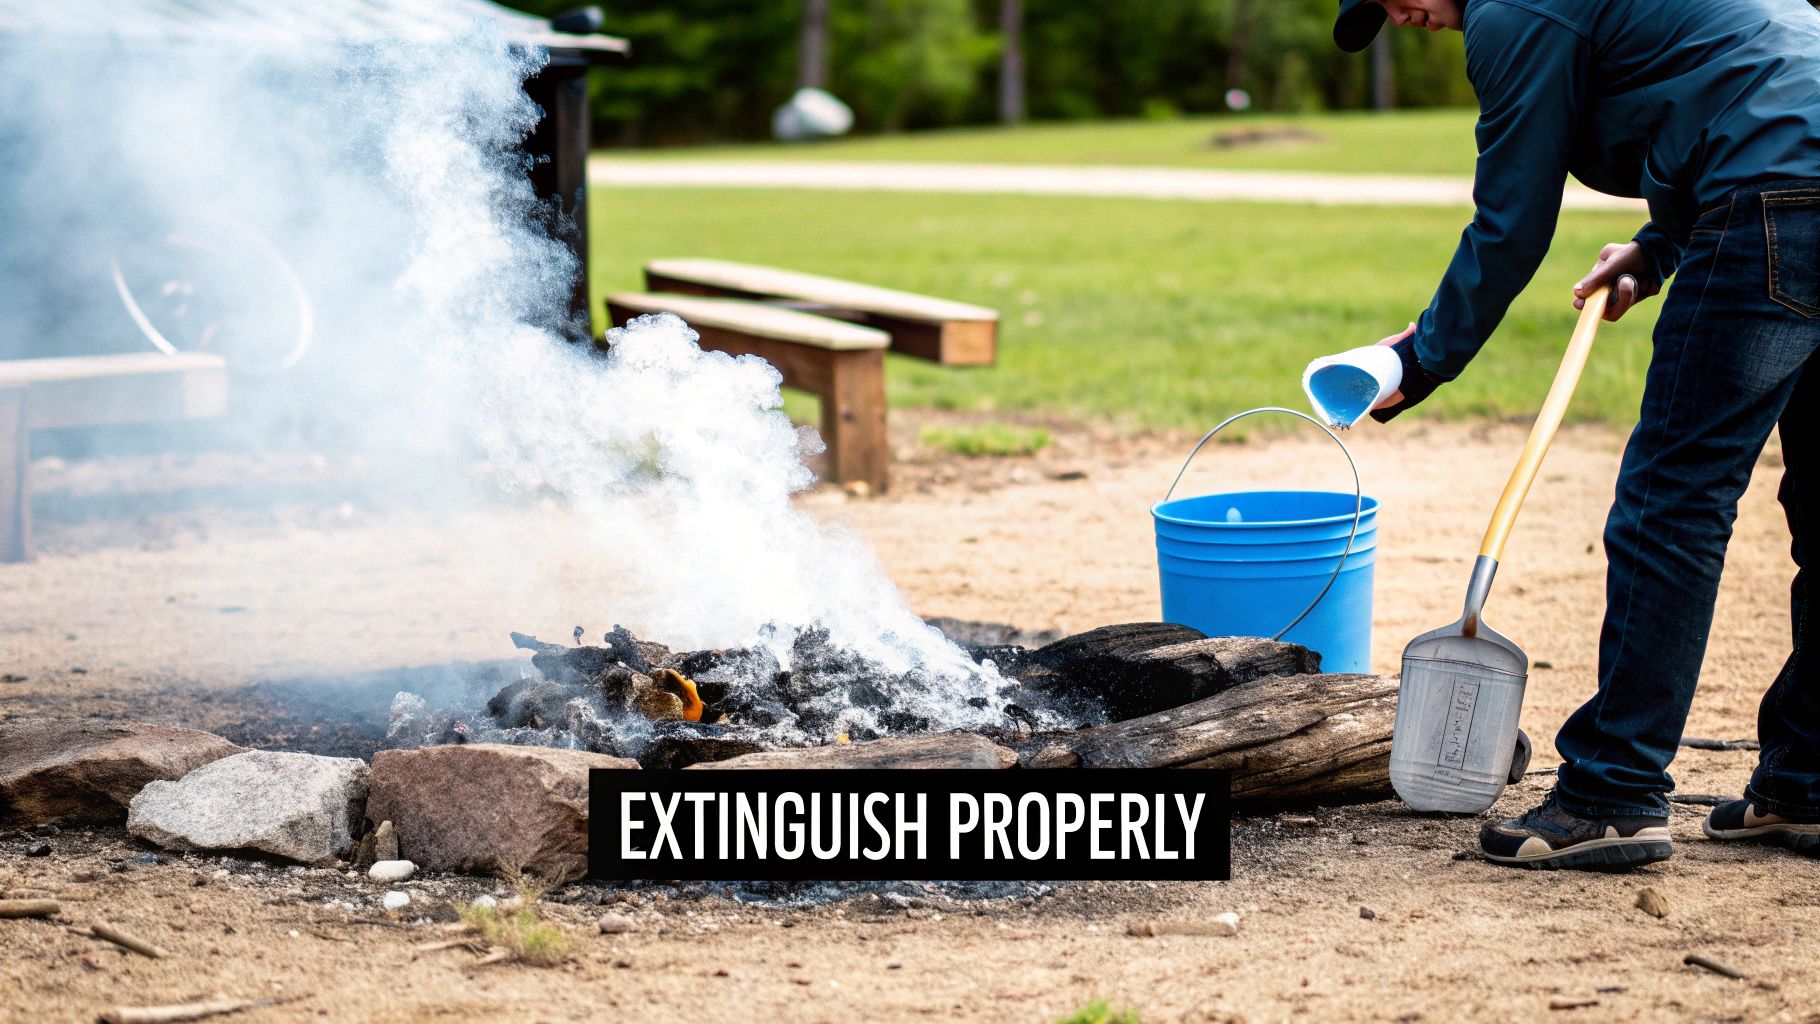
The Drown, Stir, and Feel Method
When it's time to head to bed or pack up your site, you have to be 100% certain the fire is completely extinguished. Simply kicking dirt over the top is a classic mistake. Embers can smolder underground for hours, even days, just waiting for a breeze to bring them back to life.
To make sure your fire is truly out, use this tried-and-true method every single time.
- Drown it: Start by gently pouring water over the entire fire pit, making sure to hit every last coal and piece of wood. Don’t just dump the bucket in one splash, as that can send hot embers flying. Pour slowly and listen for the hissing to stop. That's your first clue that things are cooling down.
- Stir it: Grab your shovel and get to work. Stir the wet ashes and embers thoroughly, scraping the bottom and sides of the pit. This breaks up any clumps and exposes any hidden hot spots that the water might not have reached.
- Feel it: Now for the final, most important test. Carefully hover the back of your hand over the ashes. Don't touch them directly, just get close enough to check for radiant heat. If you feel even the slightest bit of warmth, the fire is not out.
If it's still warm, repeat the whole process. Add more water, give it another good stir, and feel for heat again. Only when the area is cool to the touch can you walk away with confidence. This final, careful step is what truly separates a novice from a seasoned outdoorsperson.
Troubleshooting Your Campfire
Even with the best-laid plans, things can go wrong. A sudden downpour, a smoky fire that just won't behave—every camper has been there. Don't sweat it. Learning to troubleshoot these common hiccups is what separates a novice from an old hand.
Think of these next few tips as your field guide to fixing a fussy fire. With a little know-how, you can turn a frustrating moment into a warm, crackling success.
What Should I Do If My Wood Is Damp?
So, you got caught in the rain, and your woodpile is soaked. It’s a classic camping problem, but it’s definitely not a lost cause. The trick is understanding that while the outside of a log might be waterlogged, the heartwood inside is often bone-dry.
Your best friend here is a good, sharp knife or a small hatchet. Start by splitting your kindling and smaller fuel logs right down the middle. That dry core is your gold. From there, you can carefully shave thin, feathery curls from the inside of the split wood. These are called "feathersticks," and they make incredible tinder when everything else is damp.
- Split to the Core: Get past the wet bark and sapwood to expose the dry interior.
- Shave for Tinder: Create your own tinder by making fine, dry shavings from the heartwood.
- Build a Hot Base: Focus all your dry tinder and smallest kindling on creating a small but fiercely hot core. Once you have a good bed of coals, it will generate enough heat to dry out the slightly damper pieces as you add them carefully around the edges.
A Pro Tip for Wet Weather: If I even think it might rain, the first thing I do after setting up camp is gather my wood for the night. I'll stash it under my tent's rainfly vestibule or a small tarp. A little prep work saves a massive headache later.
How Can I Keep My Campfire from Smoking So Much?
There’s a world of difference between that lovely, nostalgic woodsmoke scent and a thick, eye-watering cloud that follows you no matter where you sit. If your fire is belching smoke, it’s telling you one of two things is wrong: you’re using bad fuel, or it can’t breathe.
The number one cause is almost always wet or "green" wood. A fire has to burn off all the water content in damp wood before it can produce real heat, and that inefficient process creates a ton of smoke. The fix is straightforward: only use wood that is dead, downed, and completely dry. Do the snap test—if a stick bends, it’s too green. If it snaps cleanly with a sharp crack, you’re good to go.
Airflow is the other side of the coin. A fire that's choked for oxygen will smolder and smoke.
- Build for Air: A Teepee or Log Cabin structure is your best bet. Both are designed to pull oxygen up from the bottom, feeding the flames and encouraging a hotter, cleaner burn.
- Don't Suffocate It: It’s tempting to just pile on the logs, but that's a surefire way to choke your fire. Add fuel one or two pieces at a time, leaving plenty of space between the logs for air to circulate.
Stick to dry hardwood and a well-ventilated build, and you’ll get a beautiful fire that throws off plenty of heat and light with very little smoke.
Is It Okay to Burn Trash in My Campfire?
This comes up a lot, but the answer is a simple, unambiguous no. Please, never burn anything in your campfire other than natural wood. It might seem like an easy way to lighten your pack for the hike out, but the environmental cost is serious.
Plastics, foil-lined wrappers, and other bits of packaging release toxic fumes when burned. You don't want to breathe that stuff in, and those chemicals leach into the soil and nearby water sources. Plus, most of that garbage doesn't burn away completely. It just melts into a nasty, semi-permanent mess in the fire pit for the next person to deal with.
Always follow the Leave No Trace principles.
- Plan Ahead and Prepare: A big part of this is planning meals that create minimal trash to begin with.
- Dispose of Waste Properly: This means you pack it in, you pack it out. No exceptions. Bring a dedicated trash bag and carry out every single piece of garbage.
Leaving a clean campsite and a pristine fire ring is a fundamental sign of respect—for the wilderness and for fellow campers. It's how we all work together to keep these beautiful places wild.
Ready to gear up for your next adventure? FindTopTrends is your one-stop shop for outdoor essentials, from reliable fire starters to durable camping gear that will make every trip a success. Explore our curated collections and get everything you need at https://findtoptrends.com.
Leave a comment


