


No products in the cart.

Diving into photography can feel a bit like trying to learn a whole new language. You're bombarded with jargon, technical specs, and what seems like an infinite number of gear choices. But here’s the secret: you don't need all that stuff to get started.
Honestly, all it takes to begin capturing incredible images are three key pieces of photography equipment for beginners: a camera body, a good all-around lens, and a memory card you can count on. That's it. This simple setup is your launchpad for building skills and shooting with confidence.
Starting Your Photography Journey With Confidence
Jumping into a new creative hobby should be exciting, not overwhelming. I like to compare it to learning how to cook. You don't need a massive, restaurant-grade kitchen to make a fantastic meal. You just need a sharp knife, a solid pan, and quality ingredients. Photography works the same way. The goal here is to trade that feeling of "gear anxiety" for the simple joy of creating.
This guide is here to help you cut through all the noise and focus on what actually matters. We'll walk through the essentials of a beginner's kit—the camera, the lens, and a few critical accessories—and I'll explain how they all work together to help you bring your ideas to life. You absolutely do not need the most expensive gear to take amazing photos. You just need the right gear for what you want to achieve.
What to Expect From This Guide
My approach here is to build your knowledge one step at a time, so you feel ready to make smart choices without feeling pressured. You'll quickly learn to tell the difference between what's truly essential and what's just a "nice-to-have."
- Core Components First: We’ll start with the heart and soul of your kit—the camera and lens. I'll break down the key differences in a way that makes sense.
- Essential Accessories: After that, we’ll talk about the things you can’t shoot without, like memory cards and batteries.
- Budget-Friendly Advice: I'll share practical tips for putting together a fantastic kit that won't break the bank, because great photography should be for everyone.
The good news is that the market for beginner-friendly gear is bigger than ever. The global photography equipment market was valued at around USD 173.9 billion in 2024 and is only expected to grow, largely thanks to new photographers looking for affordable, high-quality tools.
The best equipment is what feels right in your hands and empowers you to start shooting. Your camera should be an extension of your creativity, not a barrier to it.
At the end of the day, this is all about capturing moments that mean something to you. And once you start taking pictures you love, you'll discover that a huge part of the fun is learning how to effectively print your initial photos to share with others.
Alright, let's get you set up with the perfect kit.
Choosing Your First Camera: The Heart of Your Kit
Let's start with the most exciting piece of gear: the camera. This is the heart of your new photography kit, but don't get overwhelmed by all the options out there. Your first big decision really boils down to two main types of cameras on the market today: DSLR and Mirrorless.
Think of a DSLR (Digital Single-Lens Reflex) like a classic car with an all-analog dashboard. It uses a clever system of a mirror and a prism to show you exactly what the lens sees through an optical viewfinder. When you look through the eyepiece, you're seeing a true, unfiltered reflection of the world in real-time. It's a very direct and traditional way to shoot that many photographers still swear by.
A Mirrorless camera, on the other hand, is the modern electric car of the camera world. It gets rid of that whole mirror mechanism. Light travels straight from the lens to the sensor, which then projects a live digital image onto a tiny screen in the viewfinder or the larger screen on the back. This means you get a perfect preview of your final shot—exposure, colors, and all—before you even click the shutter.
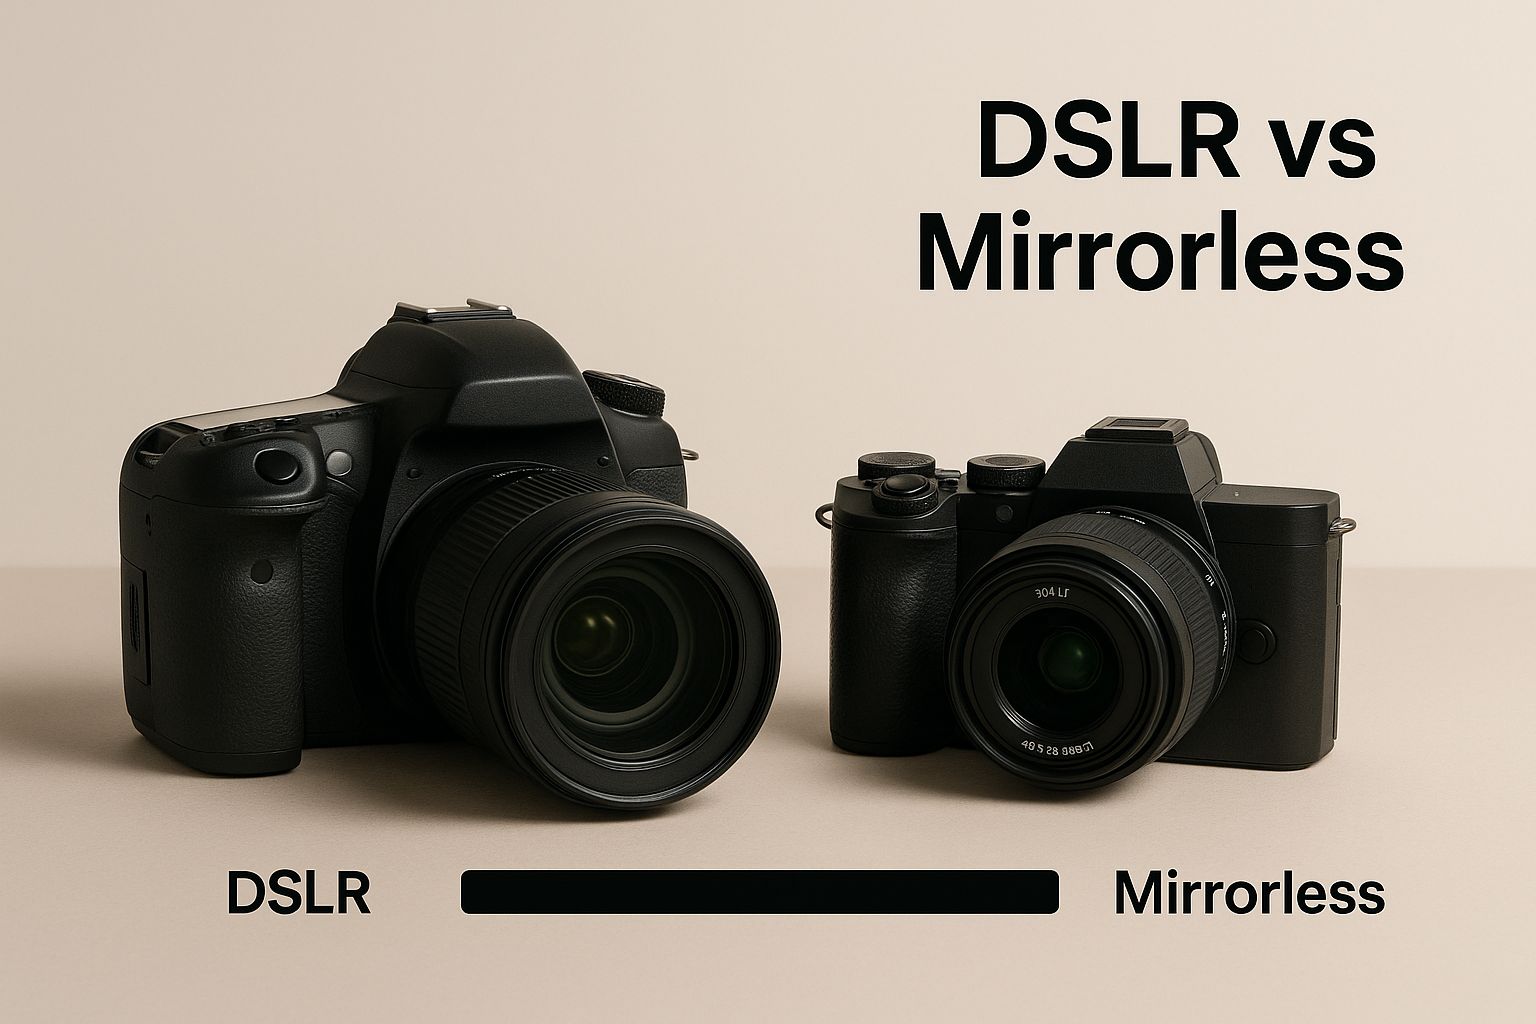
As you can see, both get you to the same destination, but the technology under the hood—and how you experience the drive—is completely different.
To help you choose, here's a straightforward breakdown of what sets these two systems apart.
DSLR vs Mirrorless Camera Comparison for Beginners
| Feature | DSLR (Digital Single-Lens Reflex) | Mirrorless | Beginner's Takeaway |
|---|---|---|---|
| Viewfinder | Optical (see-through-the-lens) | Electronic (a mini screen) | Mirrorless shows you exactly how your photo will look before you take it, which is a huge help for learning. |
| Size & Weight | Larger and heavier due to the mirror box. | Smaller and lighter, making them great for travel. | If you plan on carrying your camera all day, a mirrorless body will be much more comfortable. |
| Battery Life | Generally much longer, as the optical viewfinder uses no power. | Shorter, because the electronic viewfinder and screen are always on. | You'll want at least one spare battery for a mirrorless camera, but DSLRs can often go all day on a single charge. |
| Lens Selection | Huge catalog of older, often more affordable lenses available. | Newer, high-tech lenses, but the selection is still growing. | You can find incredible bargains on used DSLR lenses, but all the exciting new glass is being made for mirrorless. |
| Autofocus | Fast and reliable, but video autofocus can be less advanced. | Cutting-edge autofocus with features like eye-tracking for people and animals. | For capturing sharp photos of moving subjects, the latest mirrorless systems have a clear advantage. |
Ultimately, for most people starting their photography journey today, a mirrorless camera is the way to go. The technology is where all the major brands are investing their energy, and that "what you see is what you get" viewfinder makes mastering exposure and settings so much easier.
Understanding Sensor Size: APS-C vs. Full-Frame
Okay, you've picked a side in the DSLR vs. Mirrorless debate. Now, let's talk about what's inside: the sensor. The sensor is the digital equivalent of a roll of film—it’s the part that actually captures the image. For beginners, this usually comes down to two main sizes: APS-C and Full-Frame.
Think of it like a painter's canvas. A full-frame sensor is a big canvas, and an APS-C sensor is a smaller one.
- Full-Frame Sensors: These are the big kahunas, the same size as a classic 35mm frame of film. Their larger surface area can capture more light, which means they perform much better in dark situations (think less grainy photos at a concert) and make it easier to get that creamy, blurred-background look in portraits.
- APS-C Sensors: These are smaller, which makes them cheaper to produce. This is why you'll find them in most entry-level and mid-range cameras. The cameras and lenses are also more compact and affordable. Don't let the smaller size fool you; they produce incredible, high-quality images that are more than enough for almost any situation.
My advice? Start with an APS-C camera. The image quality is fantastic, and the money you save can be put toward better lenses—and trust me, lenses have a much bigger impact on your final photo than the sensor size does when you're starting out.
What About Your Smartphone?
We can't have a chat about beginner gear without talking about the amazing camera you already have in your pocket. Modern smartphones are phenomenal for learning the rules of composition, light, and storytelling. They're always with you, ready to capture a fleeting moment.
But a dedicated camera opens up a whole new world. Swapping lenses lets you go from capturing a vast mountain range to zooming in on a distant bird—something a phone just can't do. The larger sensors give you much cleaner images in tricky lighting, and the manual controls give you total creative freedom.
If you’re thinking about a smartphone as a serious photography tool, checking out the best refurbished iPhones for photography enthusiasts is a smart move to get top-tier tech without the brand-new price tag. Still, stepping up to a dedicated camera is about giving yourself room to grow and pushing your creative boundaries further than a phone will allow.
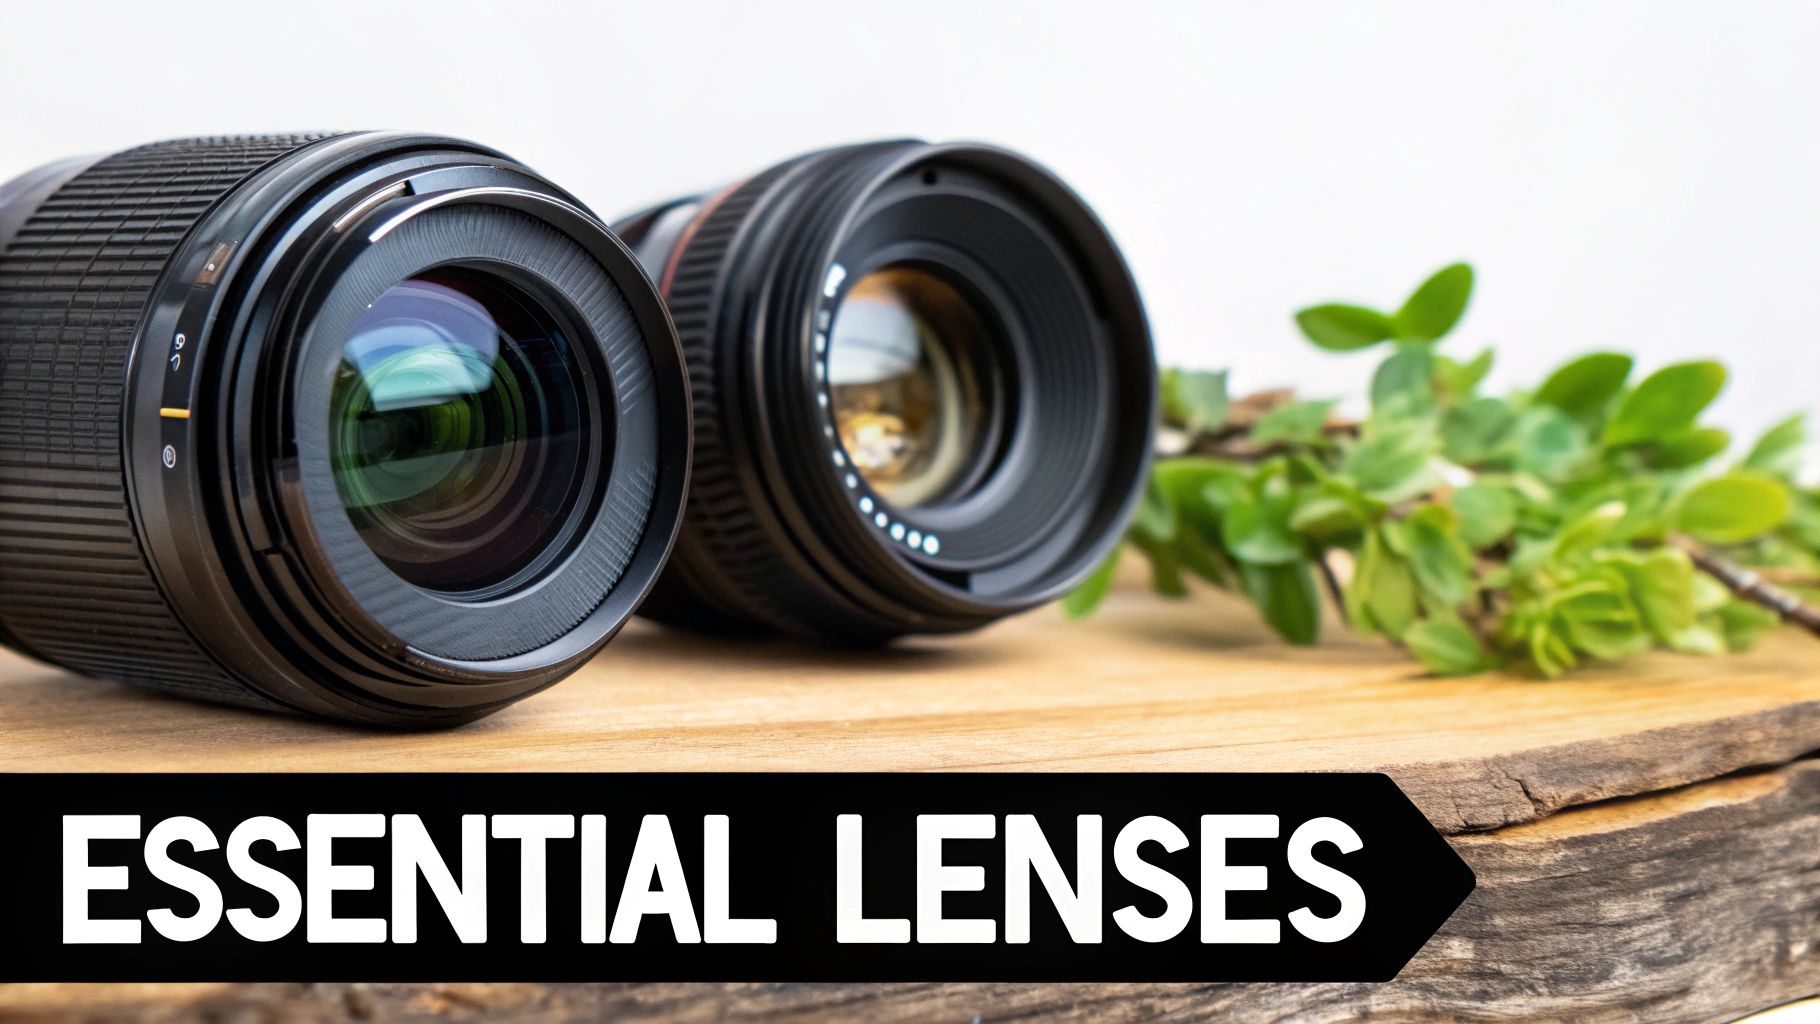
Understanding Lenses: The Eyes of Your Camera
If you hang around photographers long enough, you'll hear them say the lens matters more than the camera body. It's true. Think of your camera as the brain, but the lens is its eyes—it’s what gathers the light, shapes the world you see, and ultimately defines the entire feel of your photo. A great lens on a basic camera will almost always beat an expensive camera with a basic lens.
When you unbox your first camera, you’ll probably find a "kit lens" inside, usually a versatile zoom like an 18-55mm. Don't be too quick to dismiss it. This lens is your training ground, the perfect tool for getting your feet wet. It lets you play with everything from wide, sweeping landscapes to tighter portraits without ever swapping lenses.
Use that kit lens to figure out what you love to shoot. But once you know, you’ll need to understand two key concepts to pick the right glass for the job.
Decoding Focal Length
First up is focal length, that number you see measured in millimeters (mm). It simply tells you how much of a scene your lens can see. Think of it as a lens’s angle of view—can it see super wide, or does it zoom in like a telescope?
Here’s how focal length breaks down:
- Wide-Angle Lenses (e.g., 16mm, 24mm): With short focal lengths, these lenses capture a massive field of view. They're your go-to for epic landscapes, real estate, and shooting in cramped spaces where you need to fit everything in.
- Standard Lenses (e.g., 35mm, 50mm): These lenses see the world roughly the same way your own eyes do. Their perspective feels natural and familiar, which makes them perfect for street photography, documentaries, and everyday life.
- Telephoto Lenses (e.g., 85mm, 200mm): These are the binoculars of the lens world. Their long focal lengths bring distant subjects right to you, making them essential for sports, portraits (they create really flattering compression), and wildlife. Learning how to choose the best camera lens for wildlife photography is a skill all on its own for nature lovers.
That 18-55mm kit lens of yours is so useful because it covers the range from wide-angle (18mm) to a standard view (55mm), giving you a taste of each.
Mastering Aperture and F-Stops
The second big concept is aperture. This is just the adjustable opening inside your lens that lets light hit the camera’s sensor. It works exactly like the pupil of your eye: in the dark, it opens wide to let in more light, and in bright sun, it shrinks to a pinpoint to let in less.
We measure aperture in f-stops (like f/1.8, f/4, or f/11). Now, here's the one counterintuitive part you have to commit to memory: a smaller f-stop number means a bigger opening.
Key Takeaway: A low f-stop (like f/1.8) means the aperture is wide open. This is what you want for shooting in low light and for creating that beautiful, blurry background. A high f-stop (like f/16) means the opening is tiny, which keeps everything from front to back tack-sharp—perfect for a detailed landscape.
That blurry background effect, called bokeh, is one of the most powerful creative tools a lens gives you. A "fast" lens with a wide-open aperture like f/1.8 can make your subject pop from the background with a soft, dreamy look.
Your Best Second Lens: The "Nifty Fifty"
Your kit lens is a workhorse, but its main weakness is usually its aperture (often around f/3.5-f/5.6). This makes it tough to shoot in dim light without your photos getting blurry, and it can’t produce that really creamy background blur.
This leads us to the single best investment you can make as a new photographer: a 50mm f/1.8 prime lens. Known affectionately as the "nifty fifty," this lens is a legend for good reason.
A prime lens has a fixed focal length—it doesn't zoom. That might sound like a drawback, but it forces you to "zoom with your feet" and think more carefully about your composition. It's one of the best ways to grow as a photographer.
Here’s why the 50mm f/1.8 is the perfect next step:
- Amazing in Low Light: That f/1.8 aperture lets in over four times more light than a typical kit lens. Suddenly, you can shoot indoors, at dusk, and in moody cafes without a flash. It's a game-changer.
- Beautiful Background Blur (Bokeh): The wide f/1.8 aperture is your ticket to creating professional-looking portraits where the background just melts away.
- Incredibly Sharp: Prime lenses have simpler optics than zooms, which almost always means they produce sharper, crisper images.
- Unbeatable Value: Here's the best part. The "nifty fifty" is one of the most affordable lenses on the market, often costing under $200.
Adding this one lens to your kit will open up a whole new world of creative possibilities. It’s the tool that will help you take your portraits, food shots, and low-light photography to a completely new level.
Essential Accessories That Complete Your Gear Bag
Your camera and lens are where the magic starts, but a handful of key accessories are the crucial support crew that keeps the show running. Think of them as the unsung heroes in your photography equipment for beginners kit. They do the small but vital jobs that prevent a great day of shooting from being cut short by a dead battery or a full memory card.
Setting aside a small part of your budget for these items isn't just a good idea—it's what separates a frustrating experience from a successful one. Let's look at the must-have accessories that will round out your gear bag and get you ready for anything.
Memory Cards: The Safekeepers of Your Photos
A memory card is where every single photo you take lives, which easily makes it one of the most critical pieces of gear you'll own. But choosing the right one isn't just about capacity; speed matters just as much.
A card's write speed dictates how fast your camera can save an image file. If you're shooting action—like kids playing sports or a bird in flight—a faster card is non-negotiable. It stops the camera's internal memory (the buffer) from getting jammed up, which can force you to stop and wait. For a great mix of performance and price, look for cards with at least a V30 rating.
- Always Carry a Backup: Memory cards can fail. It’s rare, but when it happens, it’s devastating. Tossing a second card in your bag is the cheapest insurance you can buy against losing a whole day's work.
- Start with 64GB or 128GB: A card this size gives you tons of room for thousands of photos without breaking the bank.
Extra Batteries: Power When You Need It Most
There's nothing worse than seeing the perfect shot unfold right as your battery icon starts blinking its final warning. This is especially true with modern mirrorless cameras, whose power-hungry electronic viewfinders and big screens can drain a battery surprisingly fast. One battery is rarely enough for a full day out.
Get into the habit of buying at least one spare battery the same day you buy your camera. Keep them both charged, and keep them both in your bag. This simple purchase will save you from so much frustration and countless missed moments.
A dead battery is the fastest way to turn a camera into a paperweight. Always have a spare ready to go—it’s the cheapest insurance policy you’ll ever buy for your photography.
This advice holds true whether you're using a dedicated camera or even just your phone. Many mobile creators rely on power banks to get through a shoot, a topic we explore more in our guide to essential phone photography accessories.
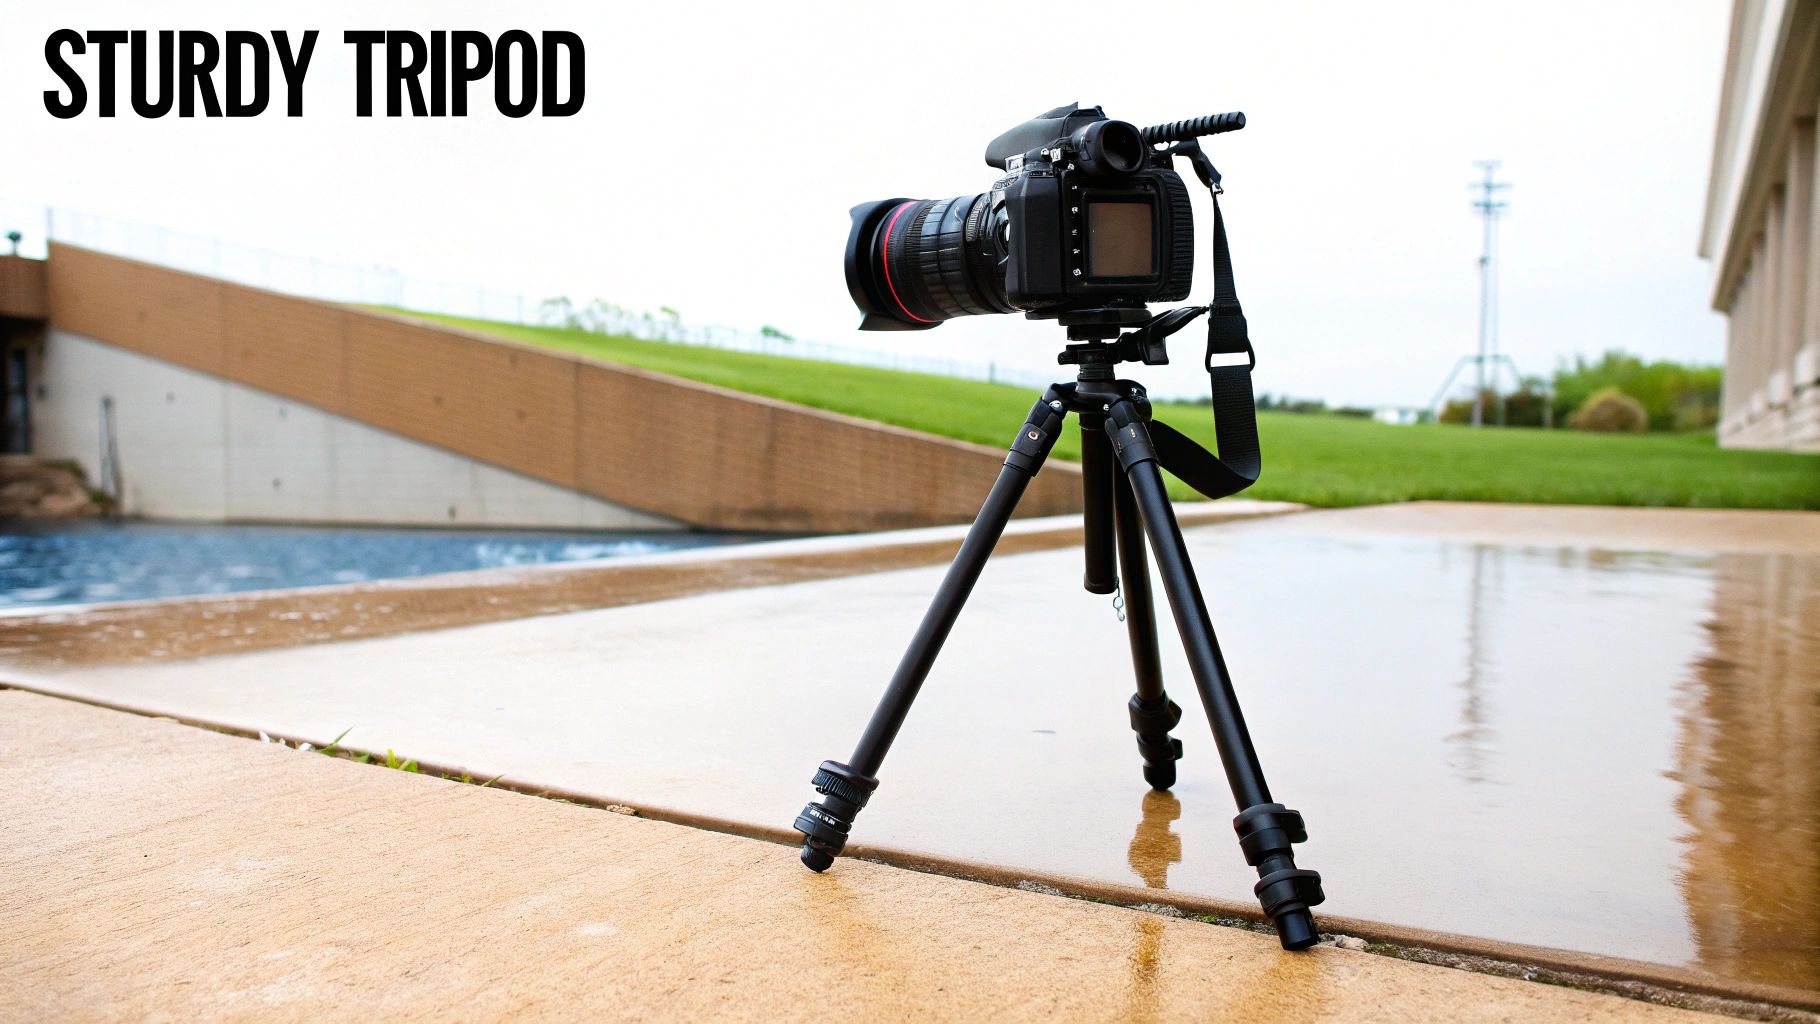
A Sturdy Tripod: Your Key to Sharper Images
A tripod can feel like a bulky, optional extra, but it's actually a beginner's secret weapon for achieving truly professional-looking shots. By holding your camera perfectly steady, it eliminates the subtle hand-shake that introduces blur, especially when the light gets low.
A tripod also opens up a whole new world of creative techniques:
- Low-Light Photography: Capture stunningly sharp cityscapes at night or moody indoor scenes without having to crank up the ISO and introduce ugly digital grain.
- Long Exposures: Create those magical, dreamy effects like silky smooth waterfalls or dramatic light trails from moving cars.
- Self-Portraits and Group Shots: Finally, you can get in the picture too! A tripod lets you compose the shot and make sure everyone is tack-sharp.
- Crisp Landscapes: Get that incredible front-to-back sharpness and detail that makes landscape photos so breathtaking.
When you're shopping for one, look for a tripod that's sturdy enough to support your camera without any wobble, but light enough that you won't dread carrying it. Aluminum models are a fantastic starting point, offering a great blend of stability and affordability.
The Right Camera Bag to Protect Your Investment
With all this great new gear, you need a safe and organized way to carry it. A dedicated camera bag is more than just a tote; its padded compartments are designed to protect your equipment from the inevitable bumps, dust, and bad weather you'll encounter.
The best bag for you really depends on how you shoot. A shoulder or messenger bag is great for street photography or city walks because it gives you quick access to your camera. For longer hikes or days when you’re carrying a lot of gear, a backpack is usually the more comfortable choice.
Photography is a booming industry, valued globally at around USD 105.2 billion and expected to reach USD 161.8 billion by 2030. That growth is fueled by new photographers who understand the importance of protecting their initial investment—which is often between $400 to $800 for a first camera. You can dig into more current photography industry statistics from Brimco.io.
Putting Your First Photography Kit Together on Any Budget
Okay, we’ve walked through all the individual pieces of gear. Now for the fun part: building your first actual kit. This is all about making smart choices that give you the most creative bang for your buck without having to sell a kidney. Remember, incredible photos come from the photographer, not the price tag on the camera. It’s about getting the right tools for the job you want to do.
To help you get started, I've mapped out three common budget levels. Think of these as starting points or shopping lists you can tweak. Each one is designed to give you the best possible setup for your money, so you can hit the ground running.
The Budget Starter: Under $600
At this price point, the goal is simple: get a solid, interchangeable-lens camera into your hands so you can start learning the ropes. You can find incredible deals on slightly older or entry-level models from the big names. This will let you finally master manual controls and create images that leave smartphone pictures in the dust.
- Camera: Hunt for a used or refurbished entry-level mirrorless or DSLR. Models like the Sony a6000 series or Canon EOS M50 are legendary for a reason—they offer fantastic image quality and full manual control.
- Lens: For now, stick with the 18-55mm kit lens that comes with the camera. It’s a surprisingly versatile workhorse that will help you figure out what kind of photos you love to take.
- Accessories: Don’t skimp here. A reliable 64GB SD card and at least one extra battery are absolute must-haves. You’ll thank me later.
The Enthusiast Kit: $600 to $1200
With a little more room in the budget, your priority should shift from the camera body to the glass in front of it. This is where a single, high-quality prime lens can completely transform your photos. The difference in low-light performance and that beautiful, blurry background (bokeh) will be obvious from your very first shoot.
This is the sweet spot for most beginners. Investing in a great lens like a 50mm f/1.8 alongside a solid camera body provides the best performance boost for your dollar. It’s a combination that can produce truly professional results.
This approach ensures your photography equipment for beginners is not just functional but a genuine creative tool. You can also start looking for a basic, sturdy tripod to open up the world of long exposures and tack-sharp landscape shots.
The Ambitious Creator: Over $1200
If you have a more flexible budget, you can aim for a more current camera body and start building out your lens collection right away. This gives you more versatility, much better performance for tricky situations like sports or very dim lighting, and often unlocks more powerful video features.
- Camera: A newer-generation APS-C mirrorless camera like the Sony a6400 or even an older full-frame model like a used Sony a7 II will offer a big step up in autofocus and overall image quality.
- Lenses: Keep the kit lens for all-around flexibility, but immediately add a 50mm f/1.8 prime for portraits and low-light work. If you can, grab a second prime lens based on your interests—maybe a wide-angle 24mm for landscapes or a short telephoto 85mm for stunning portraits.
- Accessories: Now's the time to invest in a quality camera bag, a couple of fast memory cards, and a truly reliable tripod that won't let you down.
Beginner Photography Kit Recommendations by Budget
To make it even clearer, here are some sample kits. Think of these as proven recipes for success that you can follow to build a balanced setup at any budget.
| Budget Tier | Camera Body | Lens(es) | Key Accessories |
|---|---|---|---|
| The Budget Starter (Under $600) | Used/refurbished entry-level mirrorless or DSLR (e.g., Sony a6000, Canon M50) | Included 18-55mm kit lens | 64GB SD card, one extra battery |
| The Enthusiast Kit ($600 - $1200) | Newer entry-level or mid-range mirrorless (e.g., Canon R50) | Kit lens + a 50mm f/1.8 prime lens | Multiple SD cards, basic tripod, comfortable camera strap |
| The Ambitious Creator (Over $1200) | Newer mid-range mirrorless or used full-frame (e.g., Sony a6400, used Sony a7 II) | 50mm f/1.8 prime + a versatile zoom lens or a second prime (e.g., 24mm or 85mm) | Quality camera bag, fast memory cards, reliable tripod, external flash |
These combinations are designed to grow with you. You can always add more lenses or upgrade your camera body down the road once you have a better feel for your specific needs.
Don't forget that when you buy can make a big difference. Timing your purchase around holiday sales can stretch your budget further. To learn more about getting the best deals, check out our guide on the best time to buy electronics. No matter what you spend, the real goal is to build a kit that gets you excited to go out and shoot.
Answering Your Top Questions About Beginner Photo Gear
Diving into the world of photography gear can feel overwhelming, and it's natural to have a ton of questions. Let's clear up some of the most common ones so you can feel confident putting together your first real camera kit.
Do I Really Need the Latest and Greatest Camera?
Honestly? Absolutely not. Any camera made in the last 2-4 years is more than powerful enough to create stunning, professional-level photographs. The minor updates you see in brand-new models are rarely worth the extra cash for someone just finding their footing.
A much smarter move is to put that money toward better lenses or even a good photography workshop. Your skill and the quality of your "glass" (that's what photographers call lenses) will make a far bigger difference in your final images than having the newest camera body.
Should I Buy New or Used?
This is a classic dilemma, and there's a great way to get the best of both worlds. Buying used gear from a trusted source is an amazing way to make your budget go further. You can often snag a more advanced camera or a much better lens for the same price as a new entry-level piece of kit.
But buying new comes with a manufacturer's warranty, and that peace of mind is valuable. Here’s a great compromise many photographers make: buy a new camera body to get the warranty, then hunt for high-quality used lenses to get the most creative bang for your buck.
How Many Megapixels Are Enough?
Don't fall for the "megapixel myth." It's easy to get fixated on big numbers, but any modern camera with 20-24 megapixels is the perfect sweet spot for a beginner. That's more than enough resolution to make beautiful large prints and gives you plenty of room to crop your photos without losing detail.
Keep in mind, more megapixels mean much bigger file sizes. That chews up space on your memory cards and demands a more powerful computer for editing. For learning the craft, printing, and sharing online, 24MP is more than you'll need for a long time.
Why Not Just Use My Smartphone?
Look, smartphone cameras are incredible these days. But a dedicated camera is a different beast entirely, offering creative control and image quality that a phone just can't match.
The ability to swap lenses for different perspectives, manually control your settings like aperture and shutter speed, and shoot in flexible RAW files gives you a much higher ceiling to grow as a photographer. If you're serious about learning the art and craft of photography, a dedicated camera is a non-negotiable tool for the job.
Ready to find the perfect gear for your journey? Explore the latest deals and top-rated products at FindTopTrends, where we curate the best photography equipment to help you get started. https://findtoptrends.com
Leave a comment


